
DIY Firetruck Box

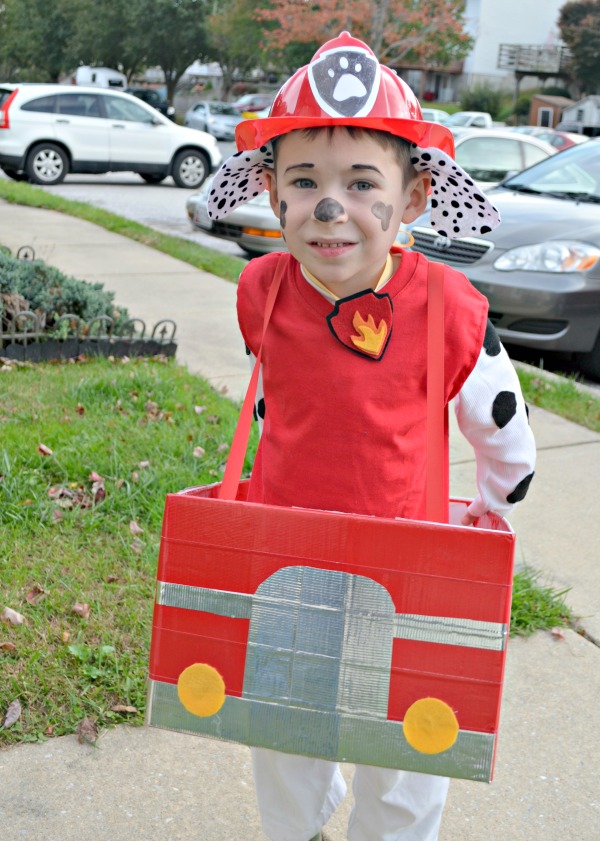
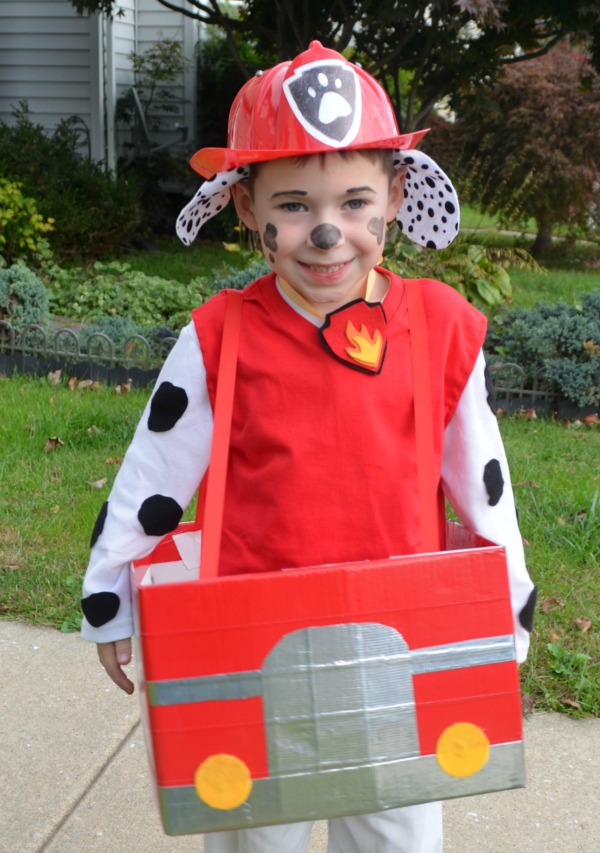
This year for Halloween, as many of you know, Little Crafter begged me to make him a costume so he could be Marshall from Paw Patrol. Earlier in the month, I showed you how I created the costume itself and how we painted his face to make him look like his favorite dalmatian. Today, I want to walk you through how I made the last piece of the disguise…every fire dog needs his truck, right? With little more than a cardboard box and Duck Tape, here’s how I made my little Marshall his very own Paw Patrol Fire Truck to “drive.”
Materials:
– large cardboard box
– Duck Tape: red, white, and silver
– yellow felt
– Fiskars Duck Edition Scissors
– wide red ribbon
– glue
Step 1: Fold the flaps on the top and bottom of the box to the inside.
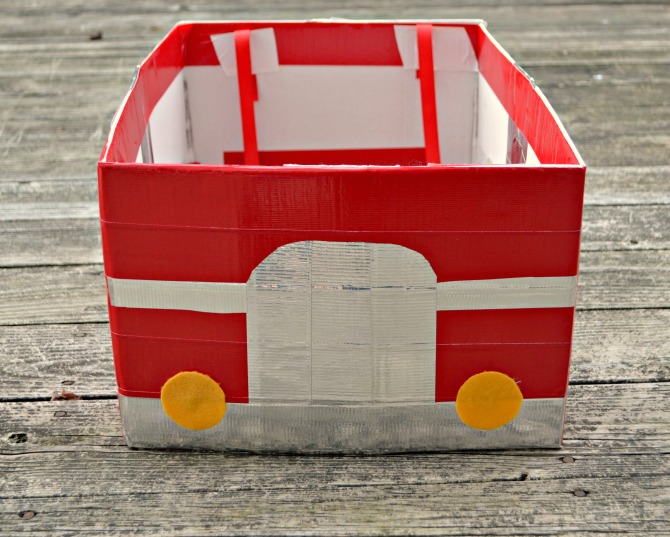
Step 2: Cover the entire outside of the sides of the box with red Duck Tape. To do this, I started in the top corner of the back and wrapped all the way around until it joined. Then, I cut the tape and repeated, just slightly overlapping the previous row. I did this six times to totally cover the box. Then, I did one more row around the top of the inside.
Step 3: Now that you have a red truck, it’s time to add details using silver and white tape! I looked at LC’s toy Paw Patrol fire truck to see what Marshall’s truck “really” looks like. Then, I tried my best to replicate it.
In the front, I started by adding a piece of silver tape across the bottom, then placed three pieces in the center that I trimmed in an arch shape. I cut a strip of tape in half and placed it on either side of the arch. Finally, I traced and cut two felt circles for the headlights. You could also make those out of yellow Duck Tape if you have some.
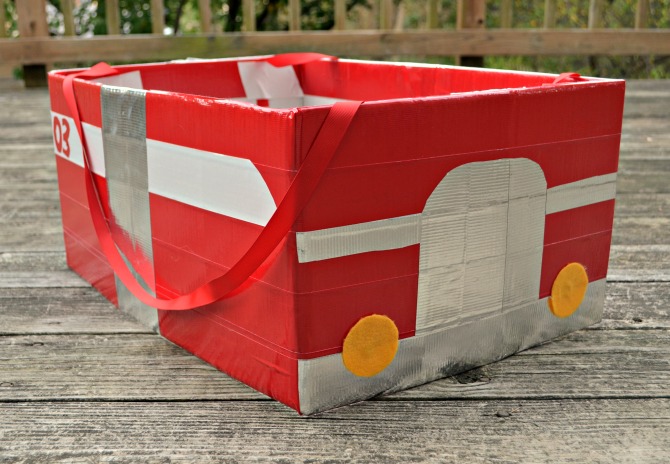
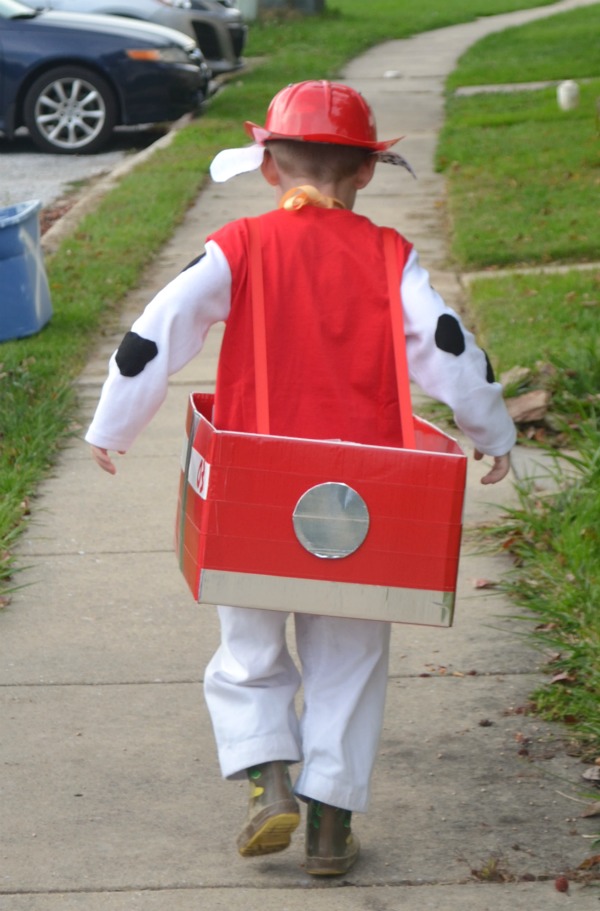
On the sides, there’s a white stripe and a red “03,” so I cut those things out of tape too. I added two vertical strips of silver tape to represent the break between the front and back of the engine.
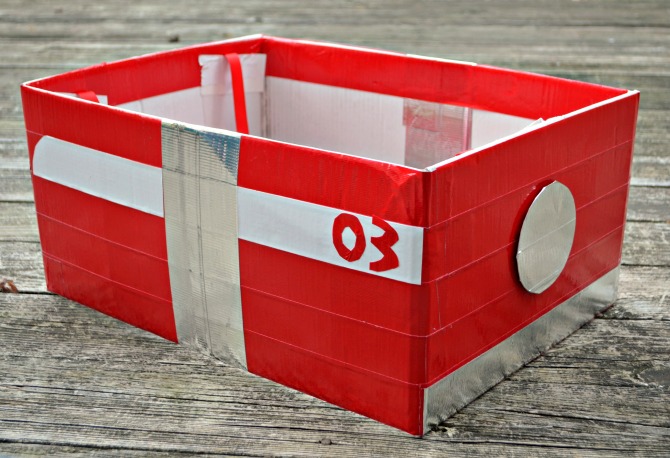
On the back, I added another horizontal strip of silver at the bottom for the bumper. Then, I took one of the cardboard pieces attached to my roll of Duck Tape, covered it with silver, cut off the excess, and stuck it to the back of the engine.
Step 4: Attach ribbon. I had LC hold the box in the right spot while I measured out how long the ribbon needed to be. Then, I attached two pieces to the inside of the front and back of the box using more Duck Tape.
The only thing left to do is let a very excited little person try it on! Seriously. How cute is that?

It cost me nothing to make because I already happened to have the Duck Tape from previous projects, and the box was one that came with some happy mail in it. Yep, a free fire truck. Which brings the grand total I spent on making this costume to…$3. You might notice that his pants don’t have spots {yet} because we’re using his karate pants and his big belt test was the day after Trunk or Treat. Now that it’s over, we’re free to add spots to totally complete the outfit just in time for Halloween! What do you think? A certain someone most definitely approves…


Love it, it came out super cute!
OMG! My kids love Paw Patrol and this is the best costume I’ve seen for it! Thanks for sharing the great tutorial. 🙂
I just love this! SO adorable!! 🙂
What an awesome costume…I know he loves it…
He is adorable… Happy Halloween…
Great job Mama 🙂
This is too precious – love it!! =)
-Laura Holmes | Kluster Shop {www.klustershop.com}
Great job on the costume and your little man is simply adorable!
Super cute!
So cute! The best part of Halloween is making the costumes, hands down!
The track is an excelent complement for Marshall. Nice idea i will try to do it!
So cute!! Making this right now. Did you fold in the flaps on the bottom too? Or did you cut a hole for your sons body/ legs to go through?
I just folded the flaps so he had plenty of room!