Today I have a project to share with you that came about a little differently than most of my projects do. Usually, I have a vision for something I want to make…either something I saw on Pinterest or a blog, or something I imagined on my own. But this time, the project happened sort of backwards and came together after the parts of it were already made. Let me explain…
Recently, I got a pack of Sketch Pens to use with “Cammie,” my Silhouette Cameo. Little Crafter and I were both anxious to test them out {I’m honestly not sure which of us was more excited}, so I let him choose a color and a design. He picked a turquoise-blue and a chevron pattern…I’m training him well, aren’t I? Then, we watched Cammie draw it onto a piece of cardstock.
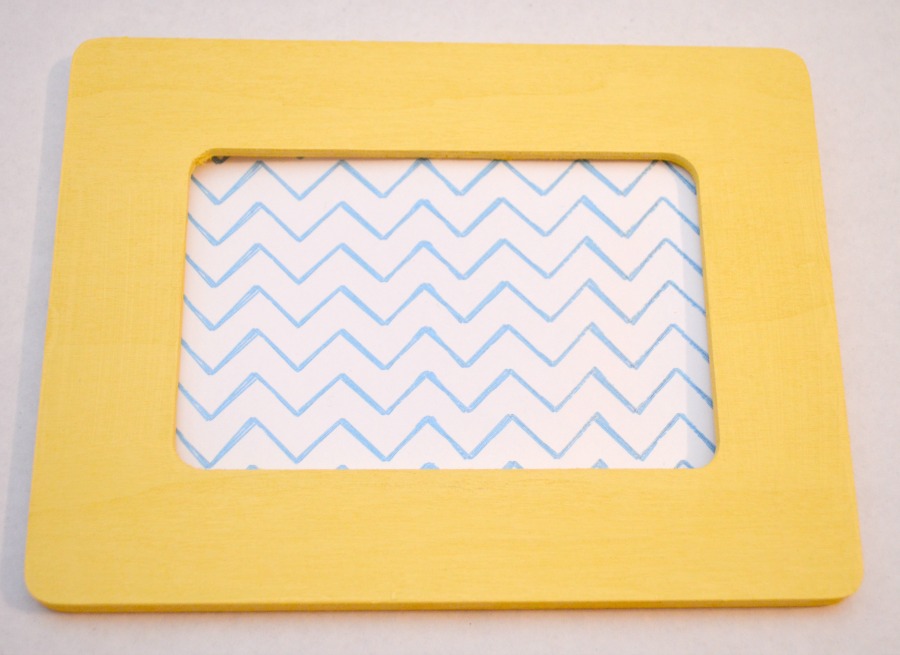
The only trouble was, I had no idea what to do with it. It sat in the computer room for several days, until one evening I happened to catch sight of the yellow photo frames I had left over from the
Swing Dance we hosted at our church back in September. Hmmm.
I trimmed the cardstock to fit, then had to come up with what to do next. At first I thought about putting a picture on top, but was afraid it would cover too much of the chevron. Then, it came to me. A vinyl saying. And the rest is history…
Here’s how you can make something similar:
Materials:
– unfinished wooden frame and acrylic paint OR frame of your choice
– cardstock
– adhesive vinyl
– Silhouette Cameo and software
– Silhouette Sketch Pens
STEP 1: If your frame is unfinished like mine was, paint it with two coats of acrylic paint and let it dry completely. If you purchased a colored frame you like, congratulations on saving yourself a {messy} step!
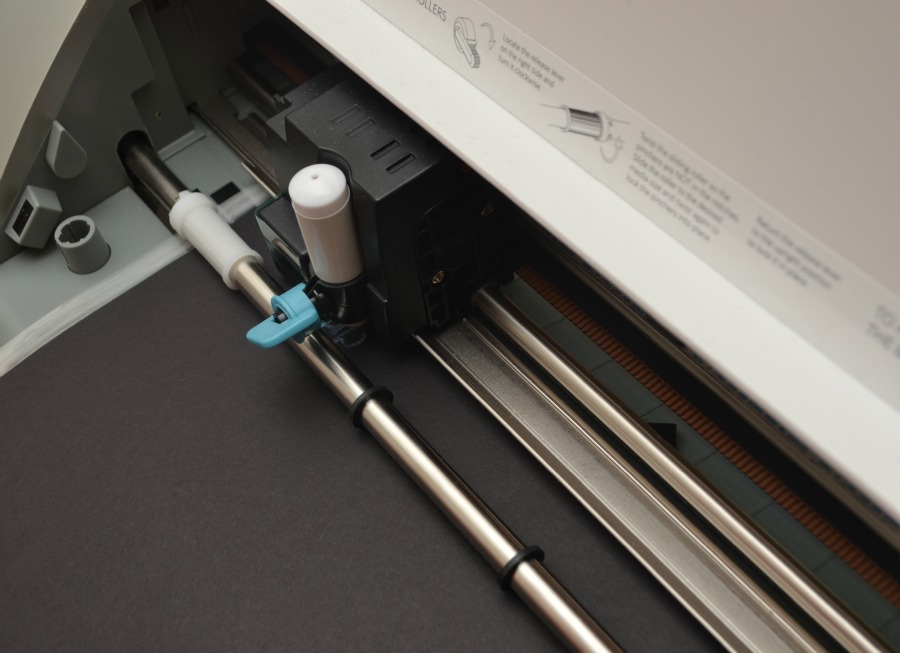
STEP 2: Choose a color for your sketch and place the pen into your machine where the blade normally goes. Create your design {this chevron was one of the 10 free design downloads that comes with the pen pack} in Silhouette Studio, and make sure you indicate that you are using a pen rather than the blade in the settings section. Have your machine draw the design onto cardstock!
Note: This photo is from another sketch pen project where I was sketching on black paper with a white pen, but it shows you the basic idea! During this particular project, I was too busy keeping LC from practically jumping inside the machine to see what “Cammie” was doing to take photos!
STEP 3: Cut your cardstock to fit into your frame.
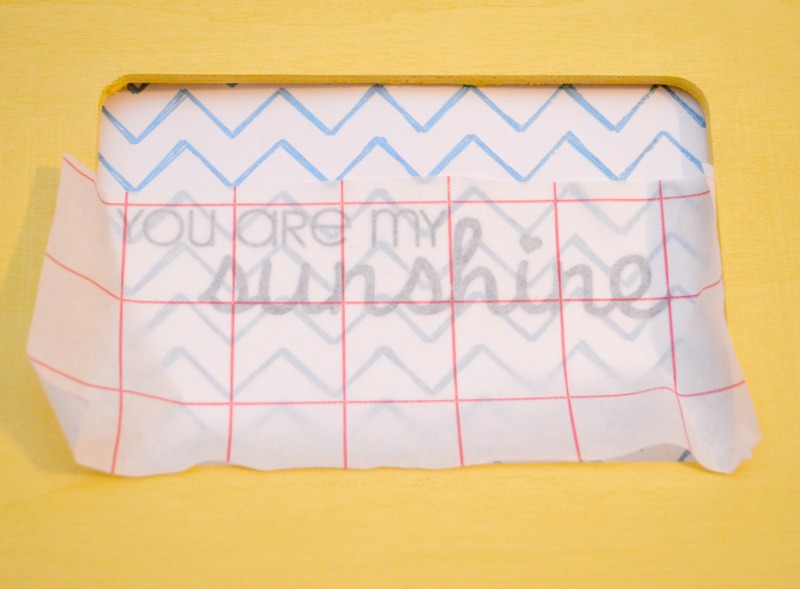
STEP 4: Choose or create a saying and cut it out using adhesive vinyl. I used transfer tape to lift the cut portion off the vinyl sheet.
STEP 5: Adhere your saying to the cardstock. Since I used my transfer paper, I was able to keep the letters together and straight, just the way Cammie cut them out!
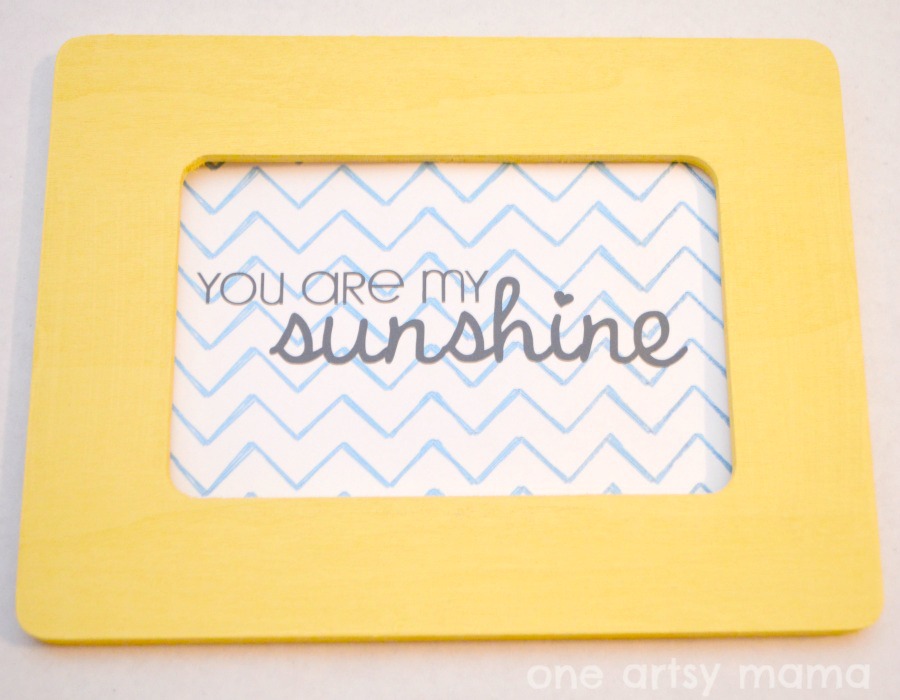
All finished!
I have to say, my very favorite part of this project was surprising Little Crafter with it. I took it in his room and we had this conversation:
Me: “I made you something.”
LC: “ooooooh! What is it?”
Me: “Look” {setting it on his night table}
LC: “What does it say, Mommy?”
Me: “Well, what words can you recognize?”
LC: “You…are…my.”
Me: “Right! It says ‘You are my sunshine!'”
LC: {grinning} “Oh! You are my sunshine! That is so nice, Mommy!”
Me: “It’s true! You are!”
LC: “You are such a nice mommy.”
Me: “I love you.”
{I kiss him and leave the room}
LC: “Mommy? I have to tell you something. I really love the present you made me.”
It doesn’t get much sweeter than that, friends!
Hugs & Glitter,


What is just the sweetest story!
Wishing you a day overflowing with joy and sunshine!
So sweet! 🙂 Love the framed sentiment but love the story more! Your LC is the cutest 😉
Awww, he’s so sweet!
I love this! So sweet Amy!
Very sweet frame and great shot of your little guy.
Lovely. Just goes to show that you don’t have to spend a fortune on children to make them happy and smile.
Such a cute idea! 🙂