
Anchor Charm Necklace
So in case you couldn’t tell from the Handmade Holidays series and various other holiday-themed posts around here for the past two months, I made a lot of our gifts this year. You see, I absolutely love making things for people I care about. I feel like I’m not just giving something I think they’ll enjoy, I’m also giving a part of myself too. I think God is pleased when we use the talents He’s given us to bless other people, and I also love the way I’m able to personalize a handmade gift so much more than one I’d buy at the store.
Today, I want to share with you a necklace I made for my friend Kristen.
ANCHOR CHARM NECKLACE
Kristen and I used to be coworkers; she was an administrative assistant at a dance studio where I worked several years ago while she was finishing up her teaching degree. Now, she is an elementary school art teacher {no doubt a fabulous one} and she and her fiancé Nate are taking dance lessons with me in preparation for their wedding. Plus, they really just love to swing dance!
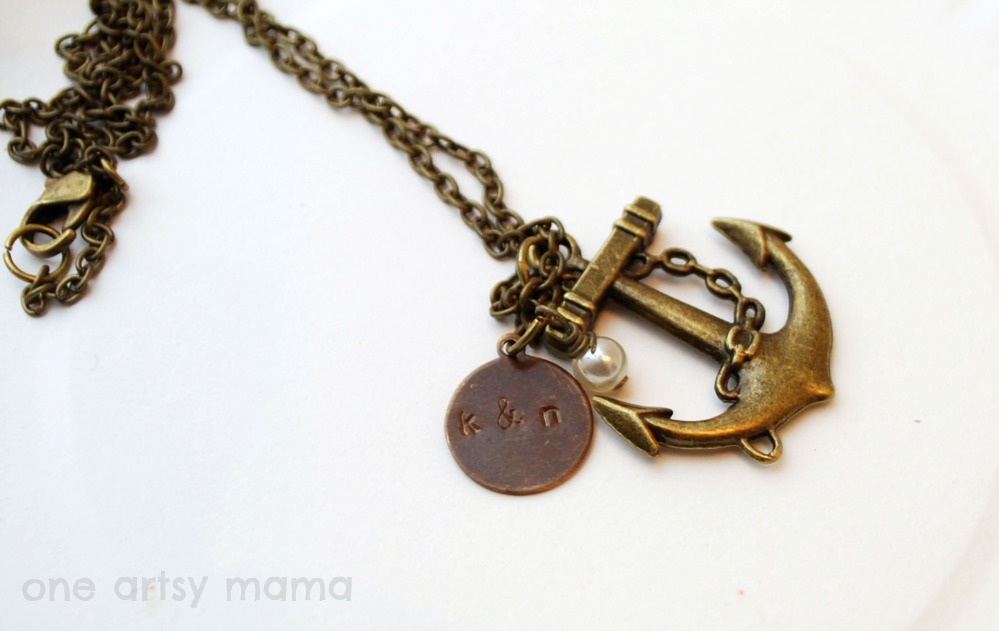
Anyway, Kristen has a thing for anchors, which are really trendy right now anyway, so every time I see one I think of her. Recently, I received a shipment of some fun beads to sample from Wholeport, along with these fabulous antique bronze anchor charms. As soon as I saw them, I knew Kristen needed one.
Here’s what I came up with; not just the anchor, but their initials too, to make it personal. Of course, you can make a much simpler version of the necklace too, using just the charm.

Supplies:
{Basic Necklace}
– Anchor Charm
– Link Chain
– Jump rings
– Lobster Clasp
– Jewelry tools: wire cutters, needle nose pliers, flat pliers {optional}
{Necklace including bead charm}
– pearl or other bead
– head pin
{Necklace including stamped disc}
– 1/4″ round stamping disc
– metal alphabet stamps
– hammer
– stamping block
– painter’s tape
To make the simple necklace, all you have to do is use your pliers to open a jump ring {always twist apart, never pull} and attach it to the hole at the top of the charm. Close the jump ring. Cut your chain to the desired length…this one is 18″…and thread it through the jump ring. Attach a jump ring to one end of the chain, and attach a jump ring and lobster clasp to the other end. Voila! A simple anchor necklace.

To add a bead, place the bead on a head pin. Bend the pin 90 degrees, then form a loop. Wire wrap around the top, trim, and attach to a jump ring. For a video tutorial on how to do wire wrapping like this, see my dangle earring post…it’s the exact same technique, just a different project.

To add the stamped disc, just place your disc on your stamping block, secure it with tape, and stamp whatever words, initials, or date you like. Then, add a jump ring, and attach it to the chain. For a tutorial on simple metal stamping, check out my post over at Sunny Vanilla with step by step instructions.

As I’m typing this post, Kristen hasn’t received this yet, but I’m purposely going to set it to go live after the fact. Here’s hoping she loves it!! {and that you do too}!
Hugs & Glitter,


Very pretty, Amy! I know she will LOVE it!
I love this! So pretty!
What an amazing gift! I’m sure she will LOVE it – who wouldn’t?! BTW, I’m your latest follower/subscriber. I love your blog!
I love this anchor necklace. Very pretty!!