
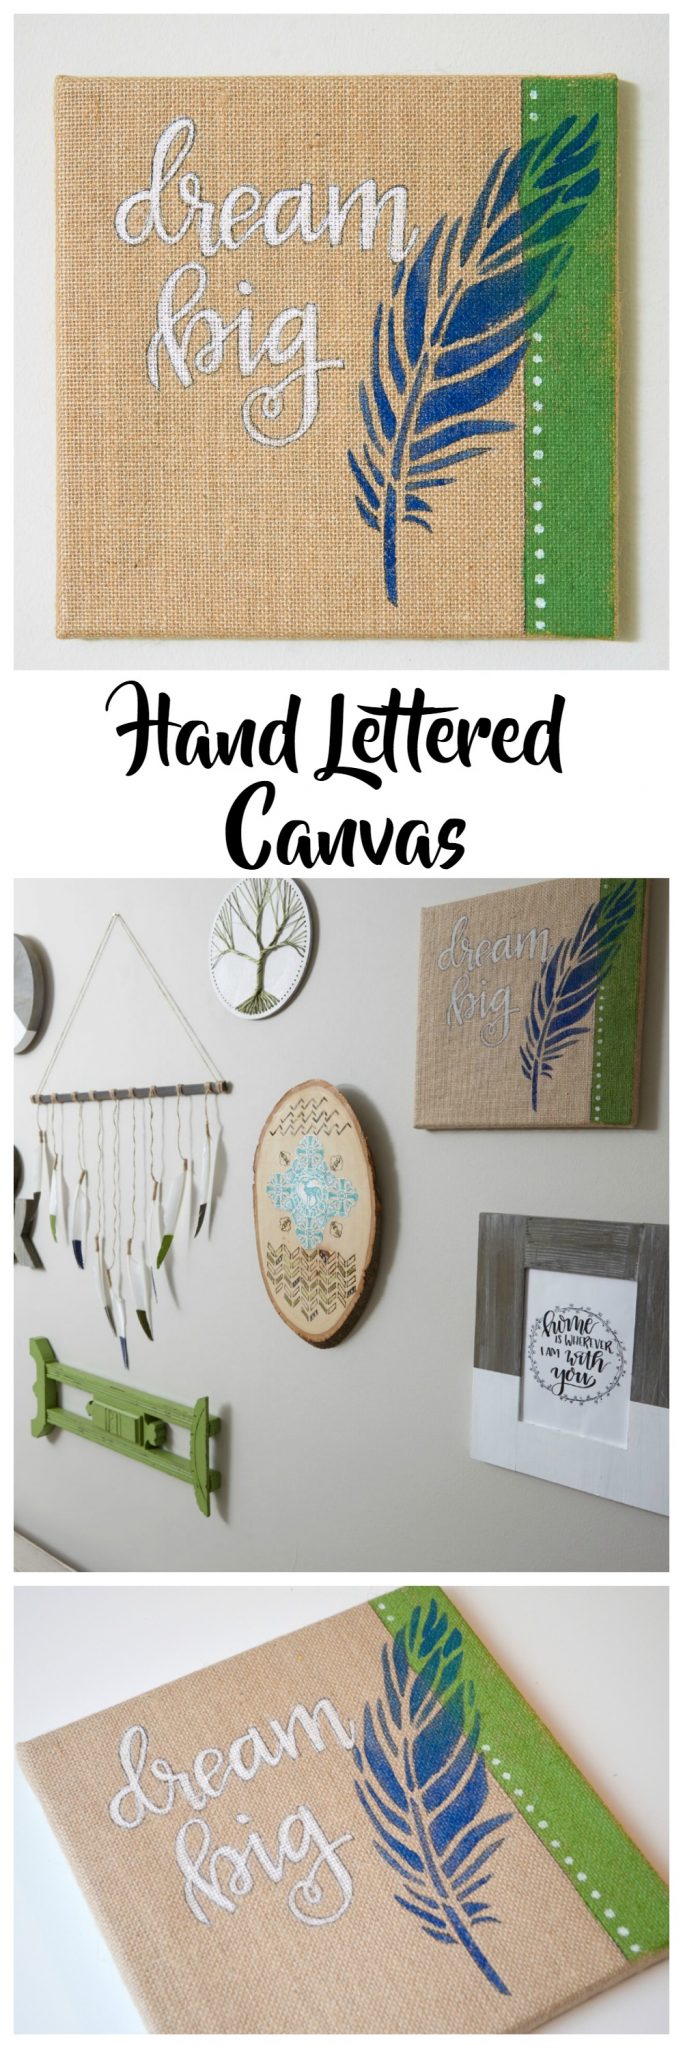
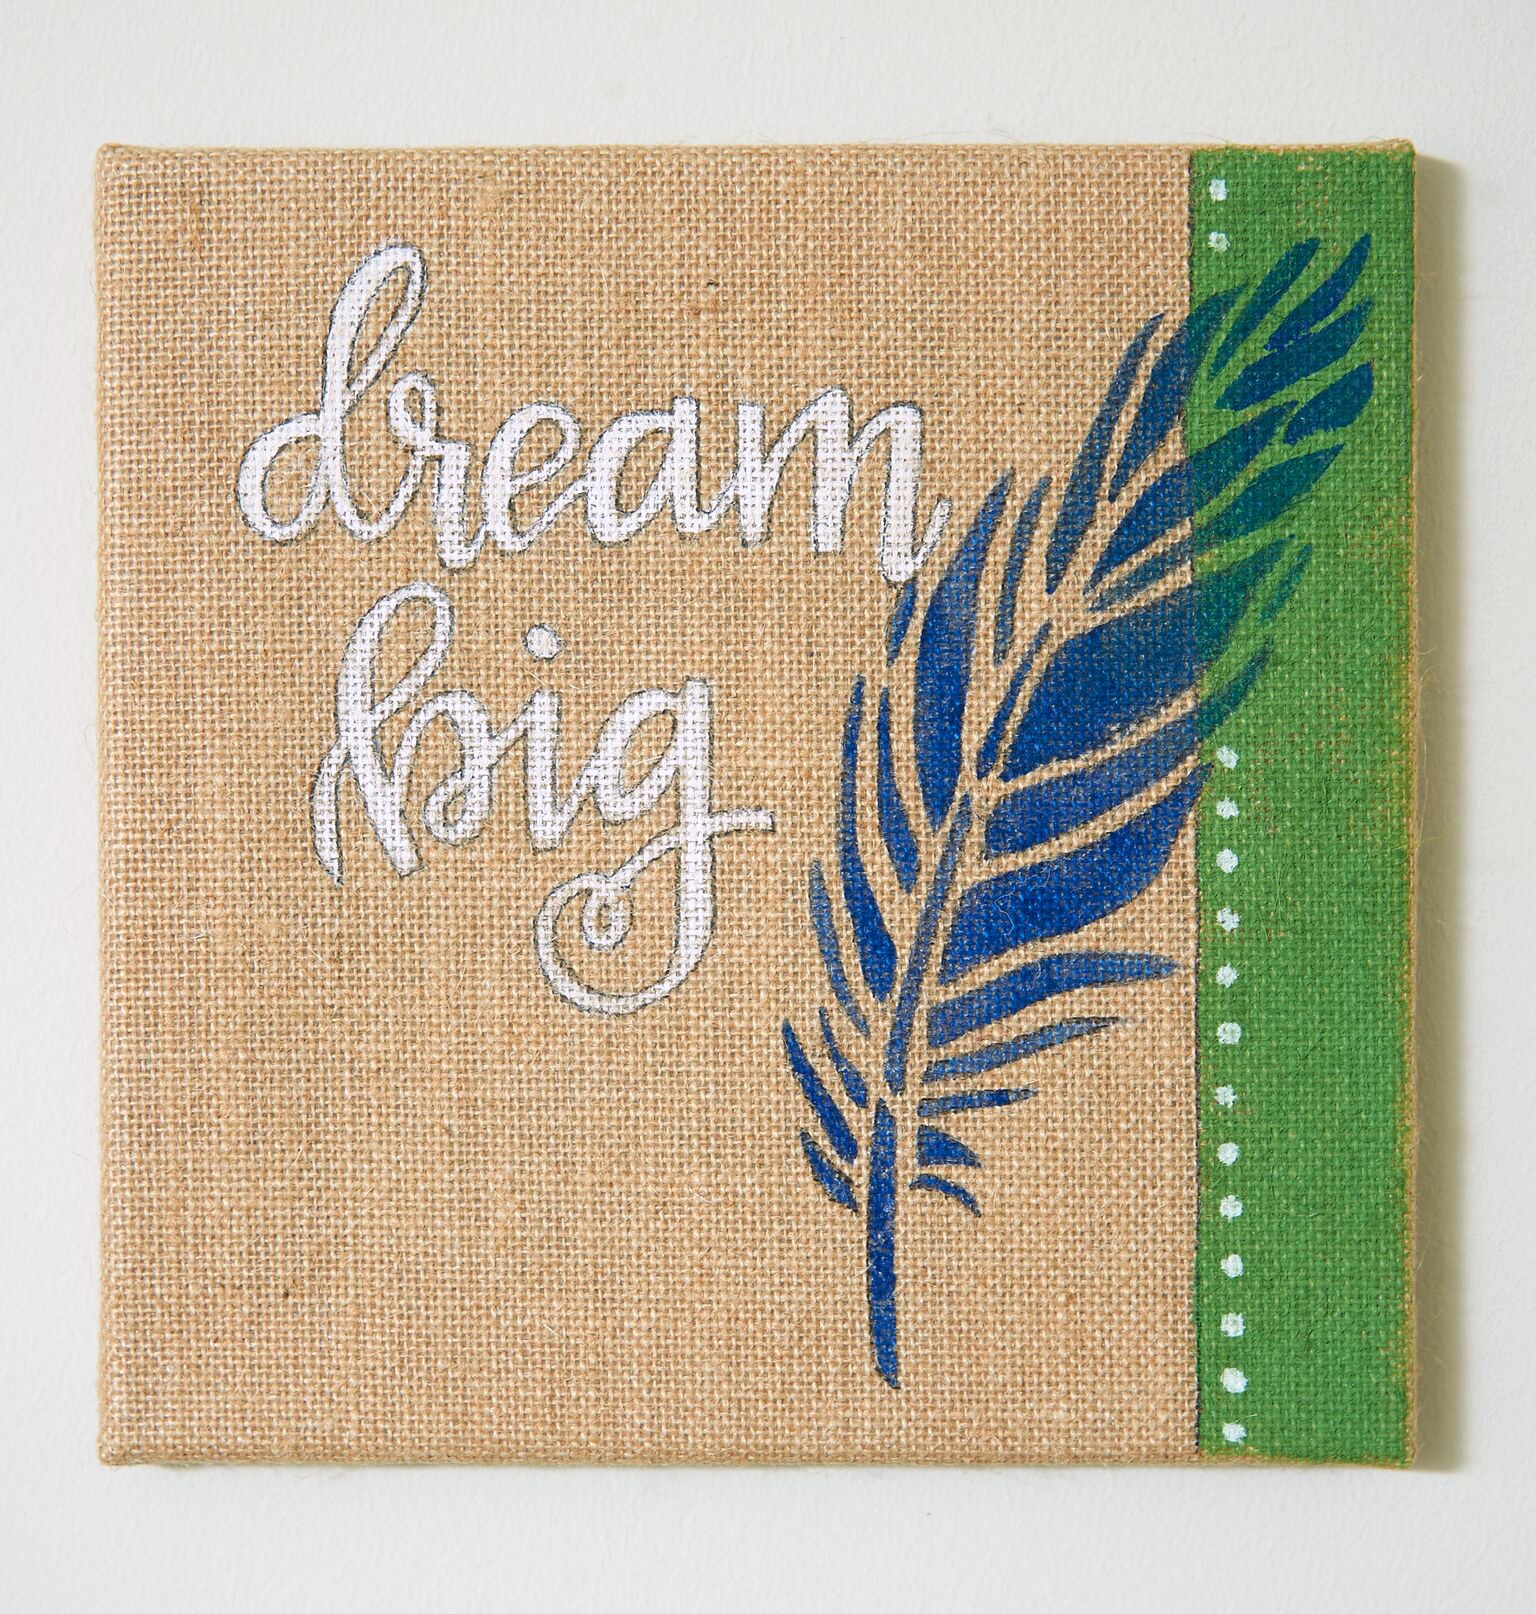
Dream Big Wall Canvas
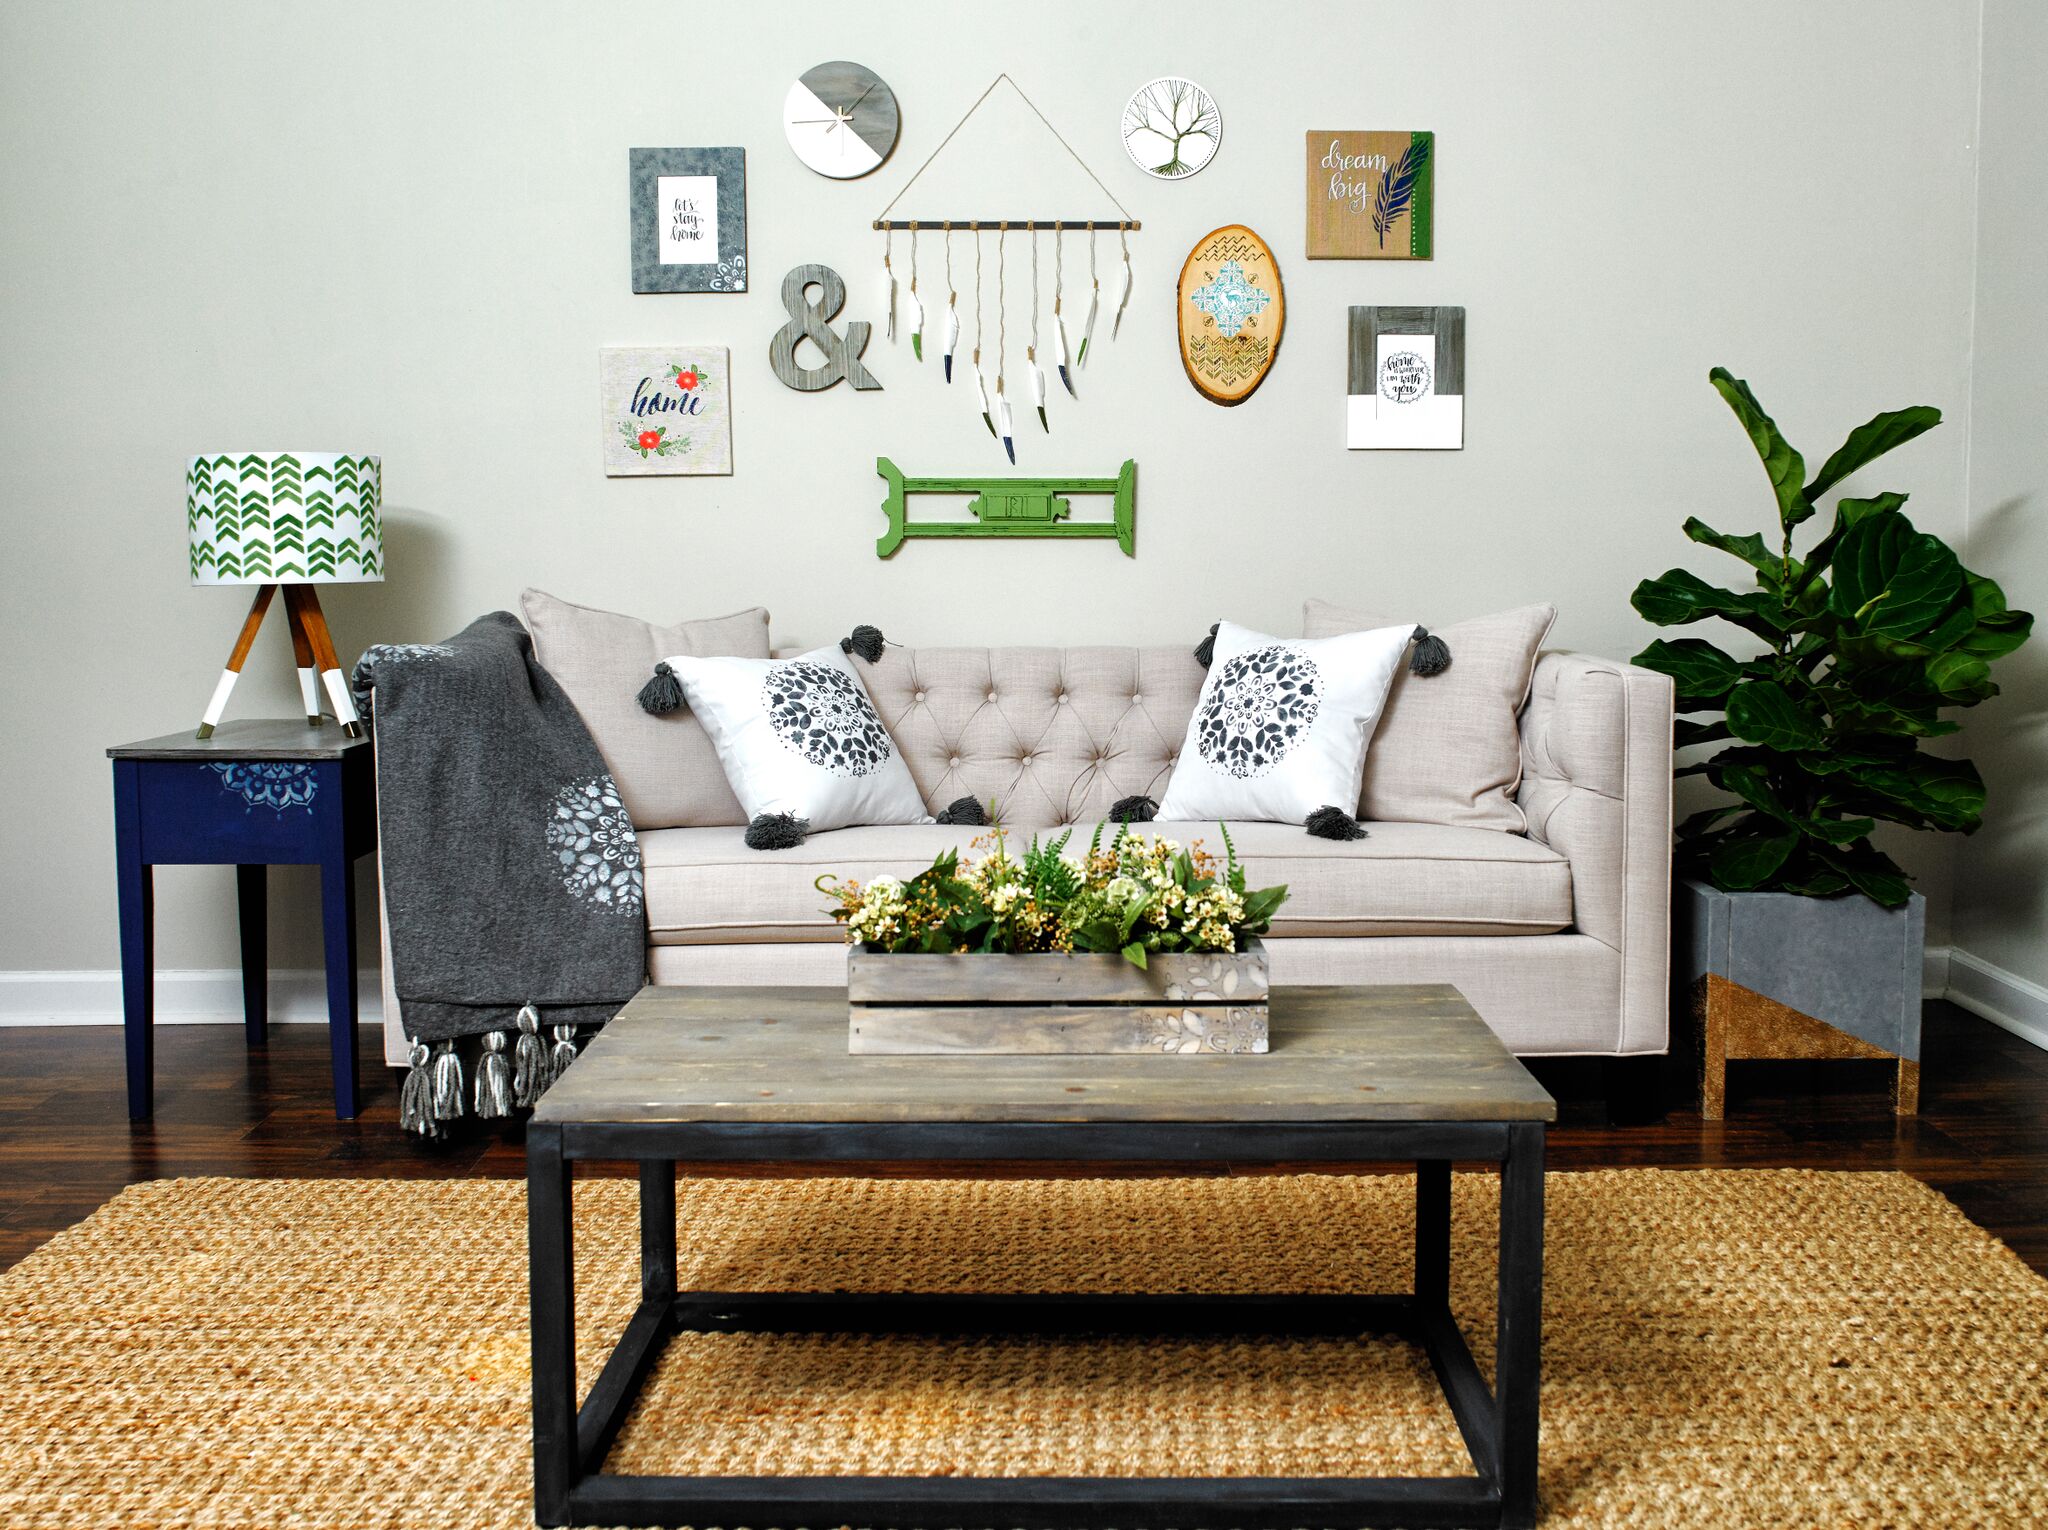
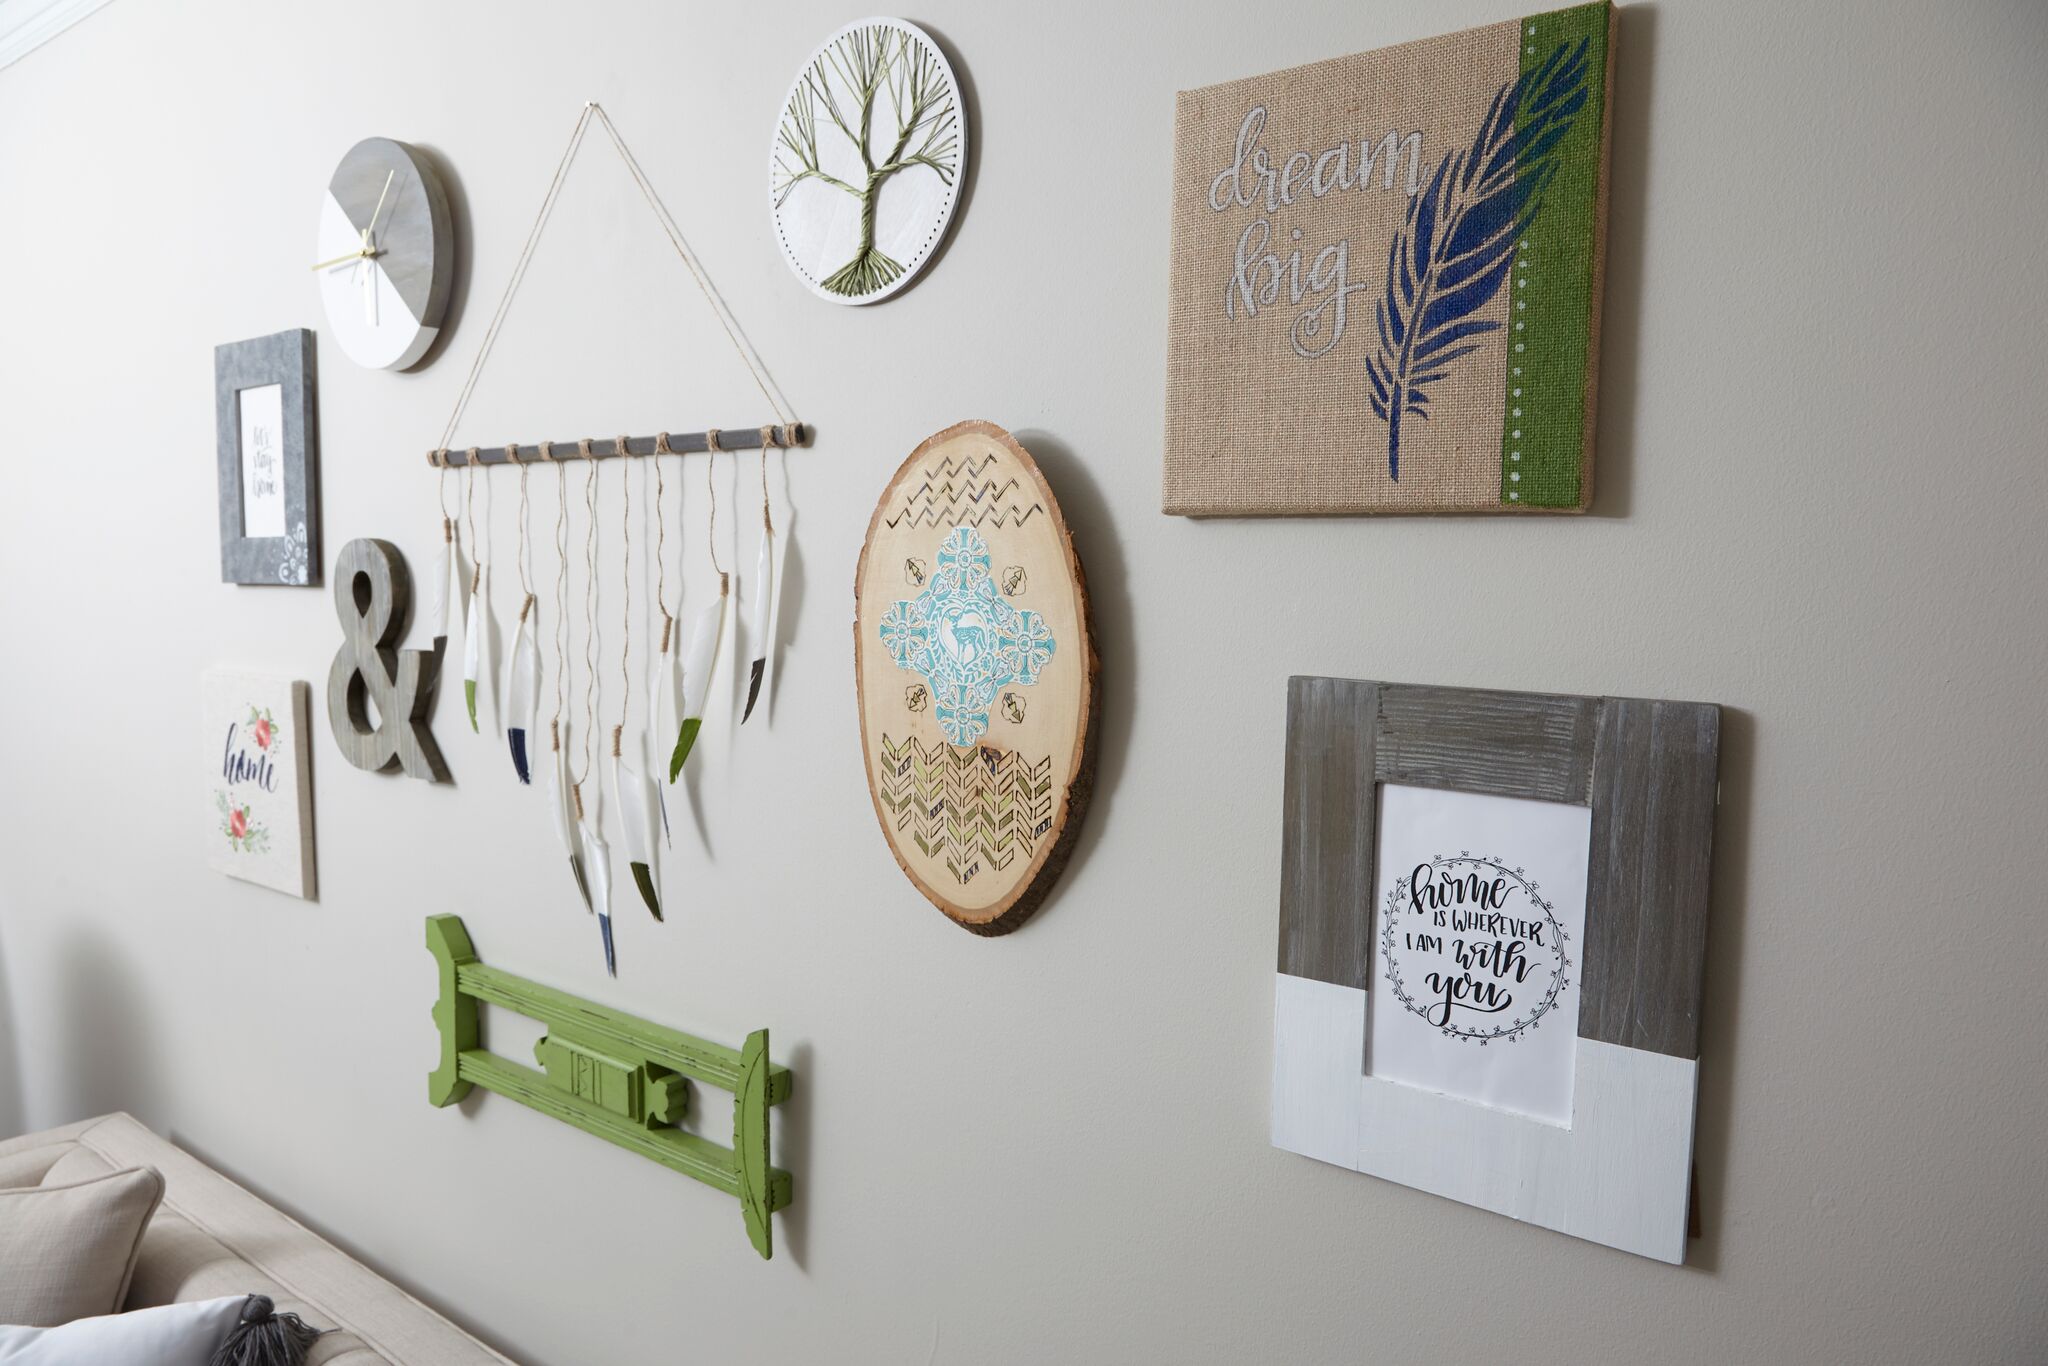
Friends, last week I had the opportunity to share something extra-special with you; the reveal of a collaboration that was six months in the making. The ten bloggers {myself included} who are fortunate enough to be Plaid Creators worked together to create an entire DIY Living Room! Part of that effort included creating a Gallery Wall full of diverse pieces that work together to create a beautiful whole. I made two of the pieces, and created the lettered insert for a third…can you guess which ones are mine?
Today, I want to share the tutorial for one of my pieces, then stay tuned for a how-to on the other this Thursday. Here’s how I created a hand lettered “dream big” canvas with a modern boho vibe and you can too!
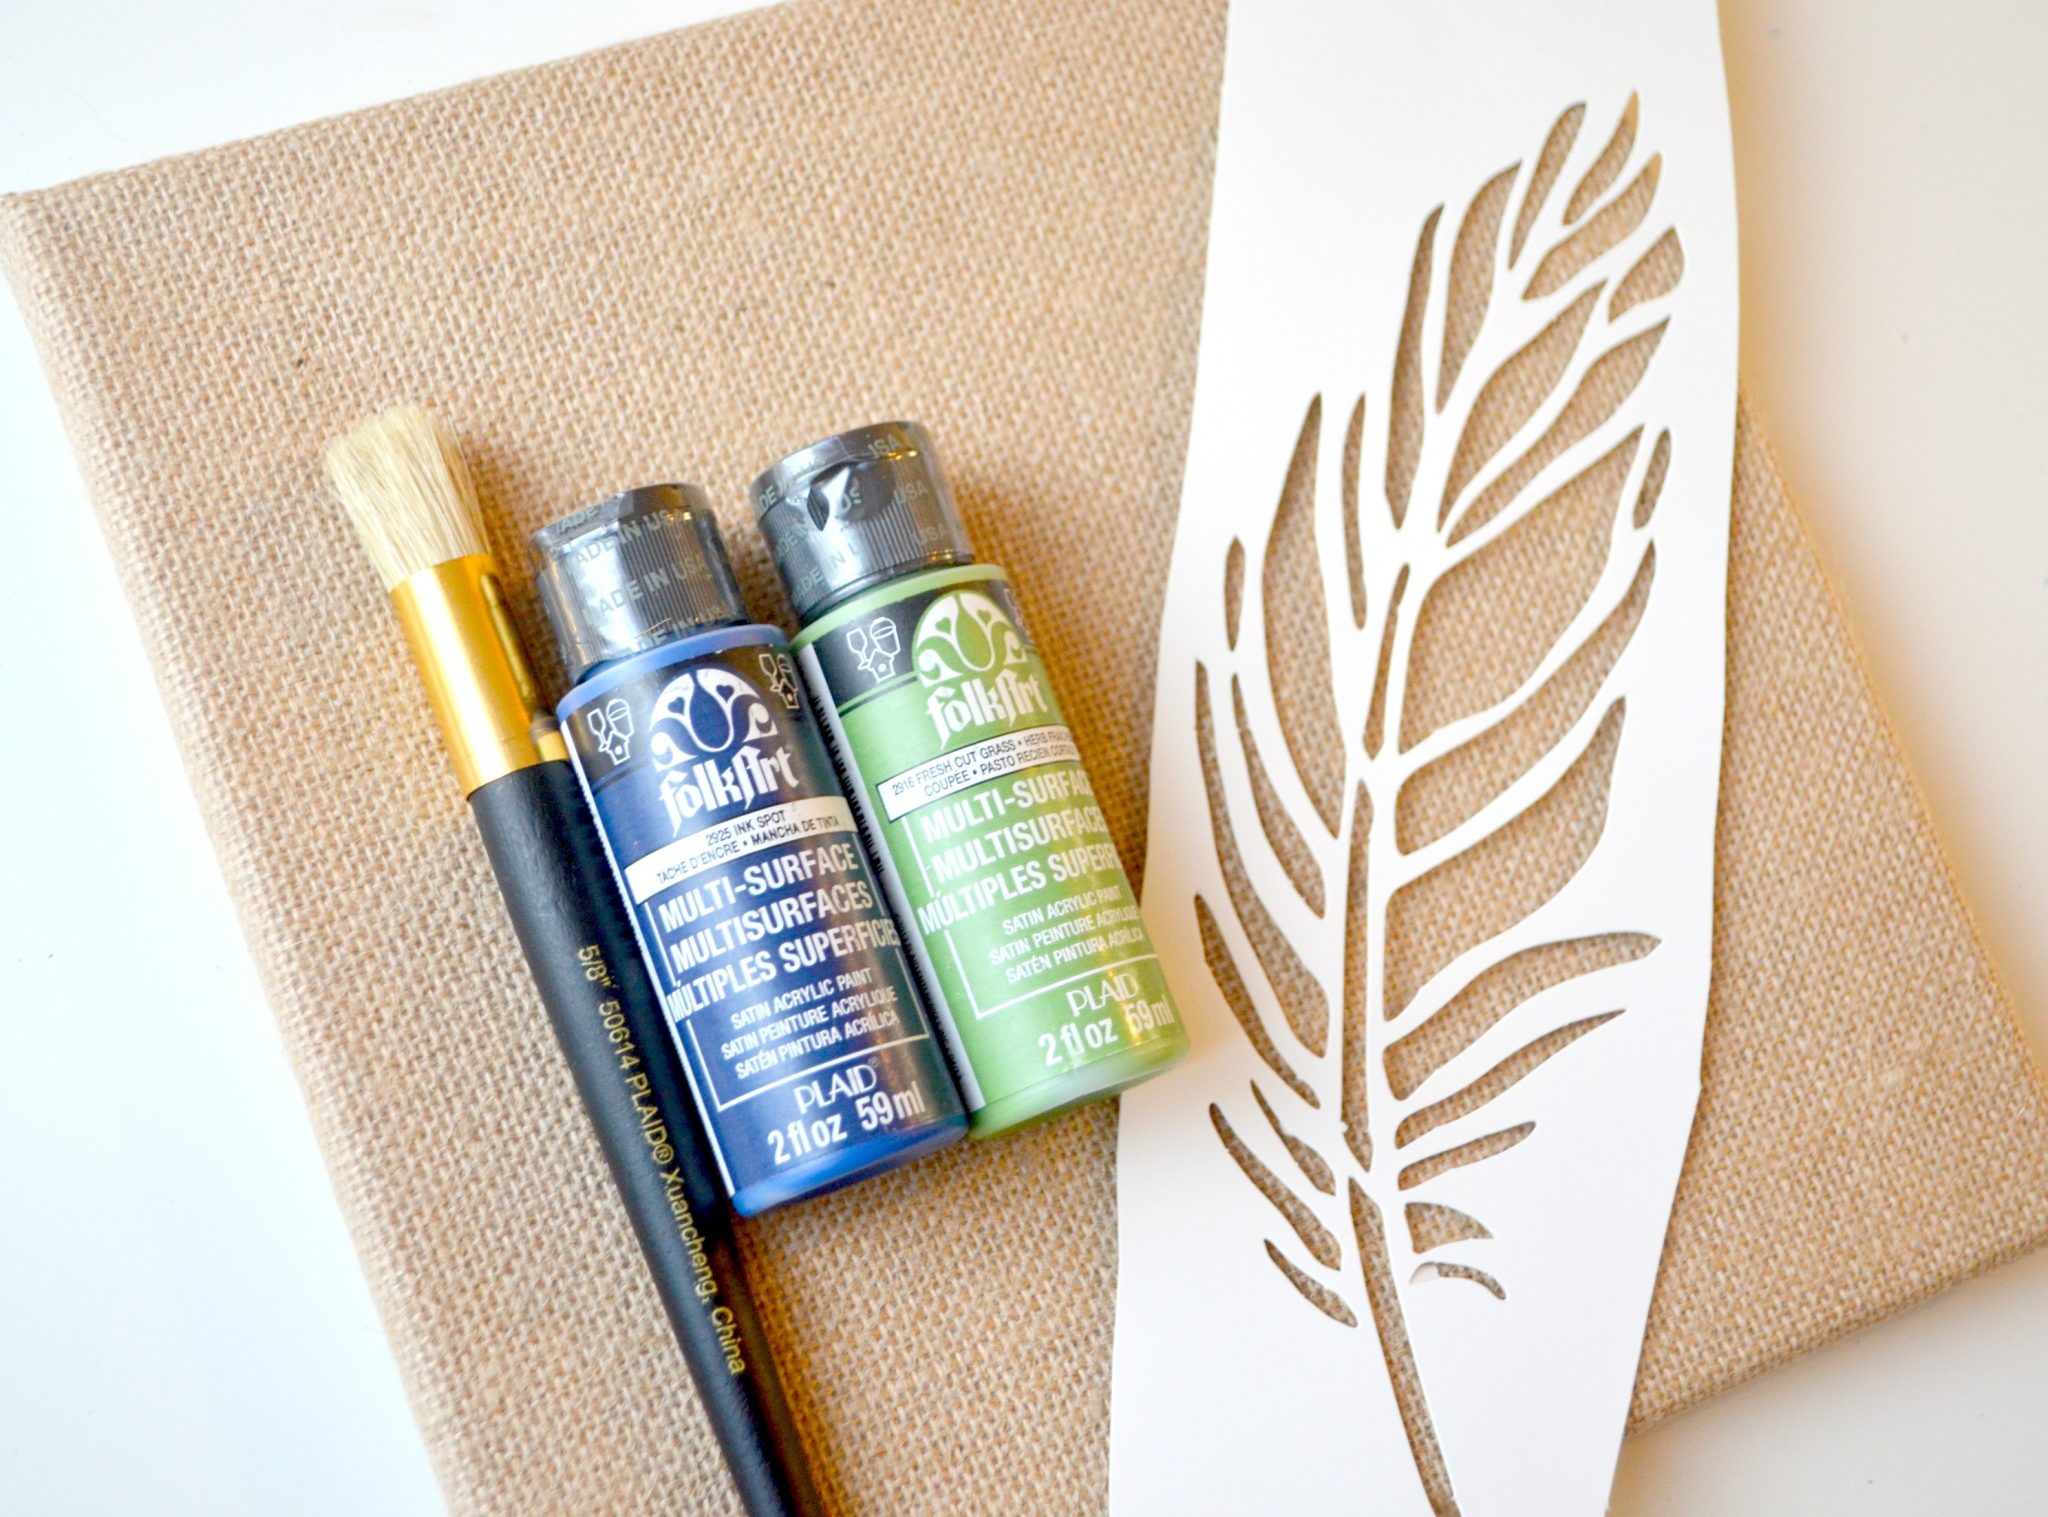
Materials:
{contains affiliate links}
Stretched Burlap Canvas {mine was 10 x 10″, but you can use any size}
FolkArt Multi-Surface Paint: Ink Spot, Cut Grass
FolkArt Die-Cut Paper Stencil: Bohemian
FolkArt Stencil Brush
White Paint Pen
Thin Black Permanent Marker
Washi or Painter’s Tape
Paintbrush
Painting Your Canvas
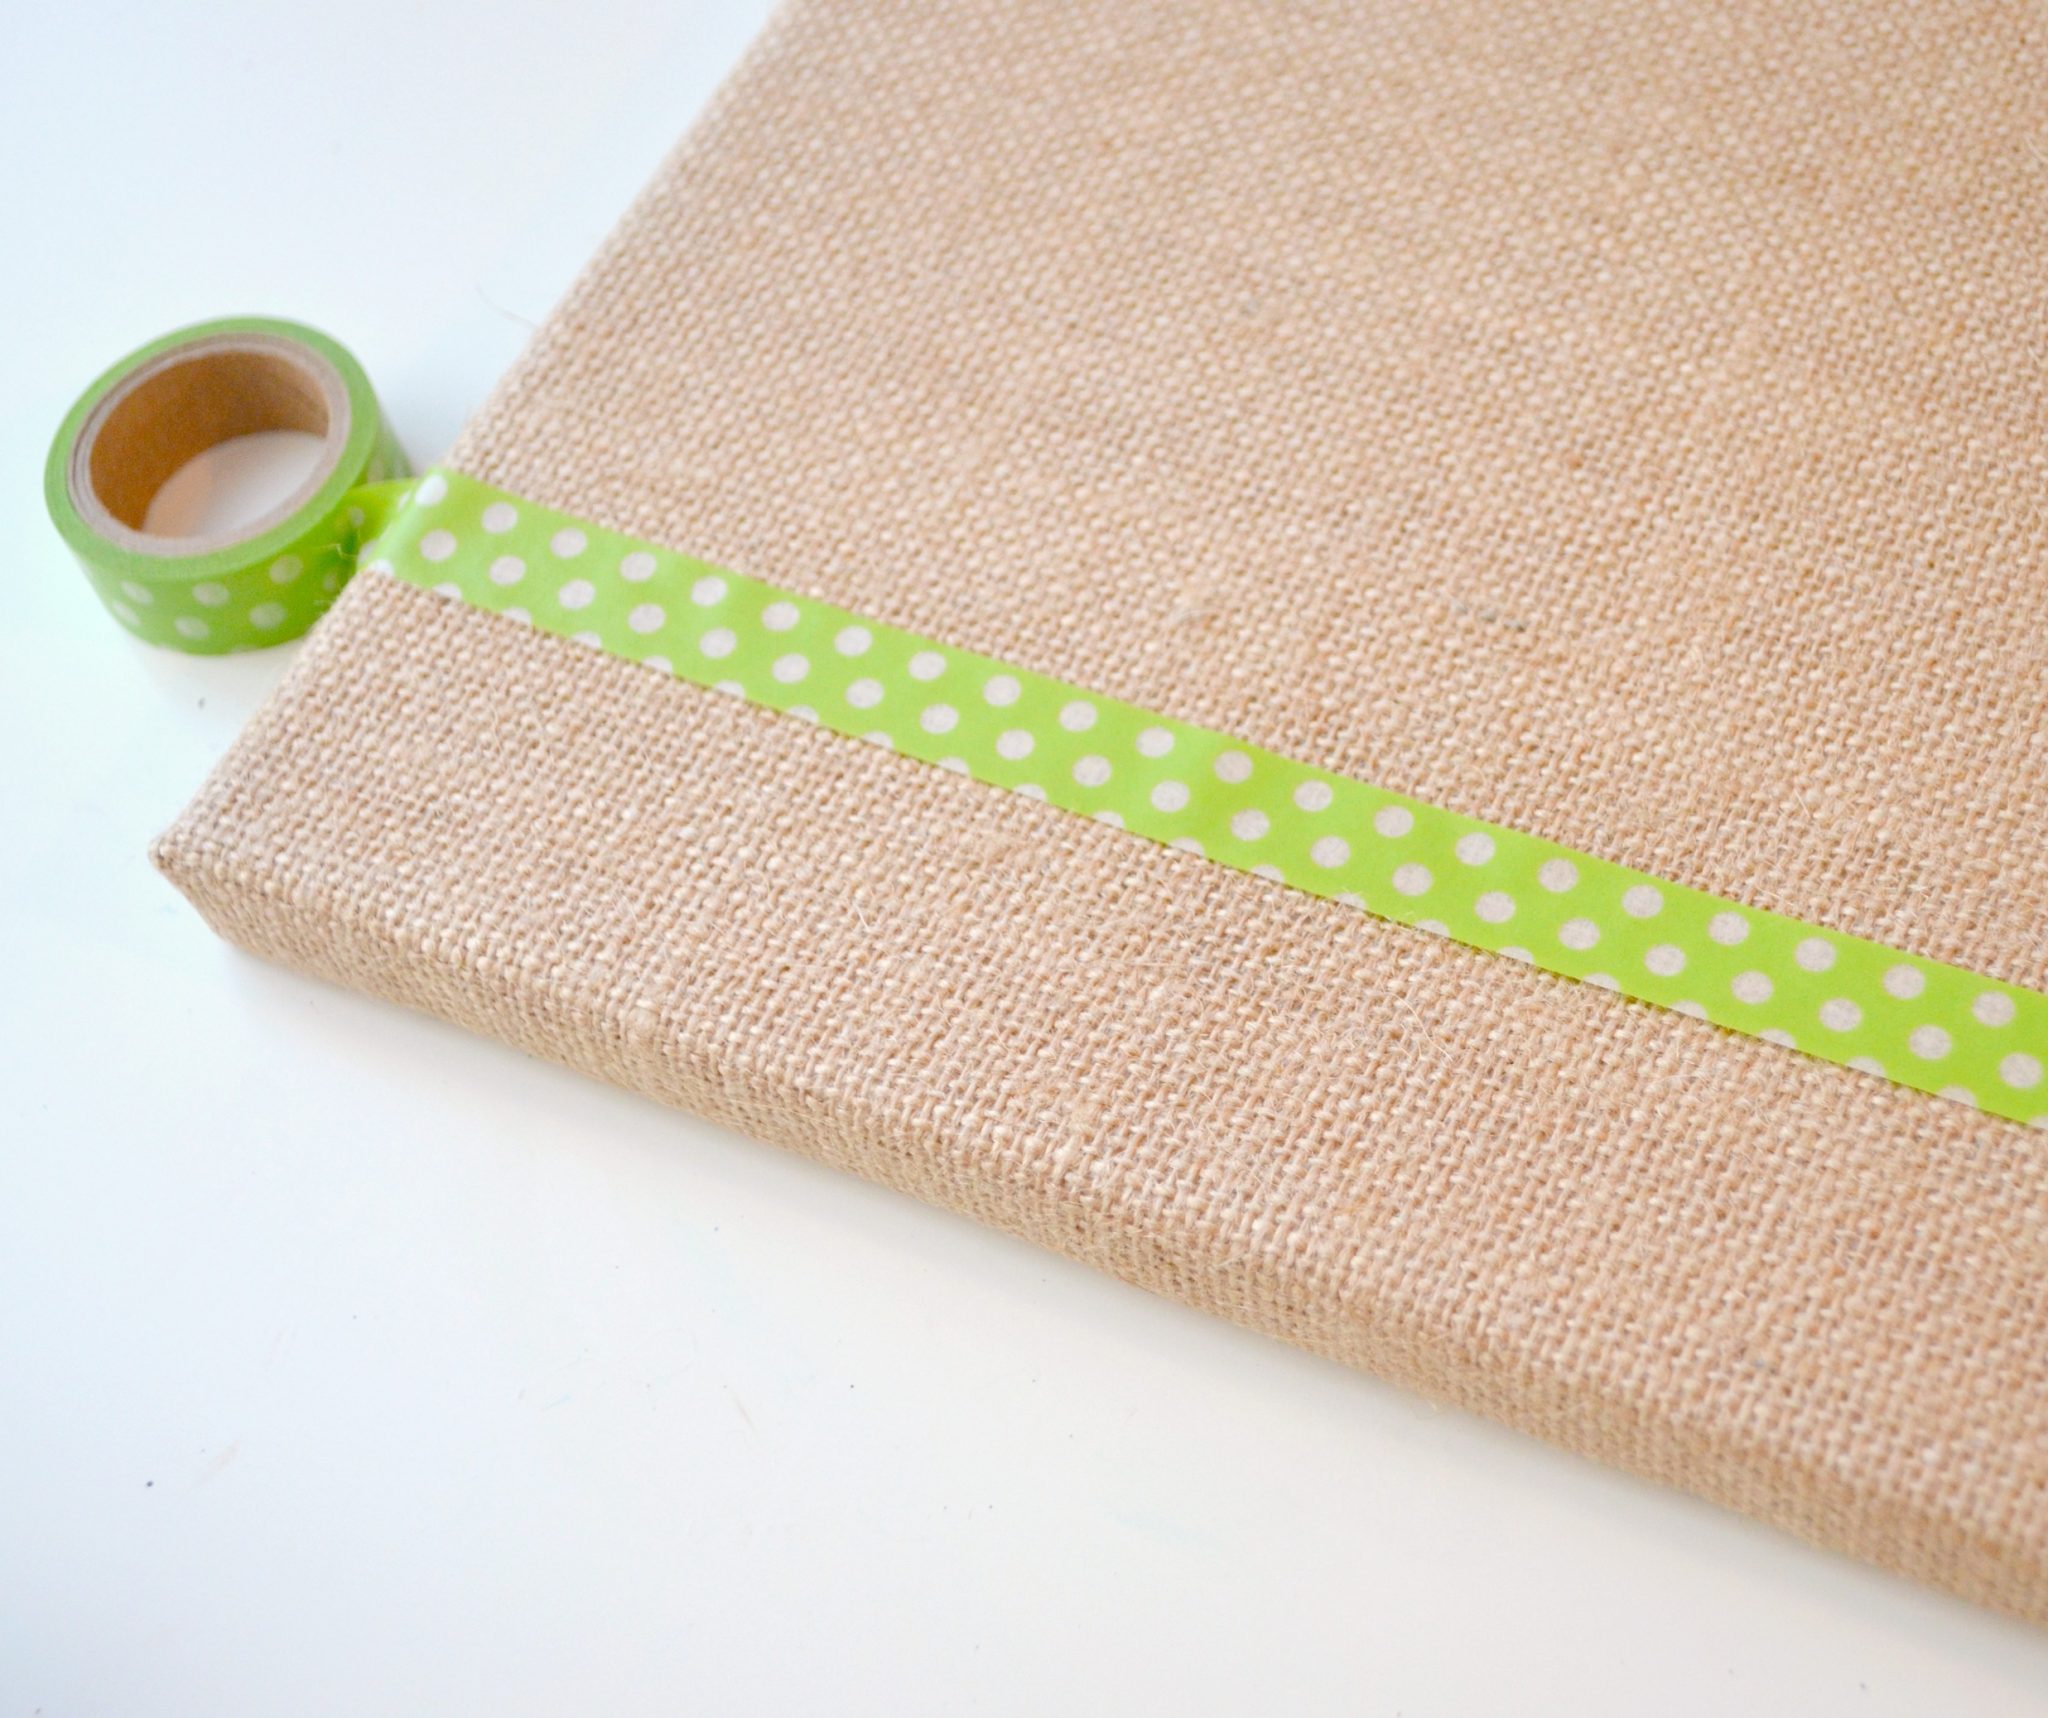
Step 1: Tape off a section of your canvas on the right side.
I’d say mine is probably about 1/6 of the width of the canvas, but you can make yours wider or more narrow if you prefer.
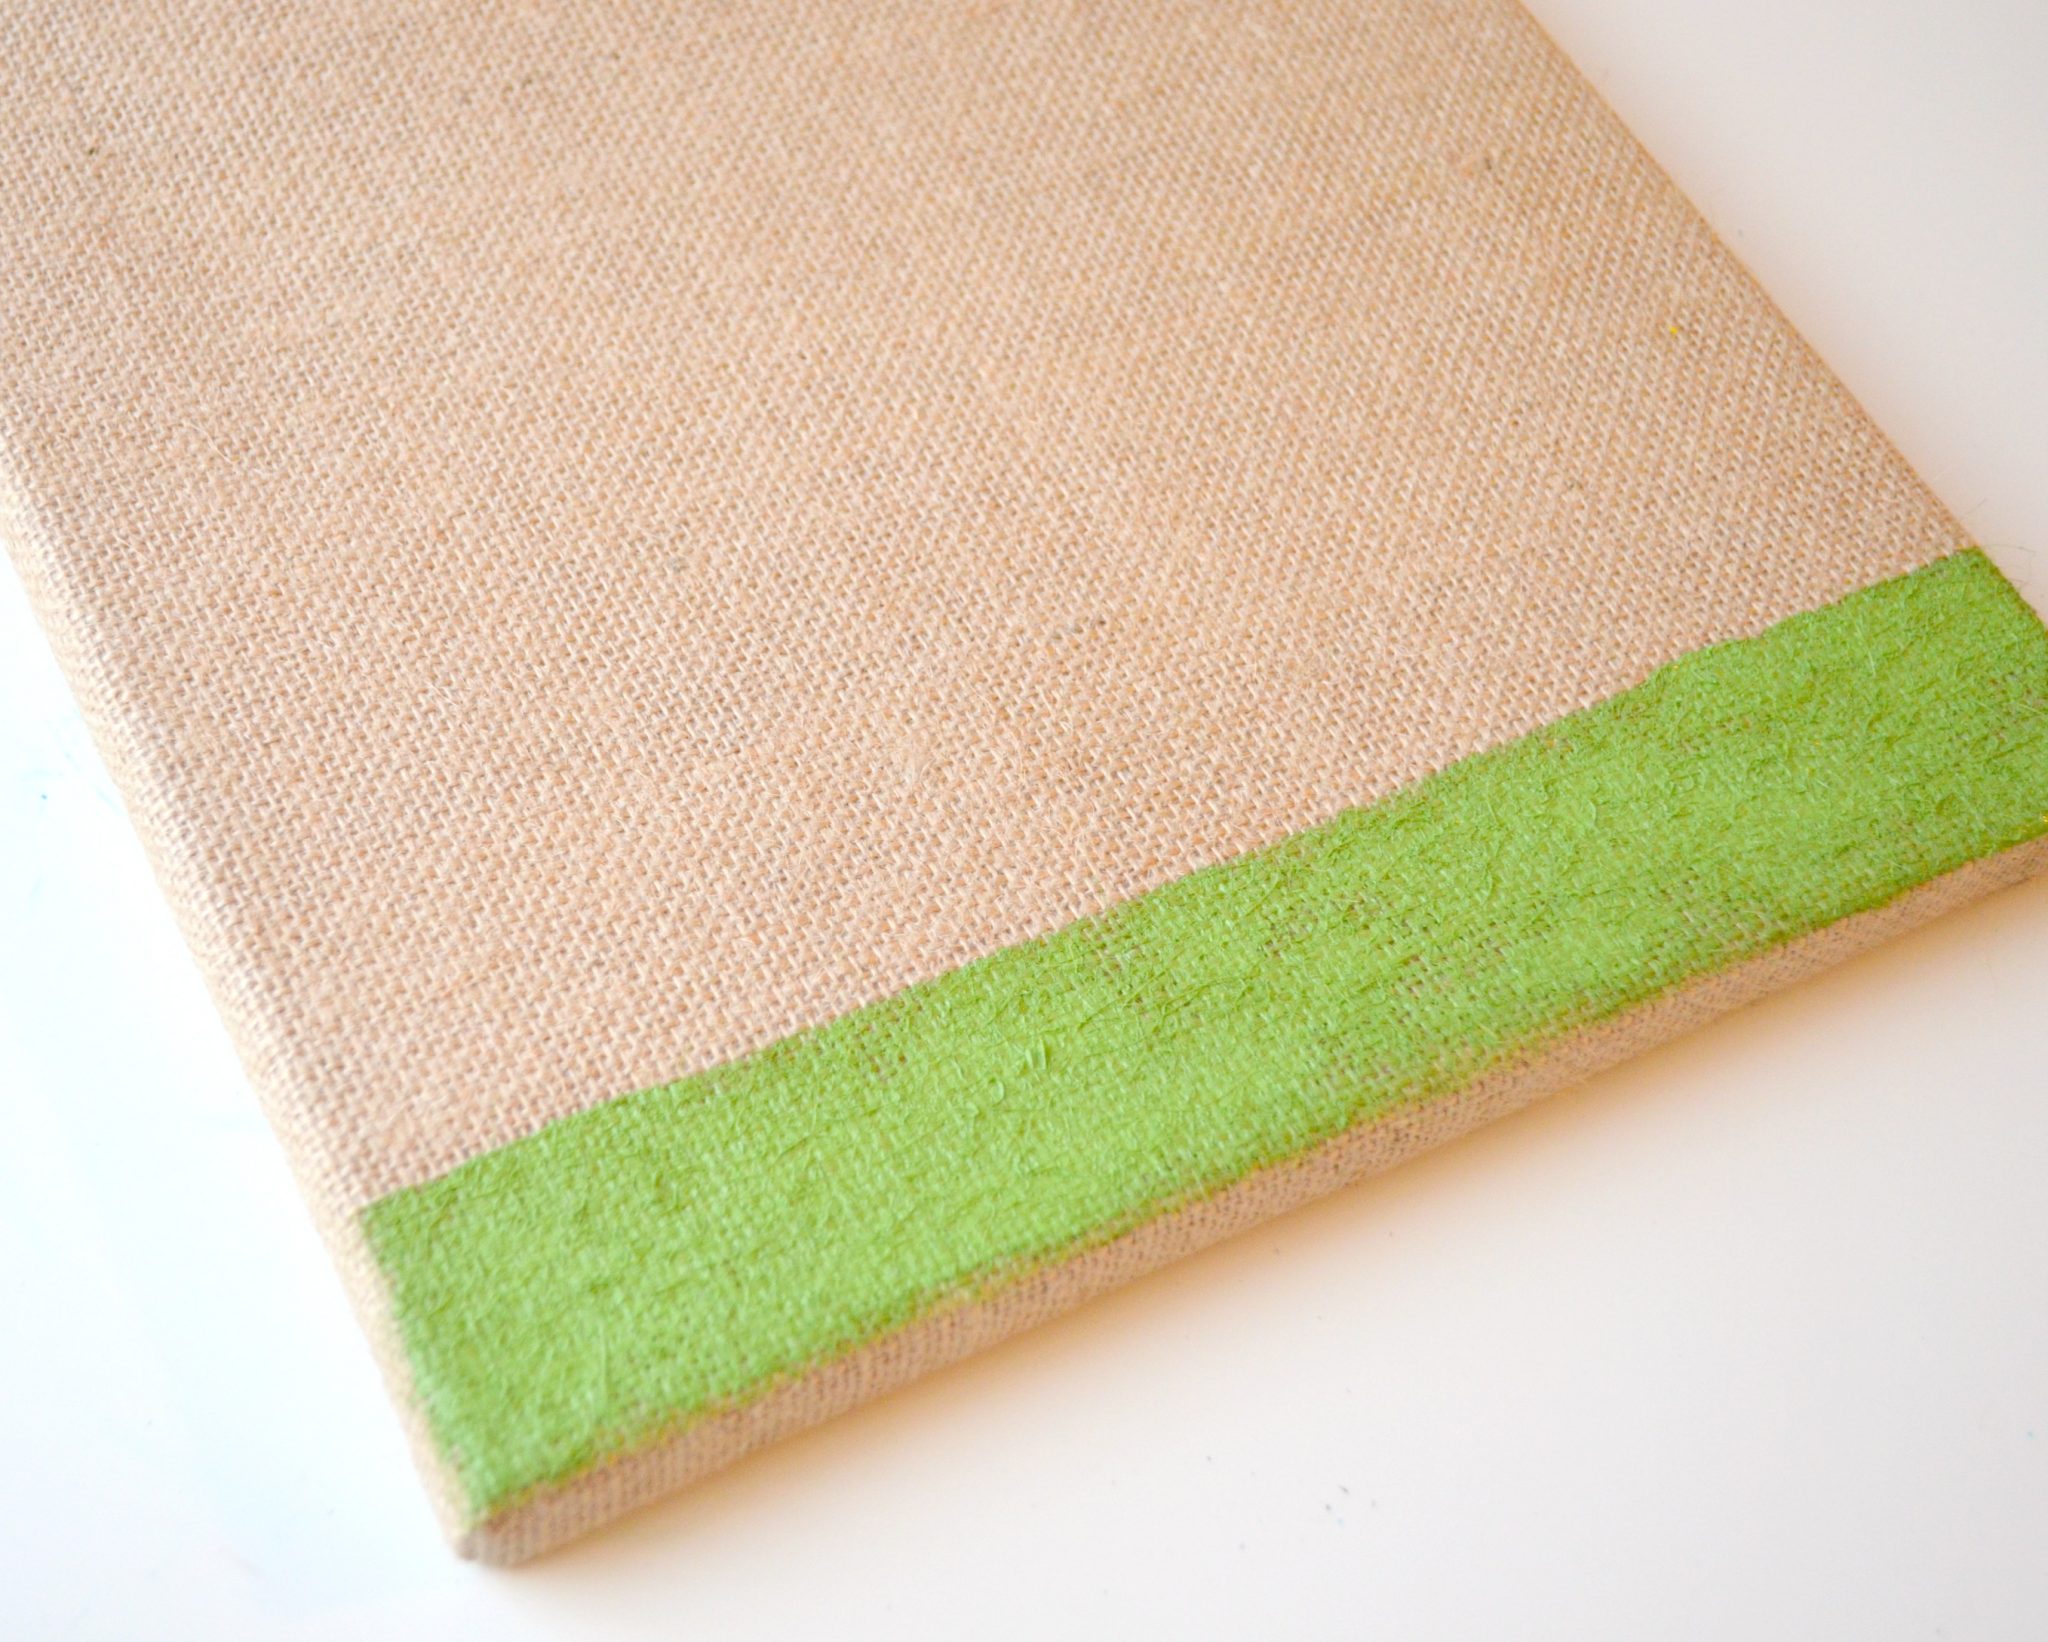
Step 2: Paint everything to the right of the tape green.
Let it dry completely before you move on so that your colors don’t run together.
Step 3: Prepare your stencil and tape it at a diagonal on the right of your canvas, overlapping the green section at the top.
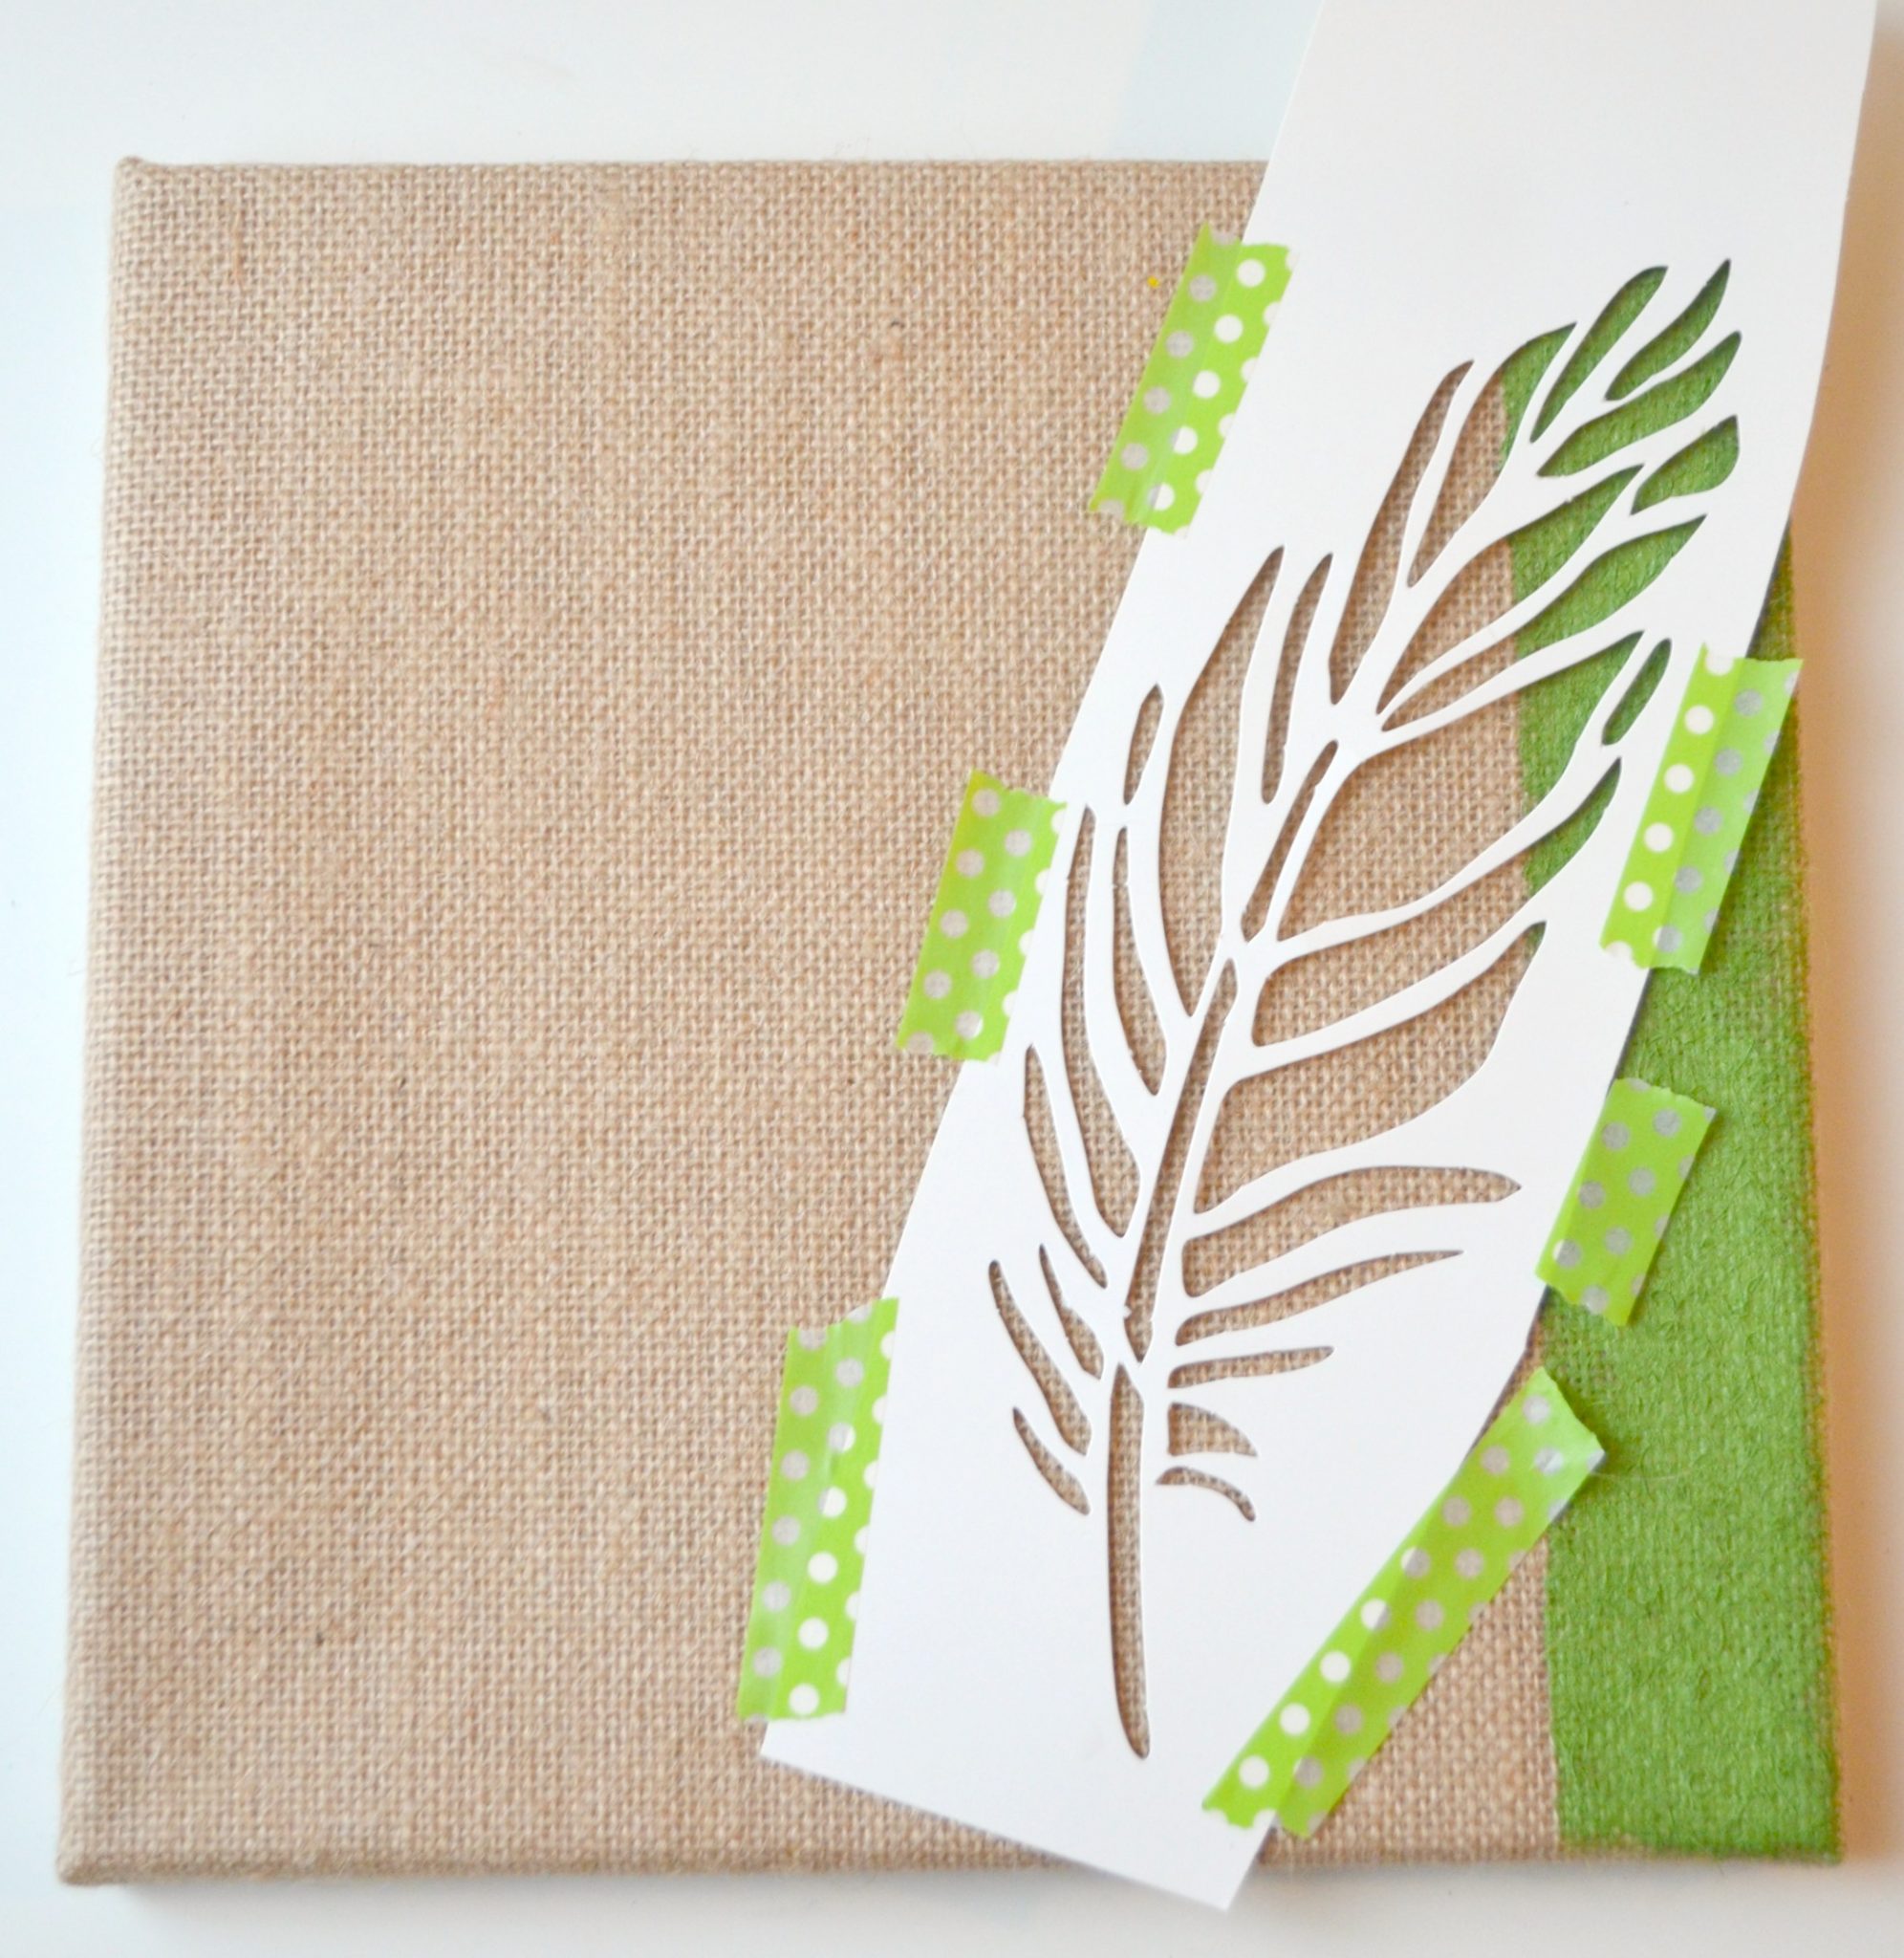
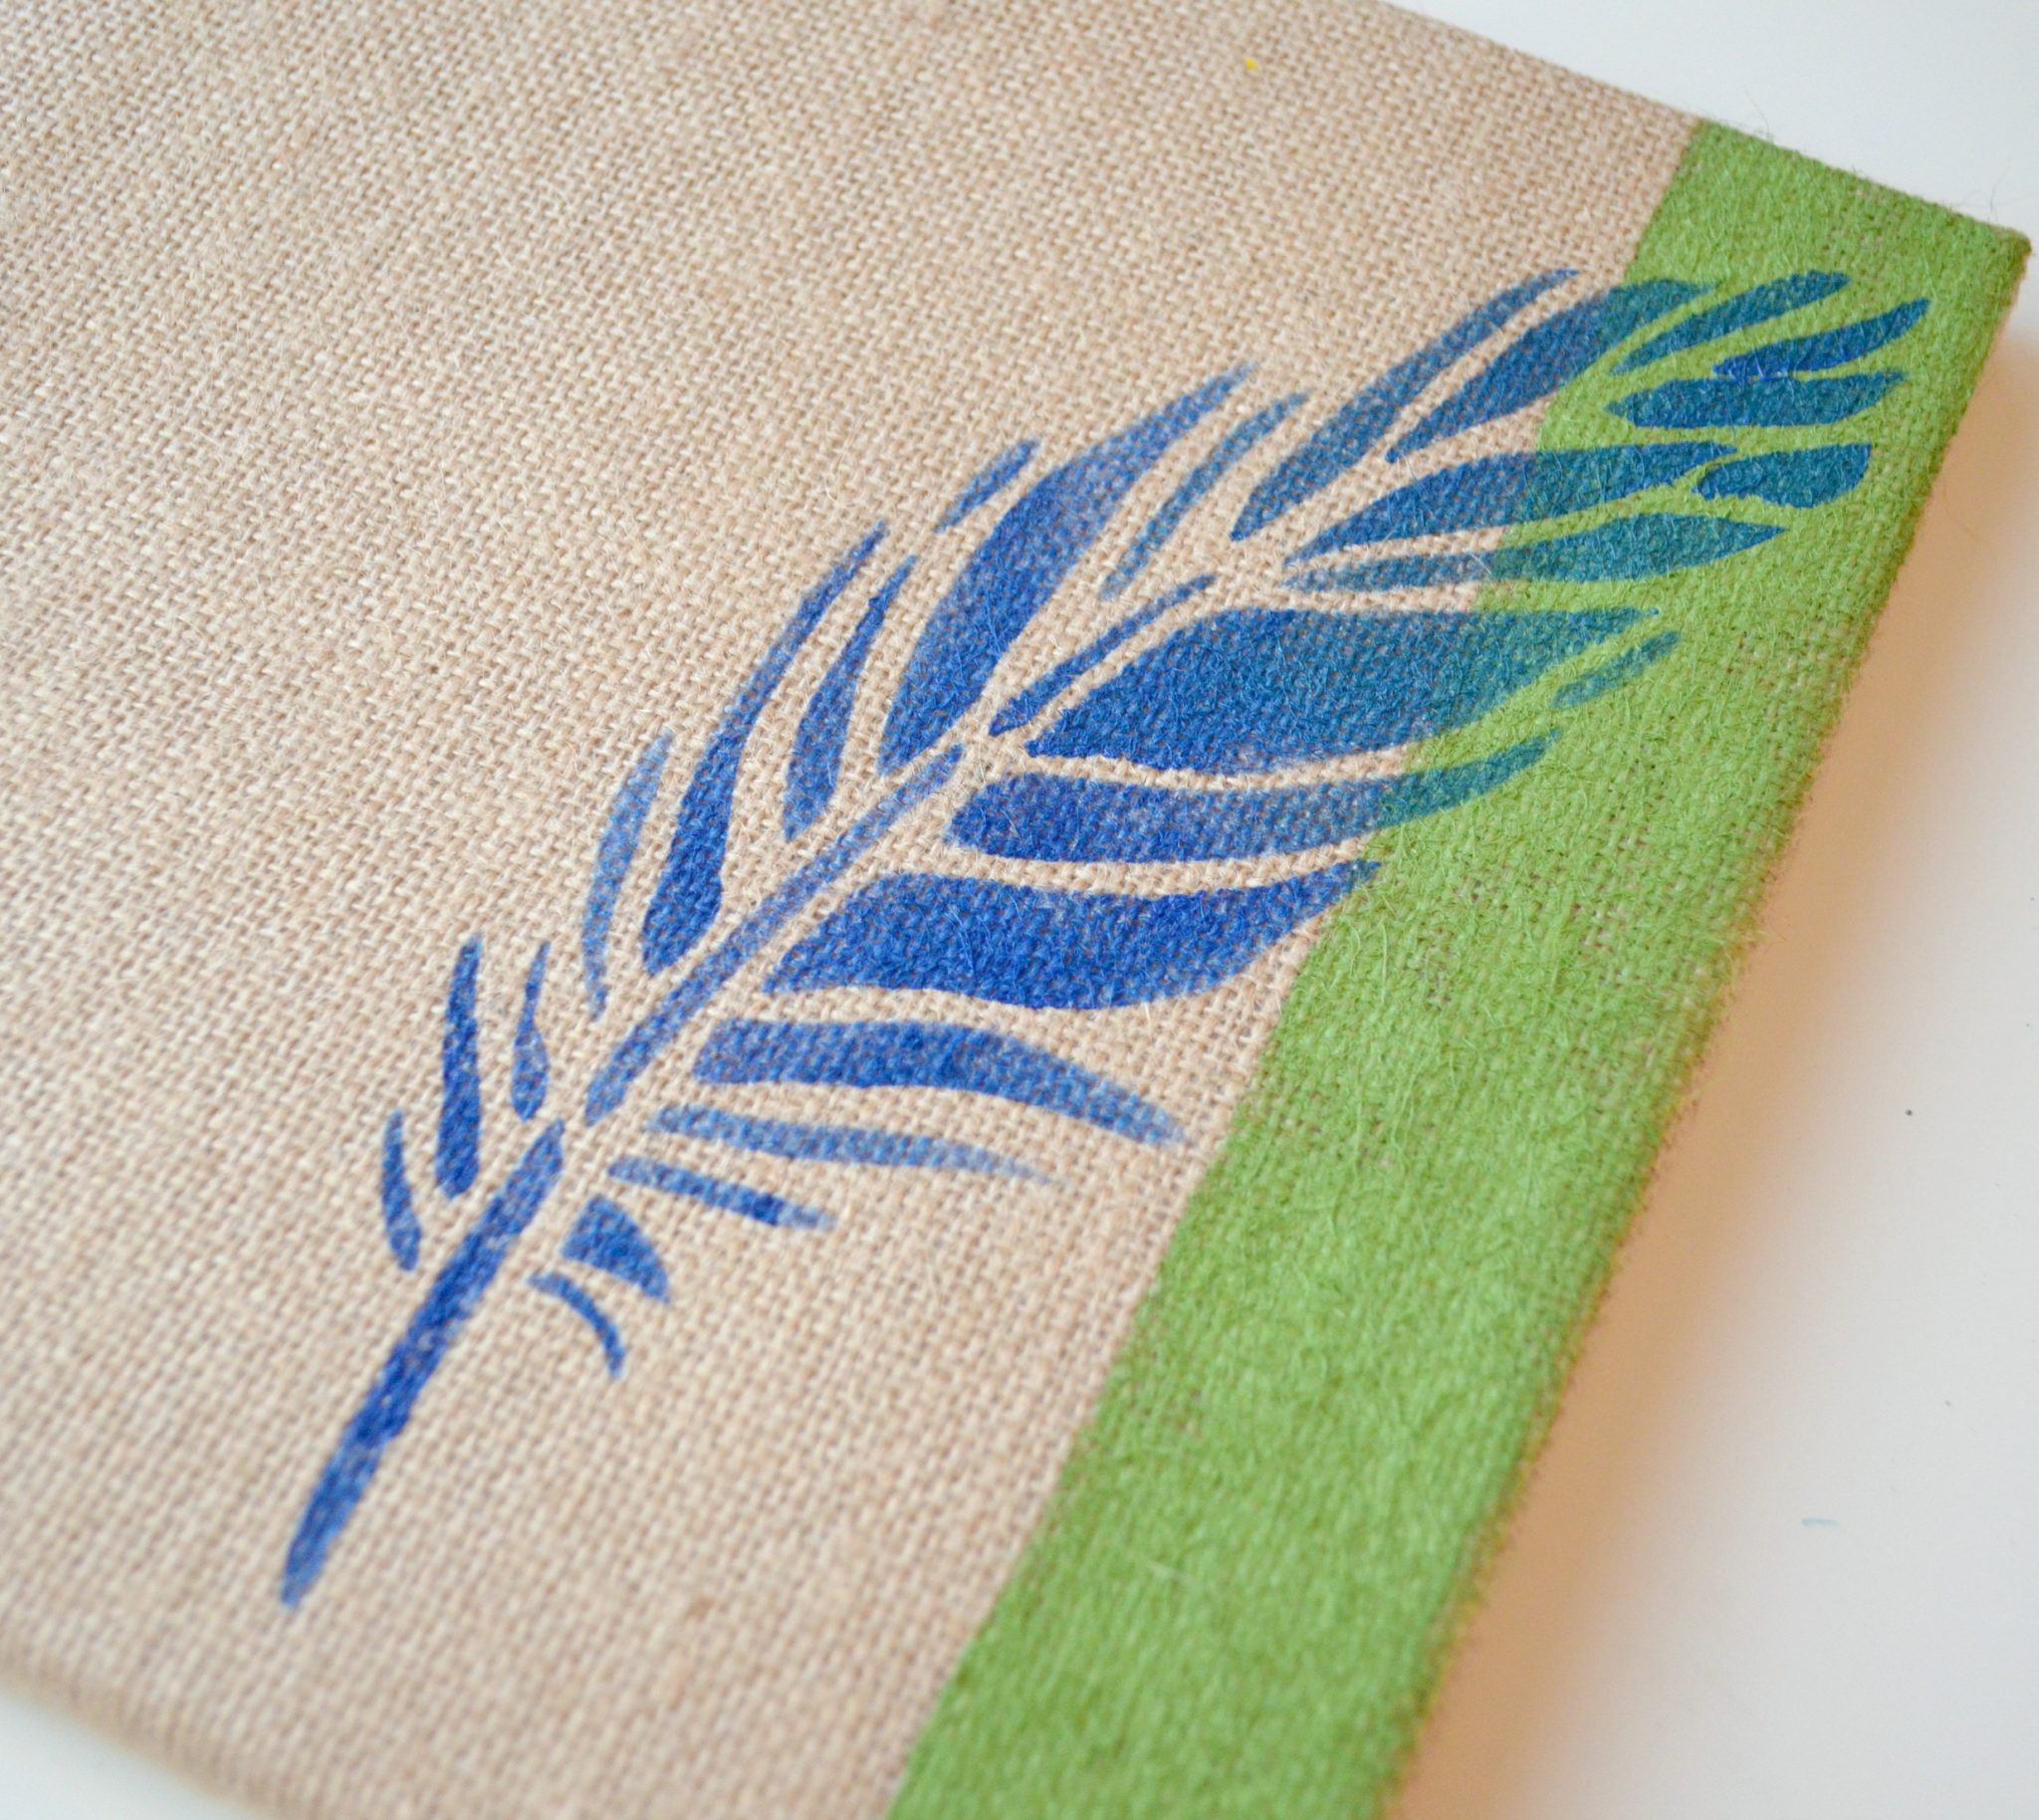
Step 3: Use a stencil brush dipped in blue paint to fill in the open spaces of your feather image.
The trick to a good clean stenciled image is that less is more. It’s best to have your brush almost dry and reload often to keep excess paint from bleeding under the stencil. Use an up and down tapping motion rather than rubbing the brush around; this will also help keep the paint where it’s supposed to be.
Step 4: Use a white paint pen to letter the words, “dream big” in the upper left of your canvas.
If you’re new to hand lettering, this is easier than you think! Check out my basic tutorial for creating faux calligraphy and you’ll see how simple it is to get this effect.
Step 5: Trace your letters with a fine point black marker to help them stand out.
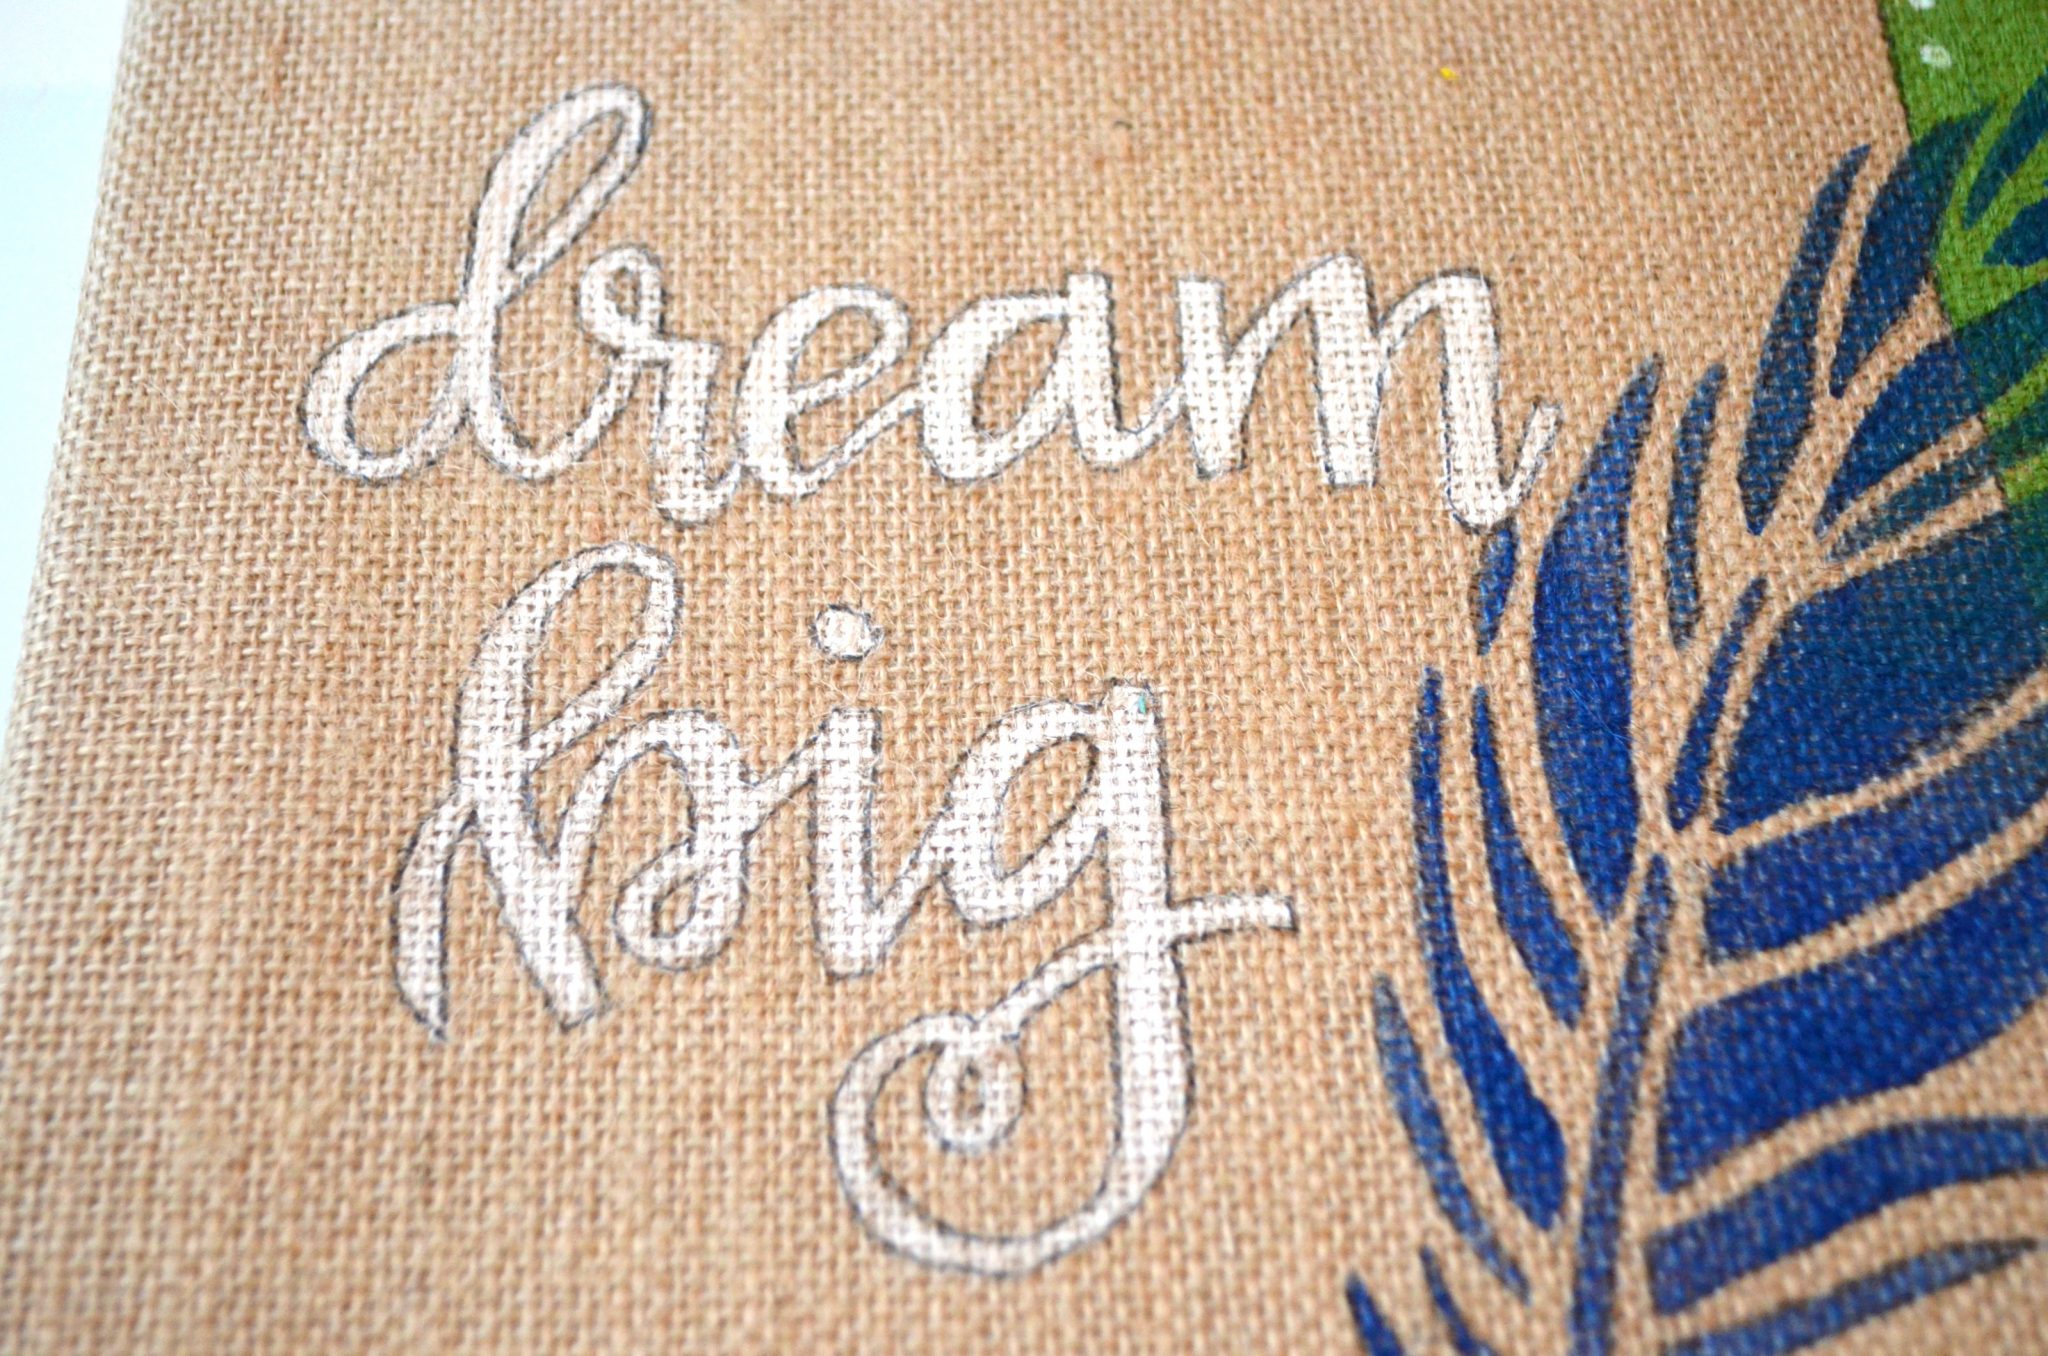
Step 6: Using the same black marker, trace along the line that divides the natural canvas color from your green section.
Step 7: Go back and add a series of white dots along the inside edge of the green section using your paint pen or the end of a paint brush dipped in white.
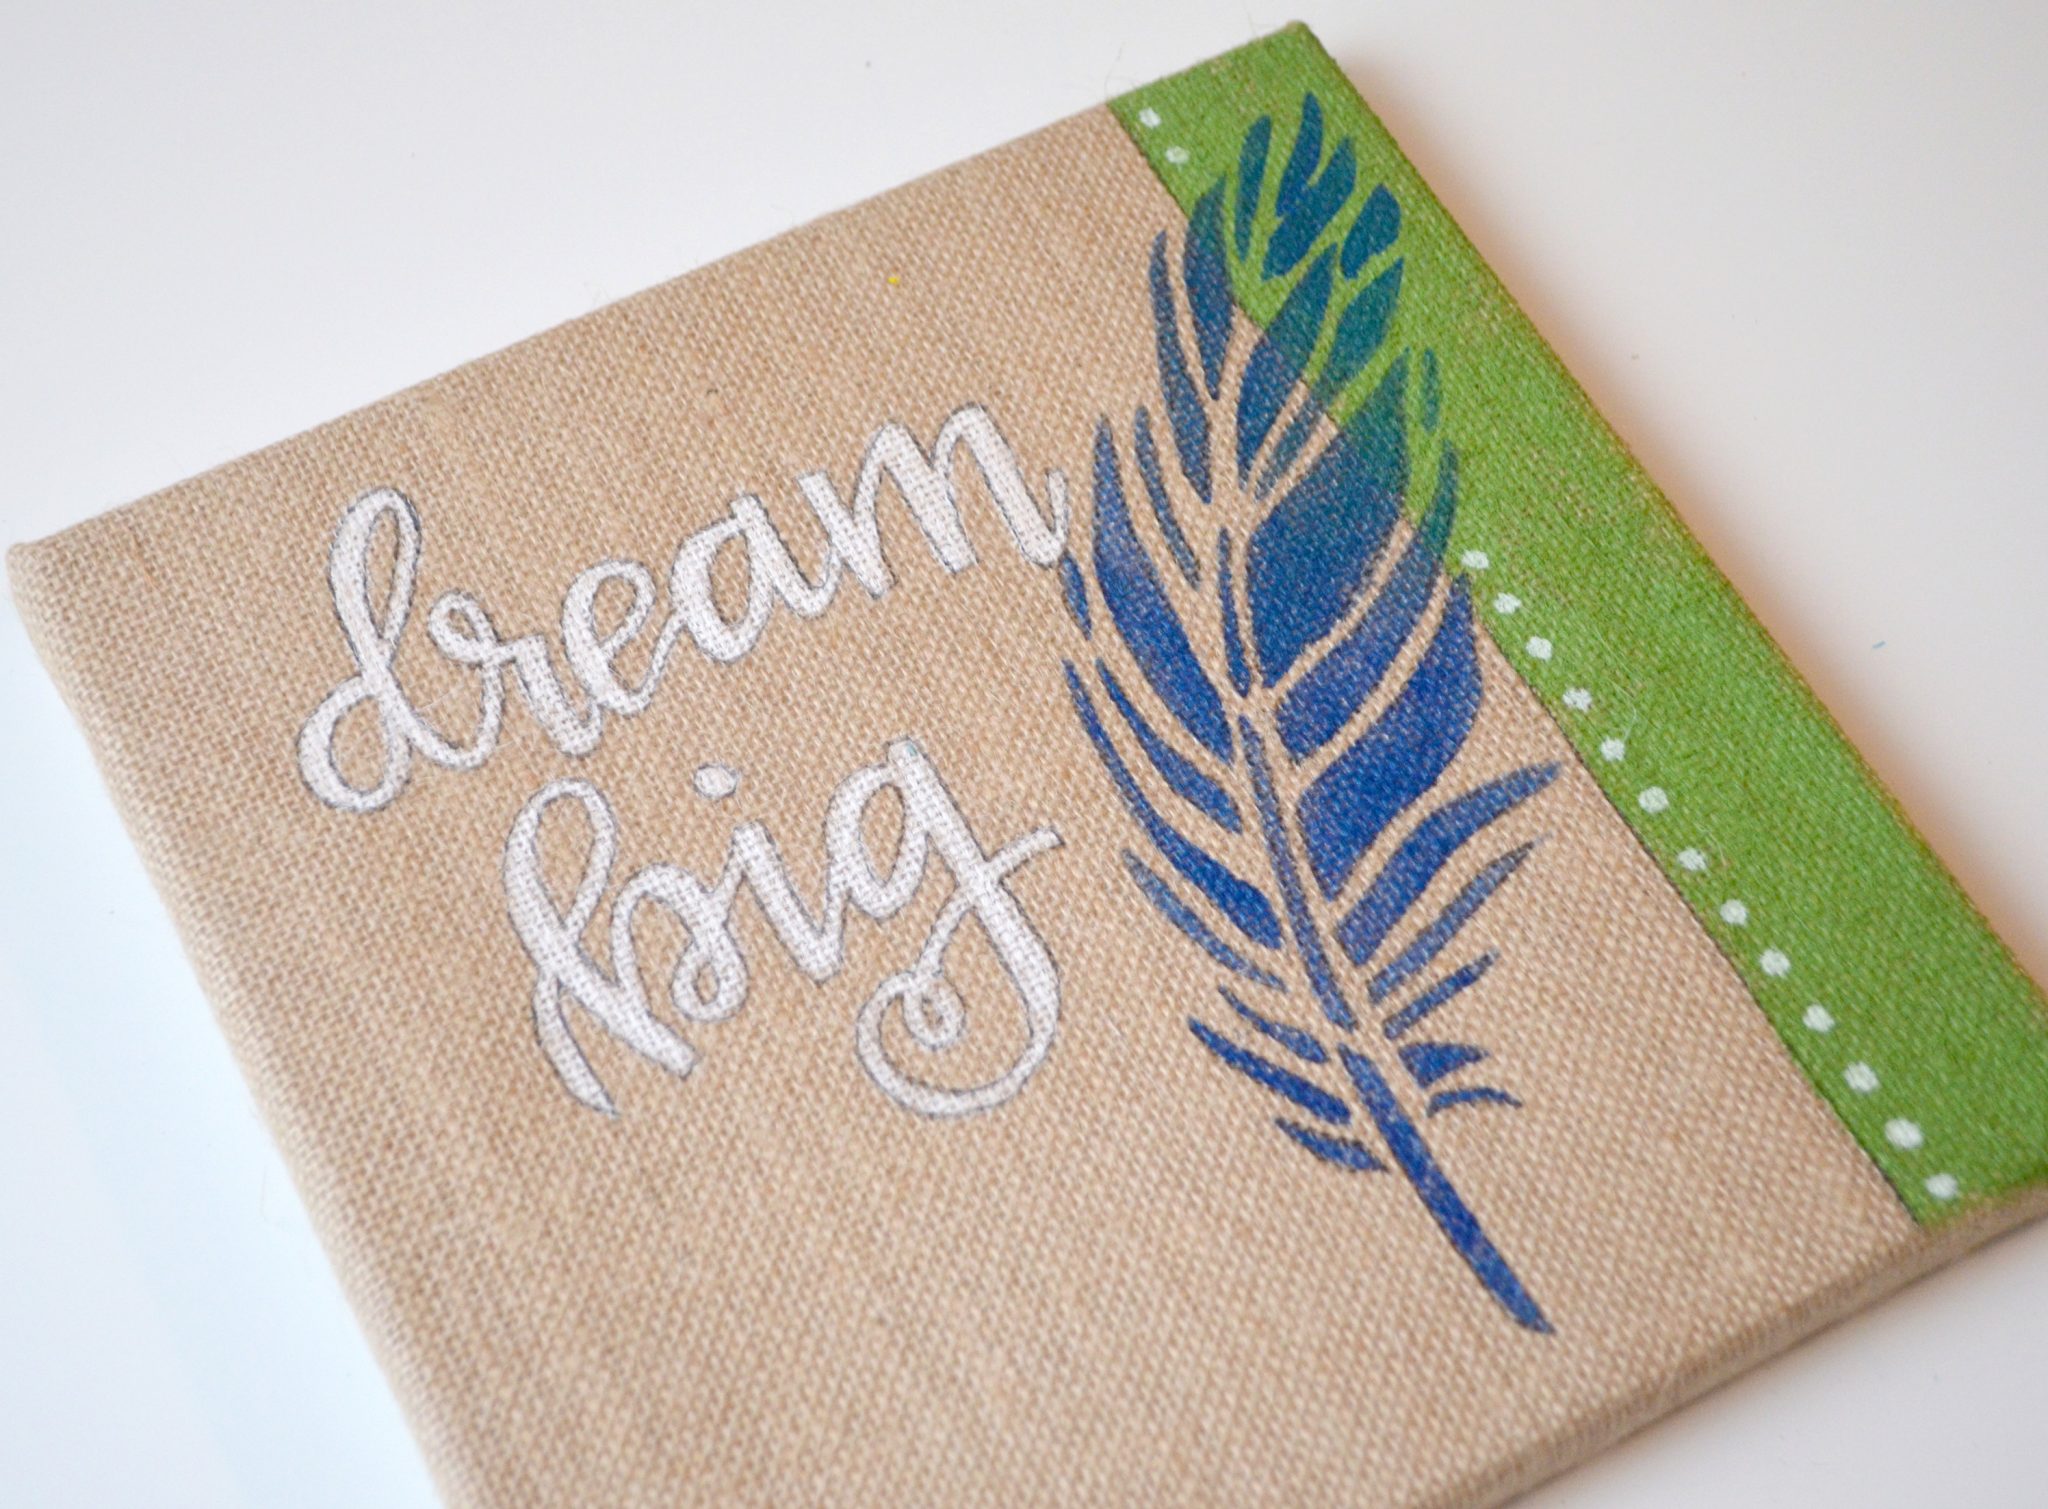
I was pleased with how my canvas turned out, especially when I saw it displayed as part of the whole Gallery Wall.
Speaking of which, did you know you can enter to win this entire wall of projects PLUS up to $500 worth of Plaid Crafts crafting supplies?! It’s true! Click here and scroll to the bottom of the post for the Rafflecopter. Good luck!
And don’t forget to stay tuned for another tutorial all about my other Gallery Wall piece, coming soon!


Dream Big has been my motto for several years, I love your canvas! What a fun collaboration, you did a wonderful job on the project.
Cheers!
Lori in Blue Ridge, GA
Thank you so much!