
DIY Wooden Crate Outdoor Table
Thanks to Crates and Pallet for sponsoring today’s outdoor table post & giveaway. All opinions are my own.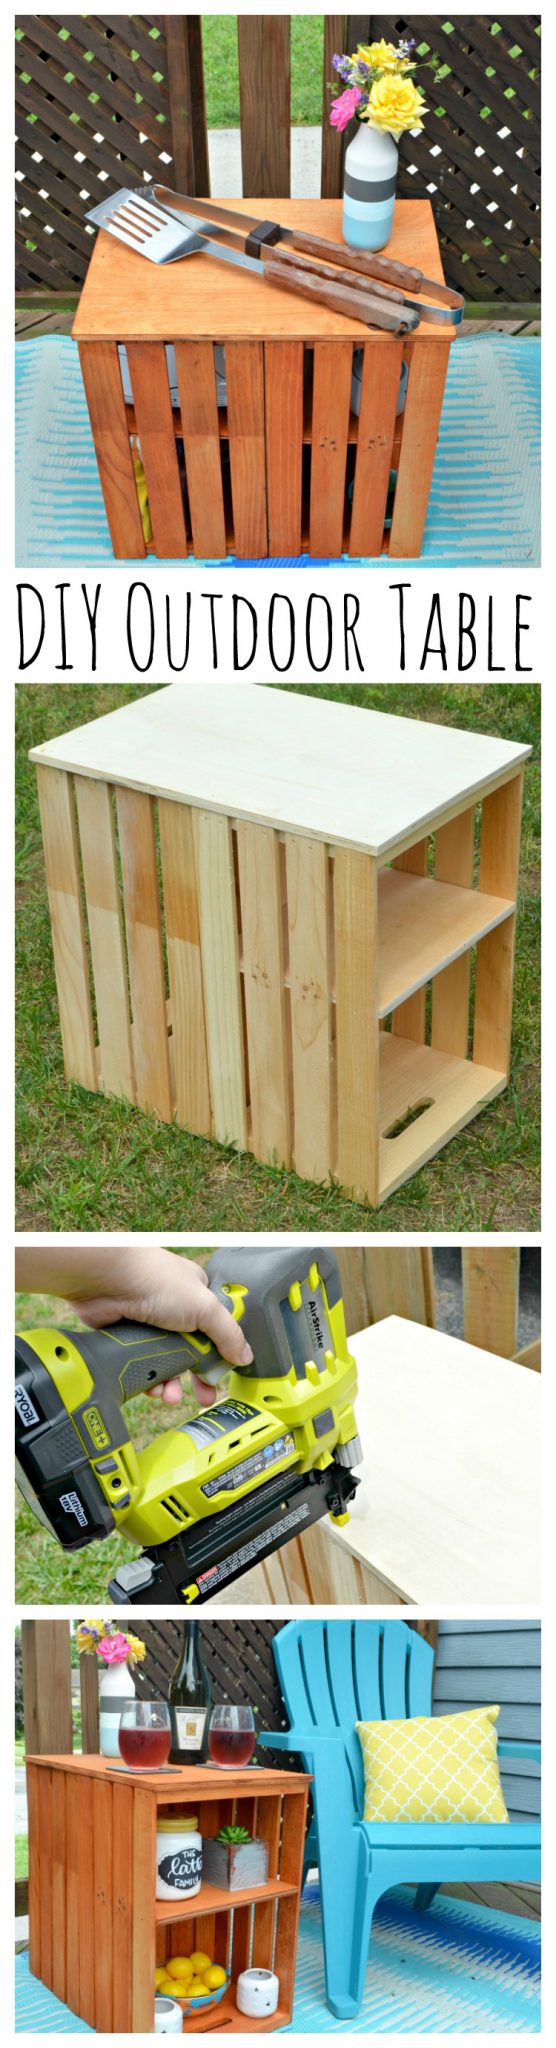
Friends, I have been having a blast this summer sprucing up our outdoor space with projects like our rose garden, patio makeover, wooden planter stand, and more. The most recent thing I created for our deck is this useful DIY Outdoor Table made from crates! It is seriously SO easy to do…even if you’ve never built anything before, this is a great beginner level project to try. All you need are two crates and some plywood, and you can build it in less than an hour! Here’s how to create your own.
Materials:
2 Large Unfinished Crates
Plywood
RYOBI ONE+ 18V Corner Cat Sander
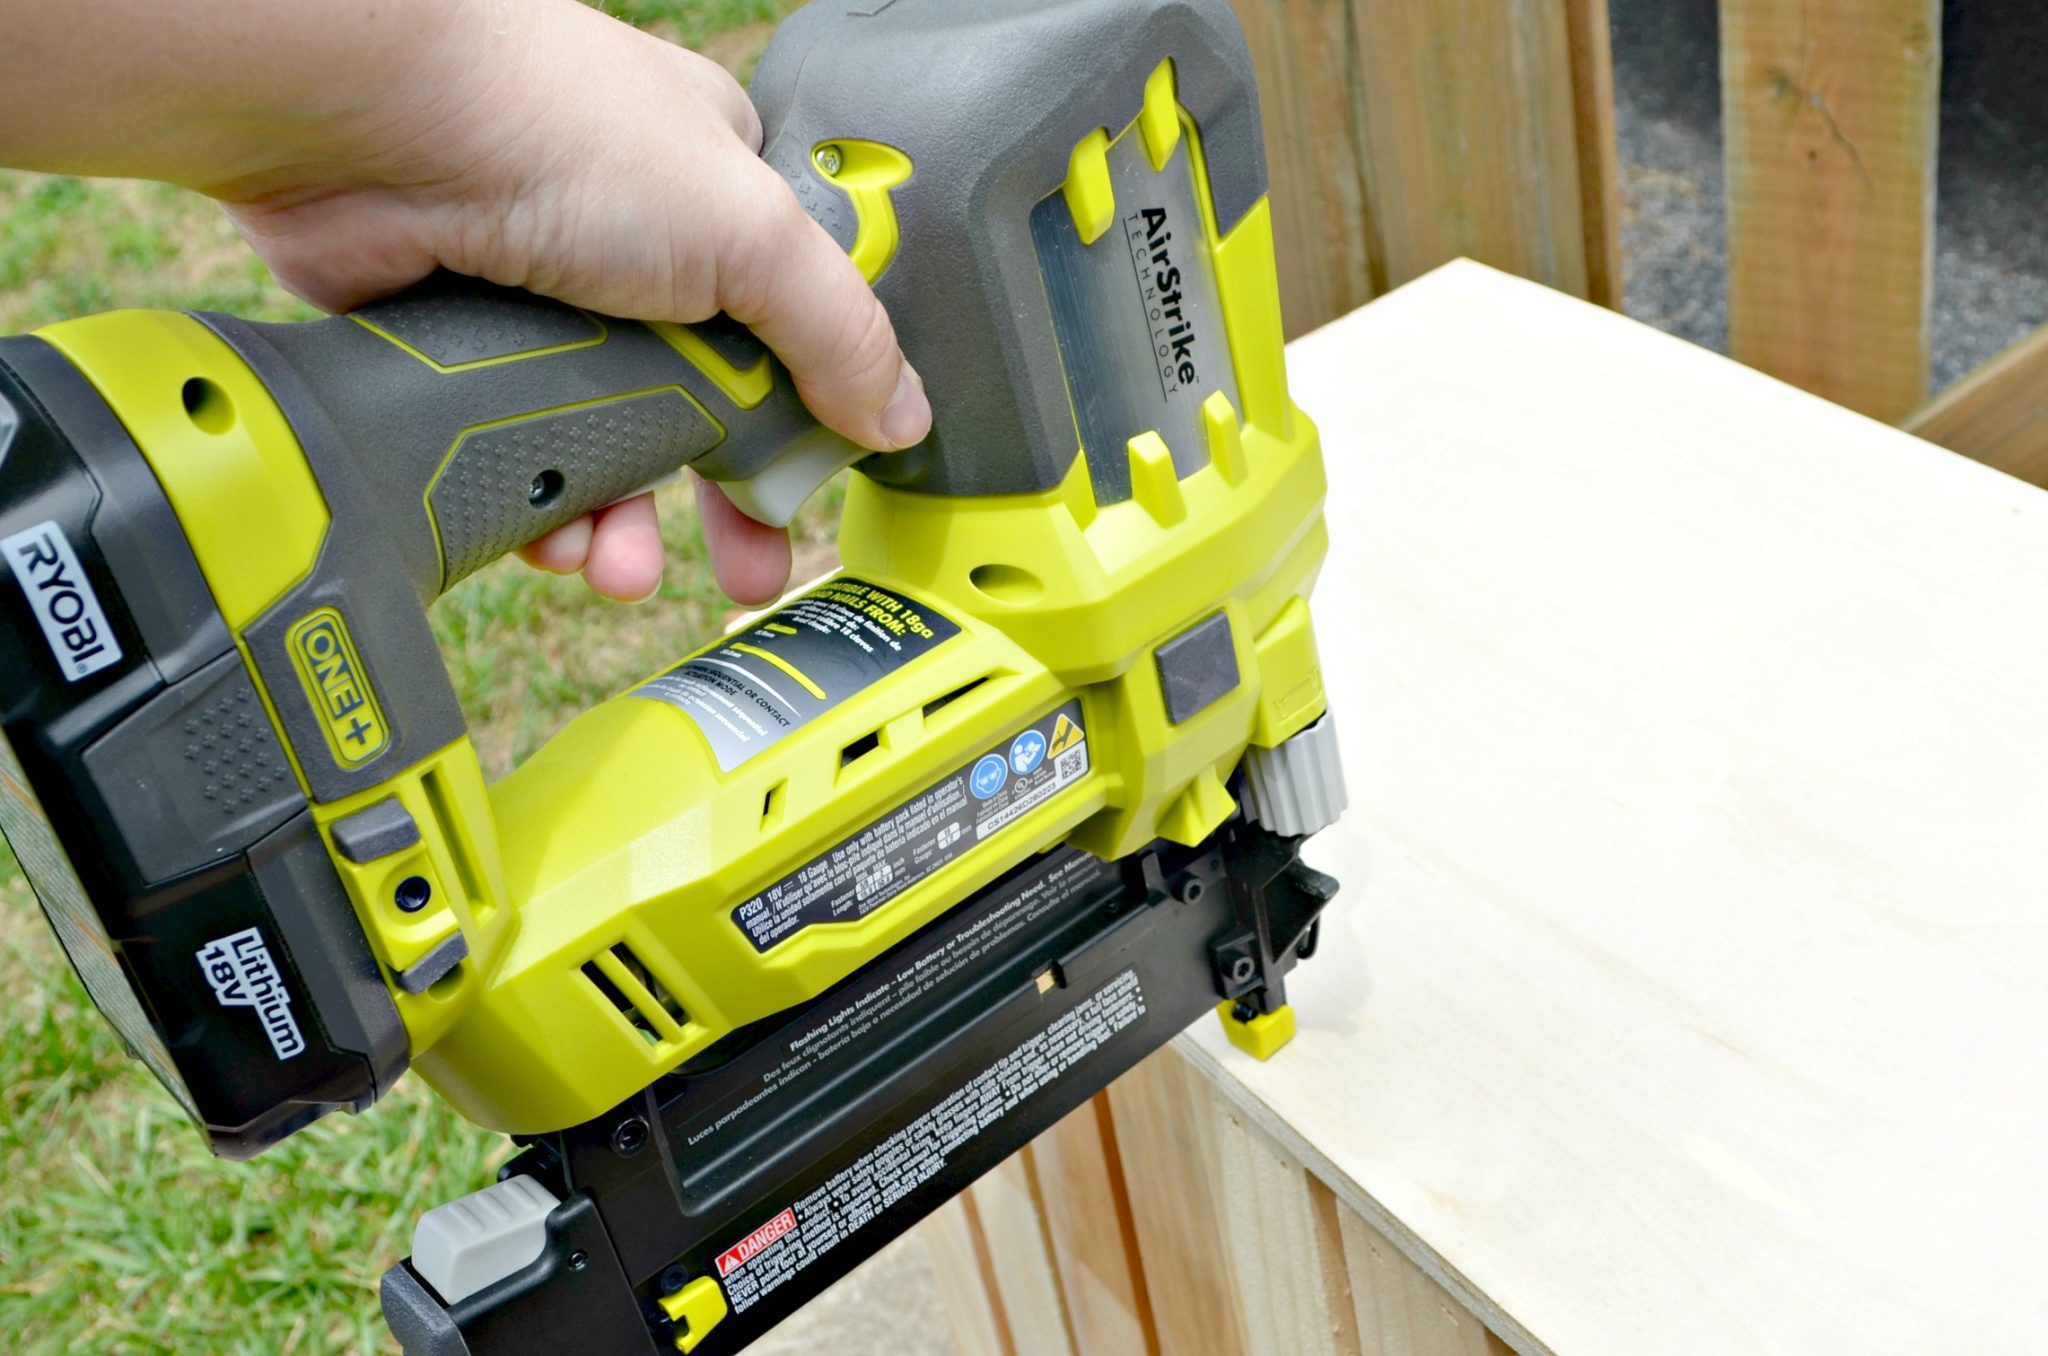
RYOBI ONE+ 18V AirStrike Brad Nailer
RYOBI JigSaw
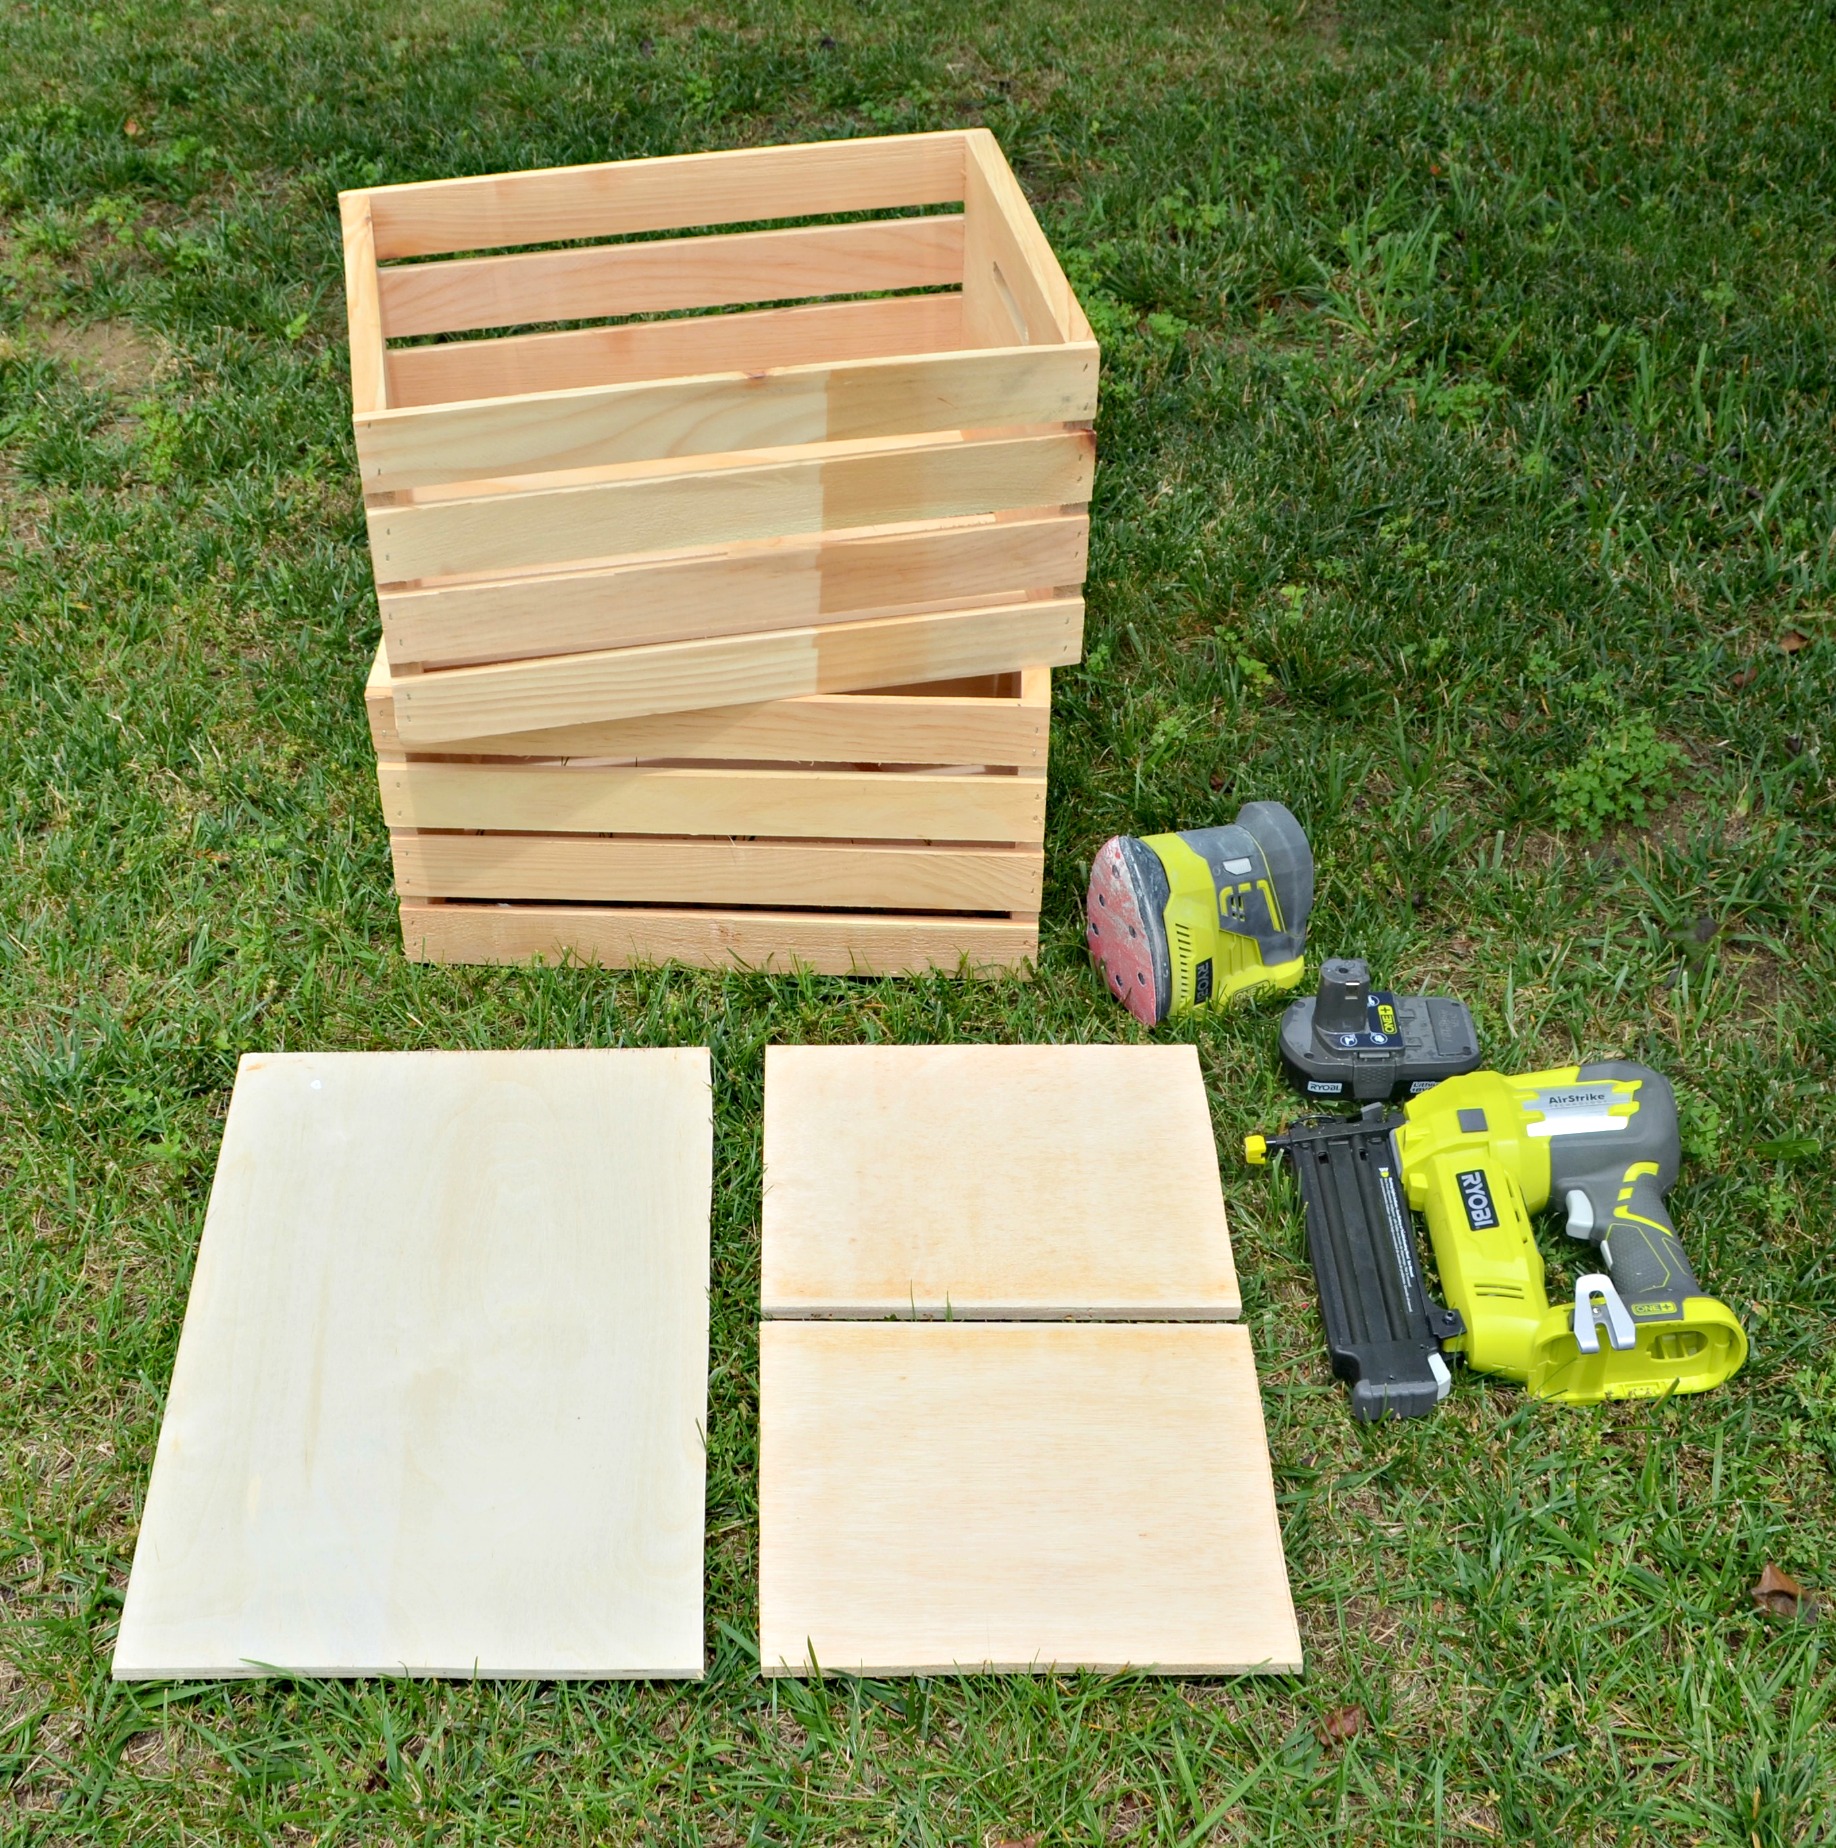
Preparing your wood
First, measure and cut your plywood.
For the top of the table, you’ll need a piece that is roughly 12.75″ x 19.5.”
Each of the two shelves should measure approximately 11.75″ x 9.25.”
If you’re new to DIY projects like this one and don’t have the tools or confidence to cut it yourself, you can get it cut in your local Home Depot store.
Next, sand all wooden surfaces.
You can do this by hand, of course, but I love to use the RYOBI ONE+ 18V Corner Cat Sander. It’s cordless, light, and easy to use on any kind of project.

Assembling your table
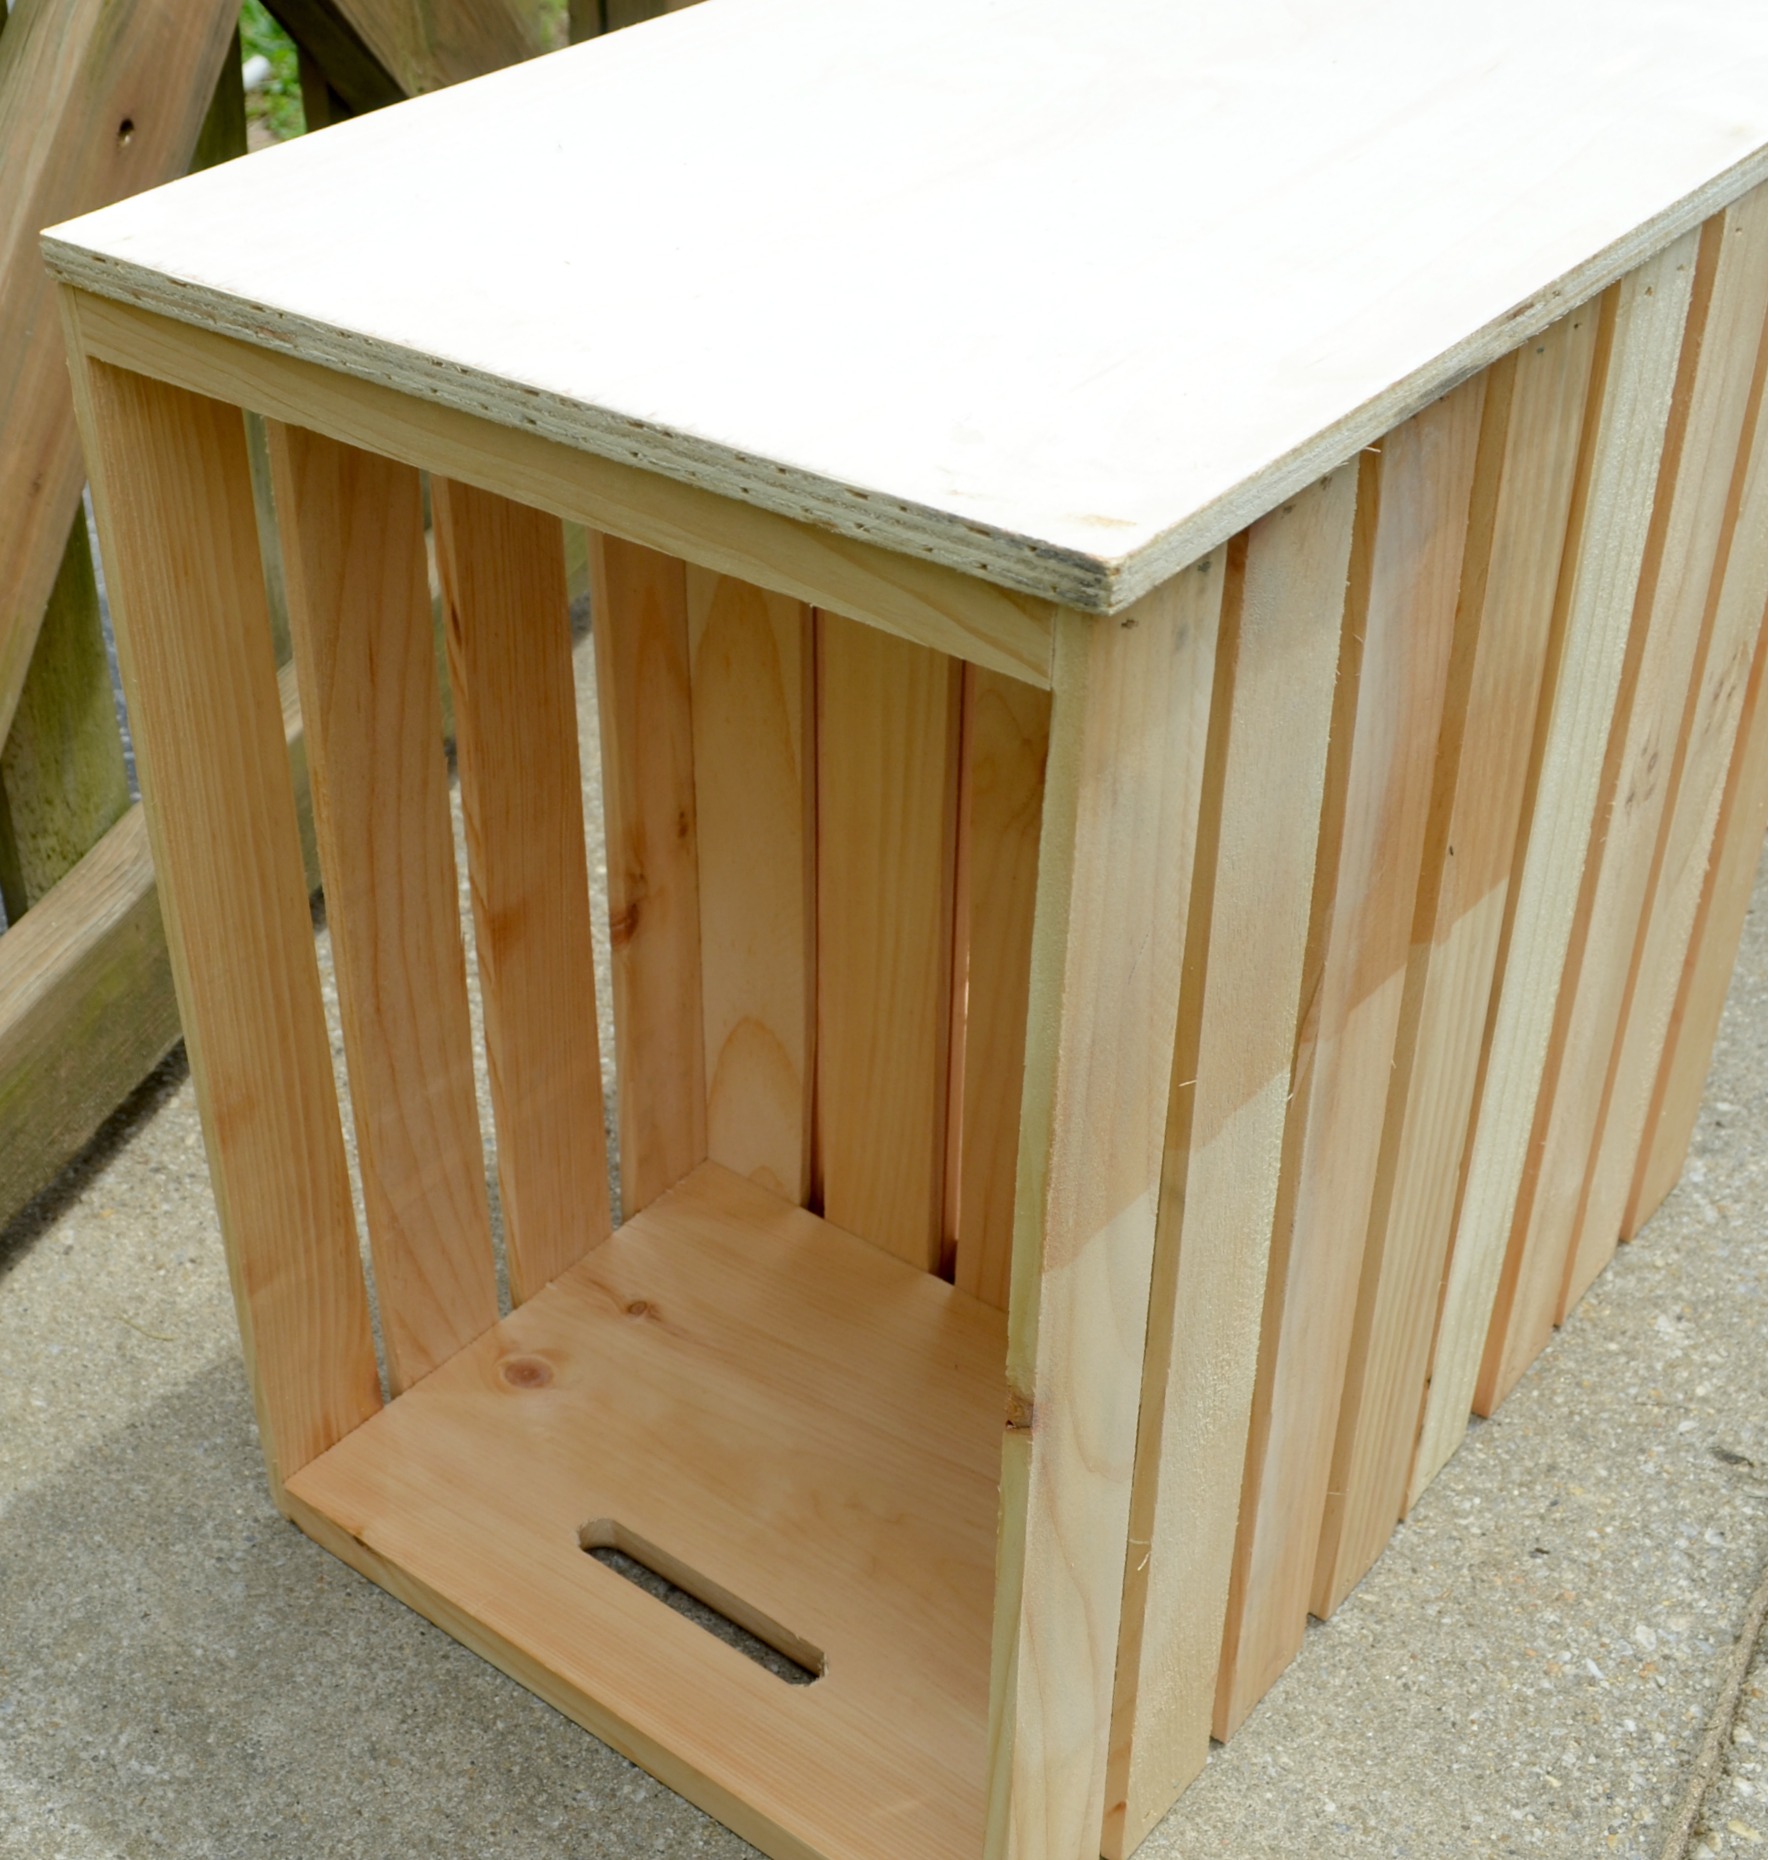
Start by standing your crates up vertically and placing them back to back with the open sides facing out. Then, nail them together.
Make sure you sit your crates on a flat surface for this step. I used my AirStrike Brad Nailer for this, but you can also use a traditional hammer and nails.
Next, place your large piece of plywood on top and nail it in place.
You should have just the slightest bit of overhang on all four sides. Once again, I used my AirStrike, which is quick and convenient.
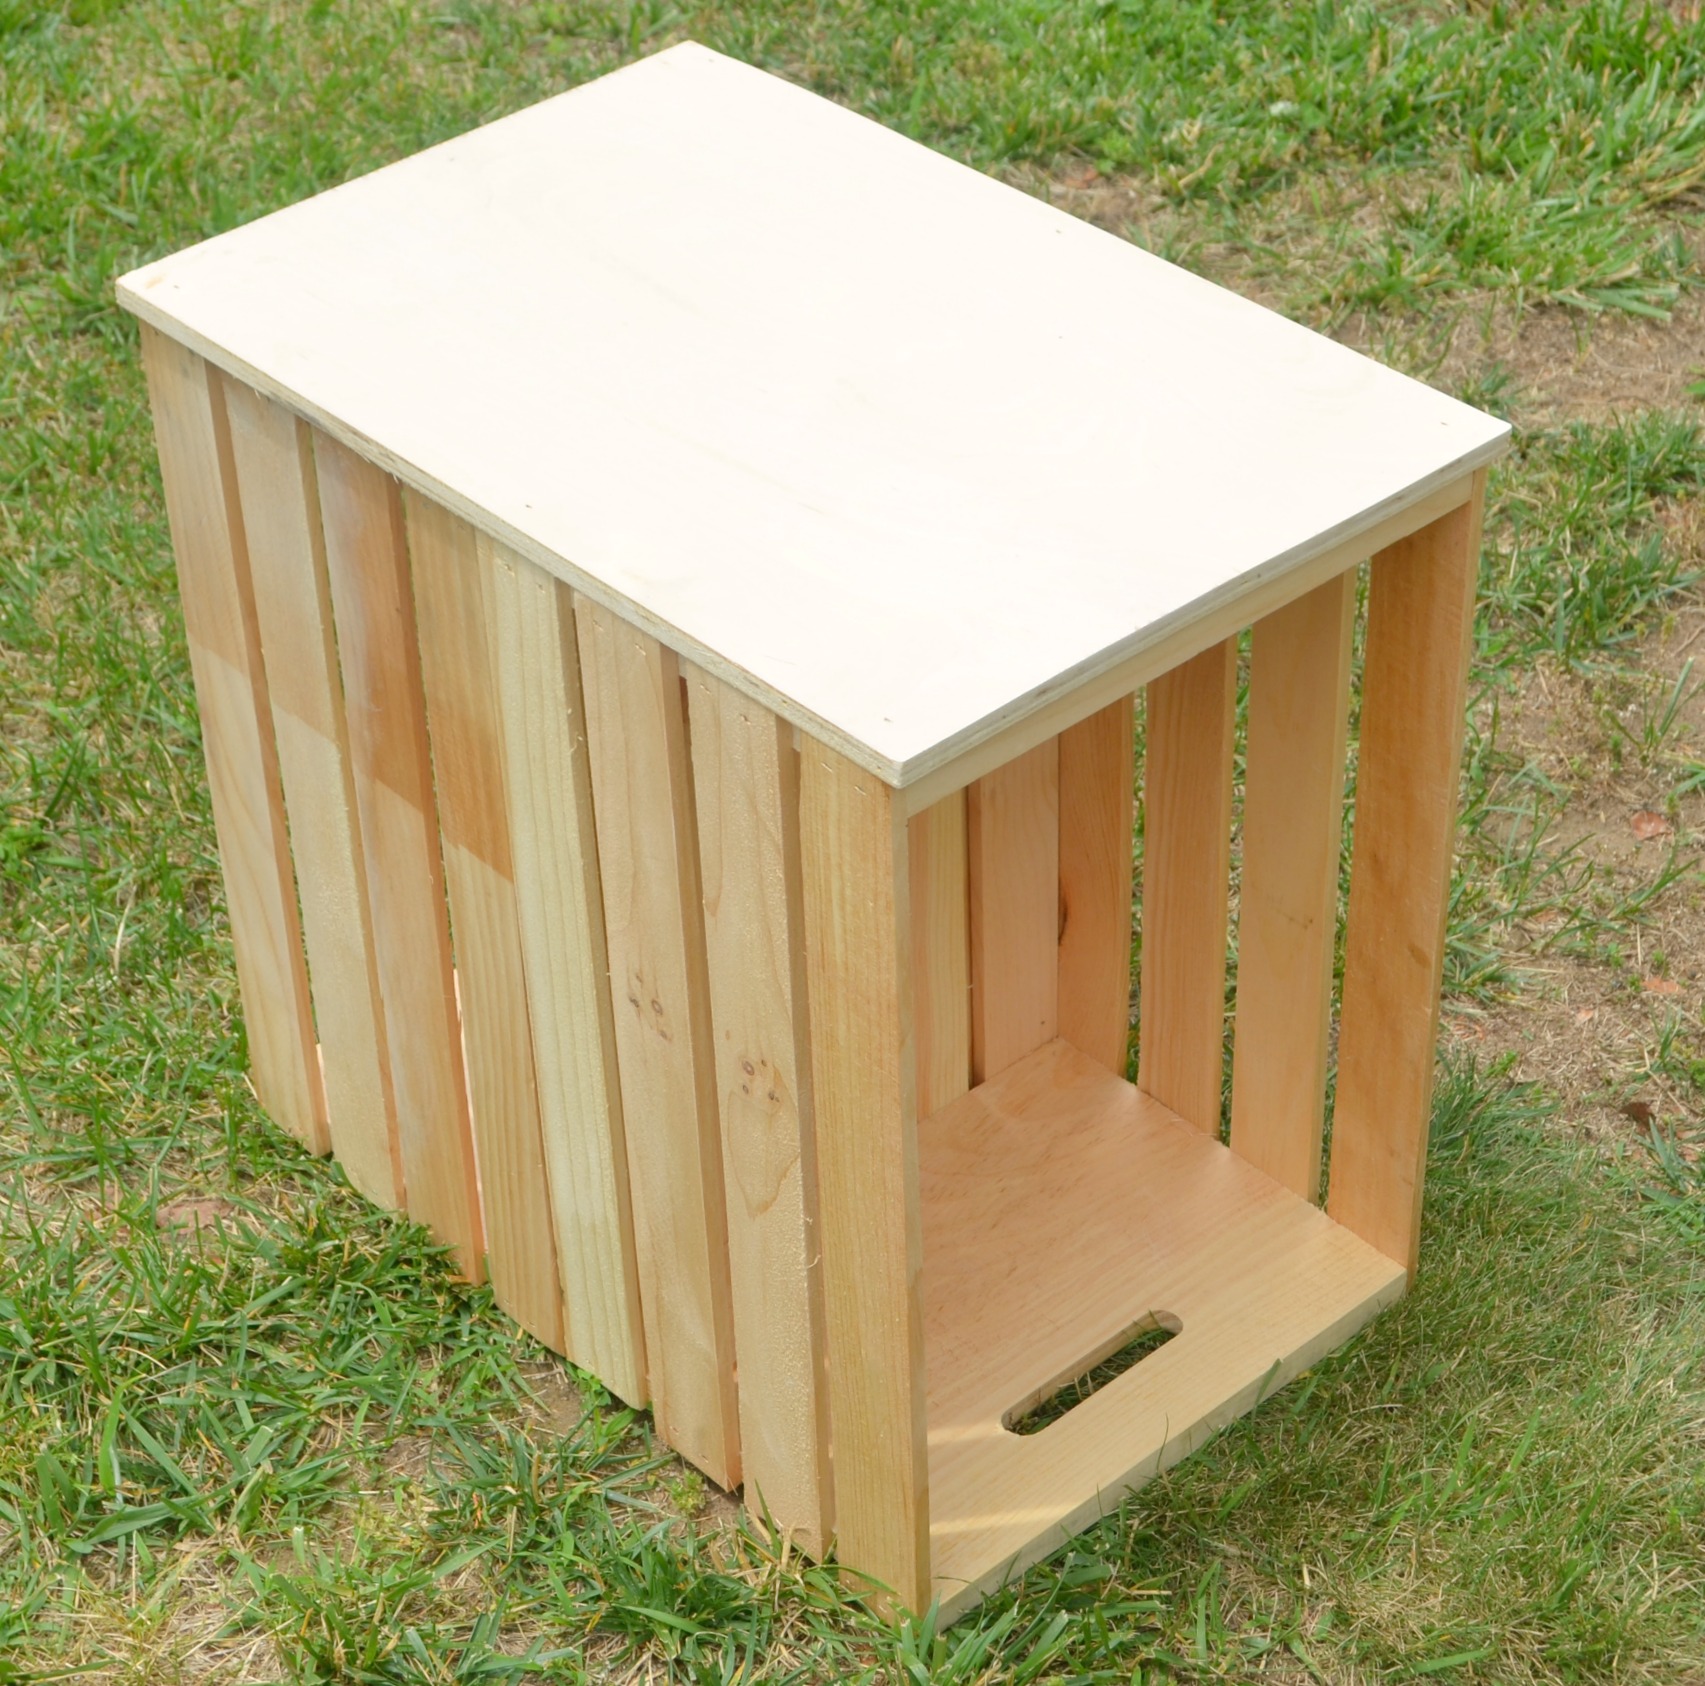
This is how the table will look when the base and top are assembled. If you like, you can keep it this way for storing large or tall items, like a bag of charcoal. Or, if you prefer to have a closed in table, just face the crates the other way so that the open parts are facing the inside.

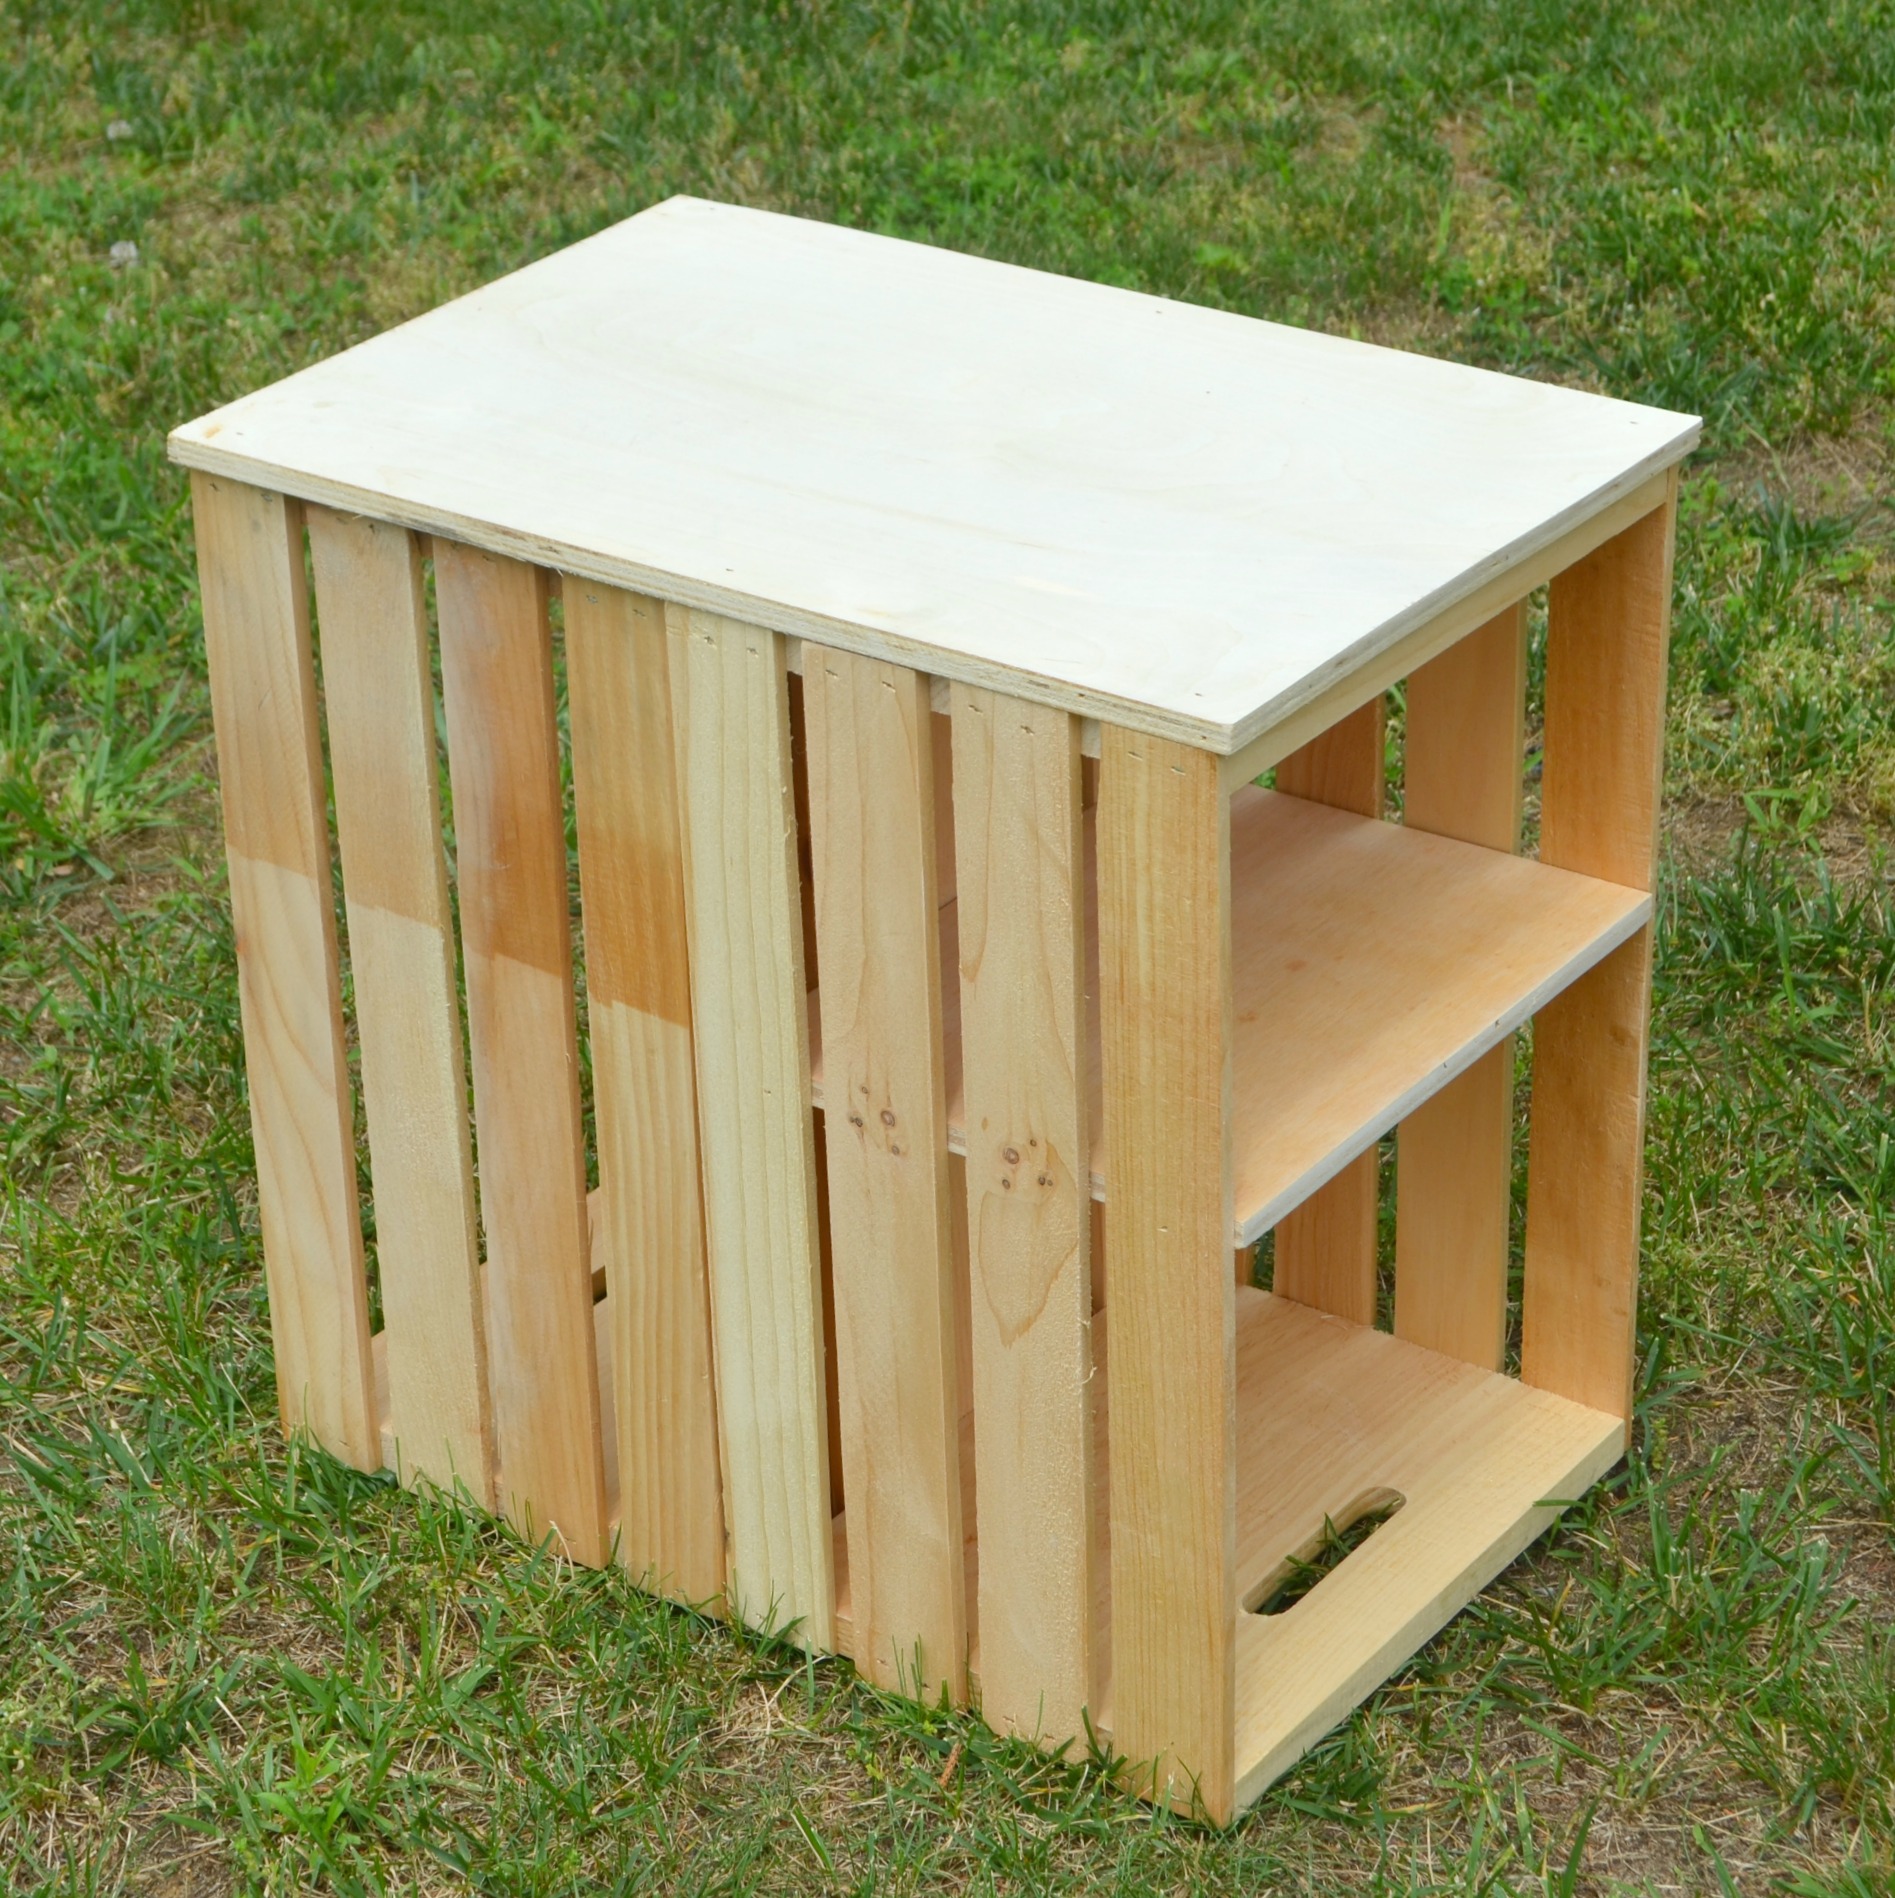
Finally, place your shelves wherever you’d like them to go and nail them in place from the sides.
I placed mine about 8″ from the top of the table, but you can put them as high or low as you like depending on how you plan to use them. You can also vary the height of the shelf on each side or add additional shelves…it’s totally up to you! That’s one of the best things about building your own furniture; you get to create it exactly the way you want it!

Once your shelves are in place, your table is ready to paint, stain, and/or seal!
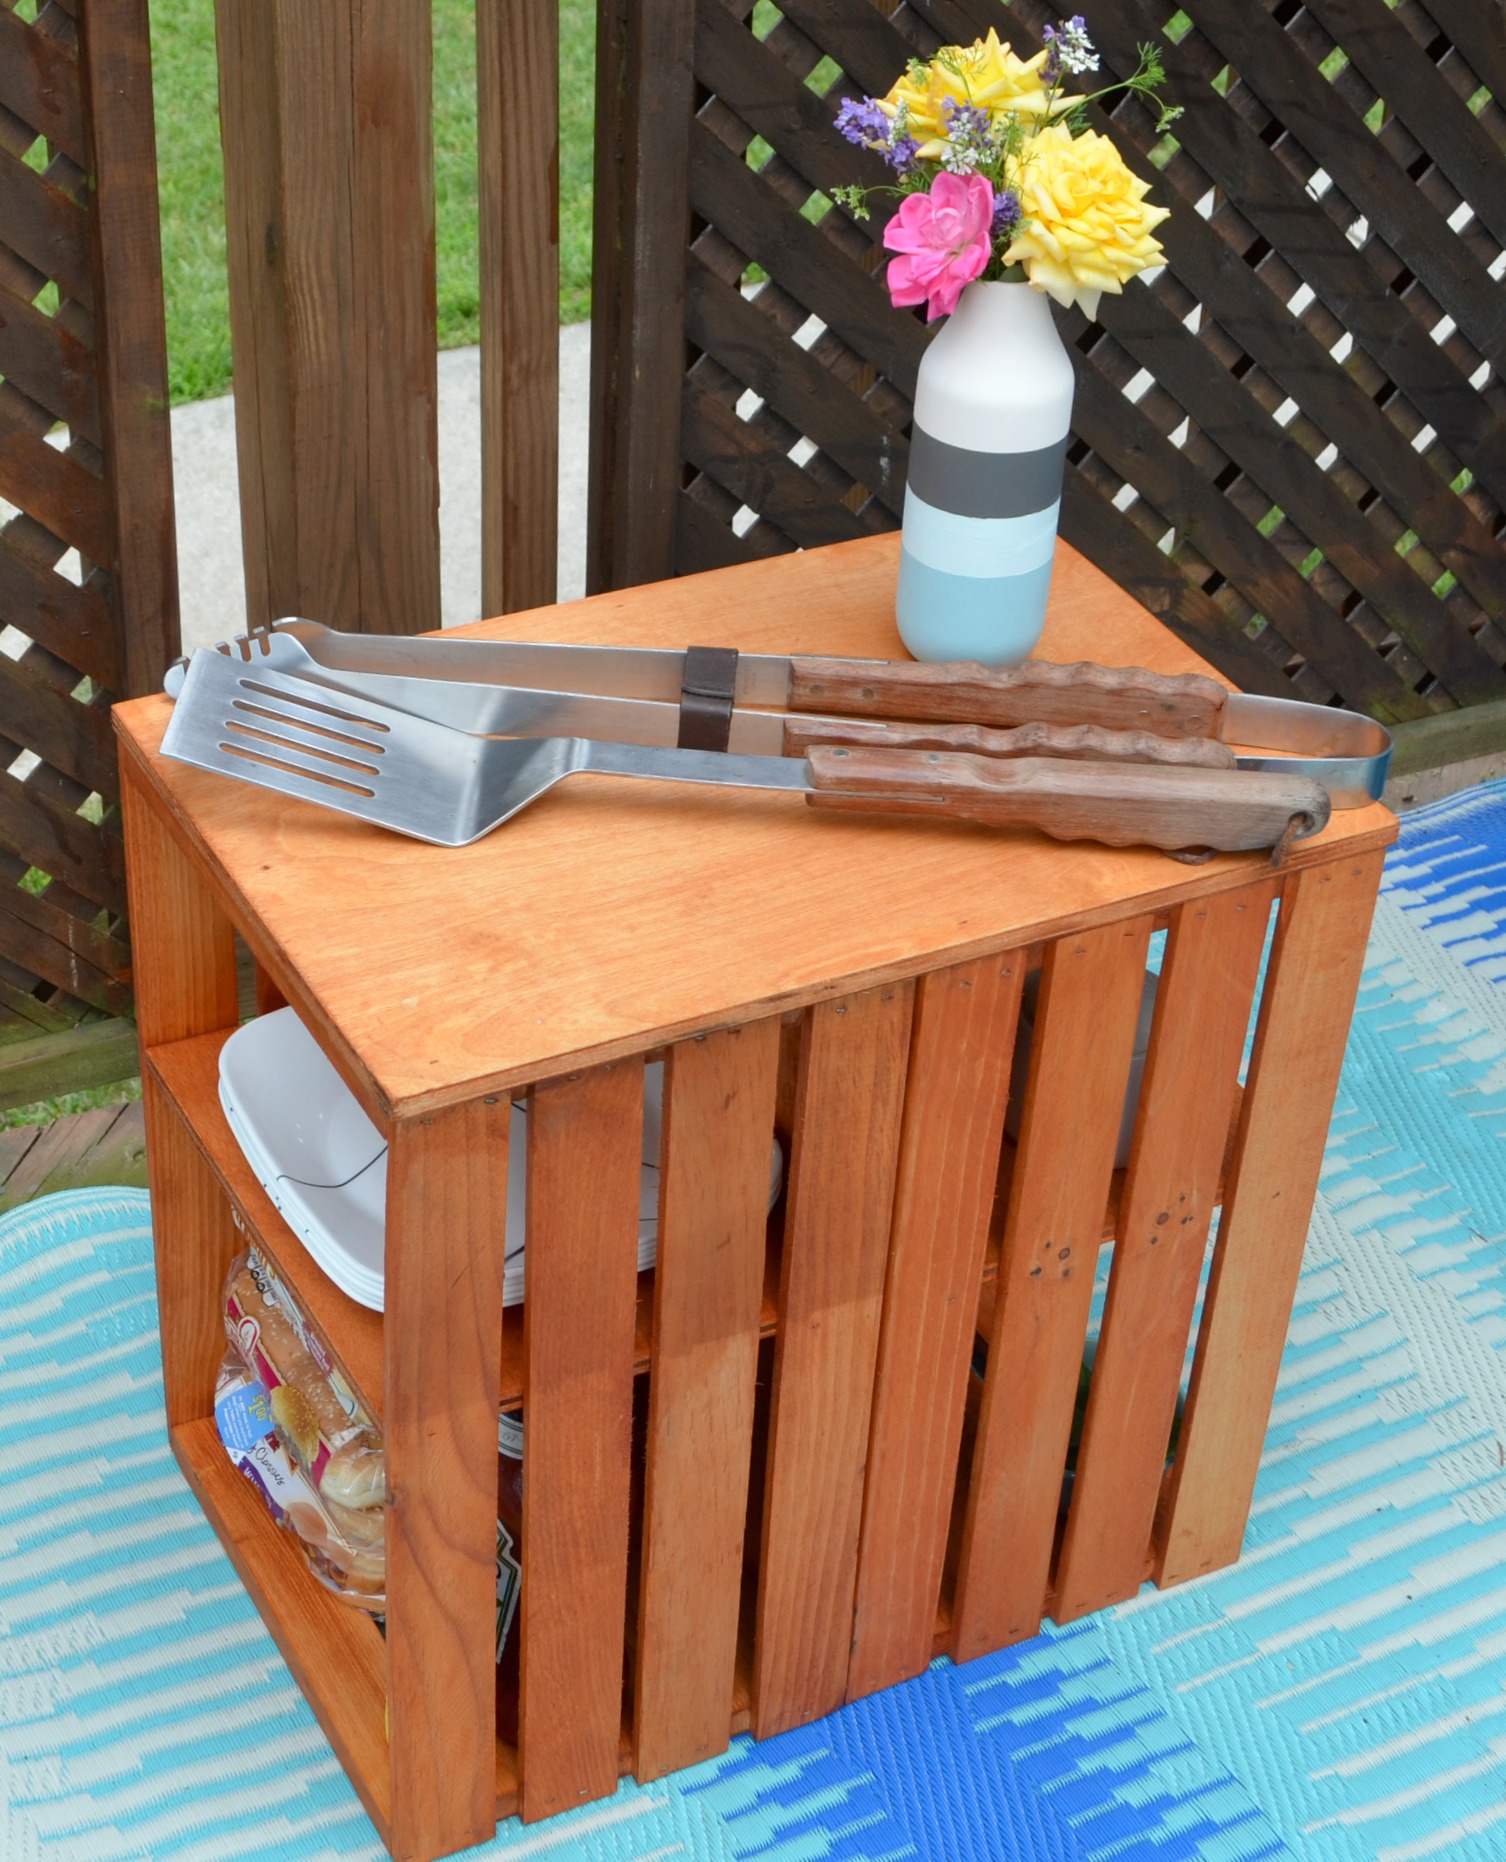
I sealed mine with Thompson’s® WaterSeal® Penetrating Timber Oil, which stains and waterproofs it at the same time. I’ll be sharing all about that process in part two of this post tomorrow! Once you’ve applied the stain or paint of your choice, your table is ready to use.
Using your table
Hubby likes to use ours as a prep station when he’s grilling dinner. The shelves are great for holding rolls, condiments, paper towels, and more, while the top is perfect for plates and grill tools.
Personally, I like using it for entertaining, like when my neighbor Lisa and I get together for some girl time on summer evenings while our kiddos play outside.

During Home Depot’s Summer Storage event July 7th – August 24th, the Crates and Pallet large crates I used for this project will be available as a special buy in ALL stores as well as online! Additionally, all multi-pack crate items on the Home Depot website will be on sale. Take advantage of the discount and grab your supplies so you can make a table too!
Plus, if you’re feeling lucky, enter to win a $50 Gift Card to Home Depot! The Rafflecopter widget below will walk you through the process; good luck!
For more Summer Storage inspiration featuring crates, check out these blogs!
- House of Wood
- That’s My Letter
- Sawdust 2 Stitches
- Damask Love
- At Home with Natalie


Love the cute Wooden crate shelf, Amy! Thanks for the opportunity to win the gift card. I would use it to get more plants to do some curb appeal in the front of the house. Can never have too many colorful flowers!
That is so cute!! I love using pallets to make stuff. I will have to keep an eye out for some crates!!
I would use it to add something to my front porch!
I would spend it on plants for my porch and deck 🙂
Such a cute idea and simple too! Love it! 😉
Thank you!!
I was just online for Home Depot today – actually this time, looking for clocks! So many things you can get at Home Depot!
i’m doing a lot of outdoor projects and one of them is redoing our fence 🙂
How fun!
I would use the gift card to buy pavers for our back yard. We have a soft hot tub (it was a gift) that I’ve been dying to get set up, but the pavers fall into the splurge category, so we haven’t done anything yet.
Adorable table. One day, I’ll get back to making stuff like this! <3
I can’t wait to make this! It’ll make me enjoy our deck just a little more
You definitely should! I want pics!
This table is seriously so cute!!!! We, for the first time ever, have a small deck….plans to make it a larger, more inviting deck…these are the kinds of ideas I need to make it homey! 🙂
Oh, I am so excited for you and your house!!!
I would put the money towards a sink for my laundry room.
Good plan!
I would use it to buy paint. I’m painting the bathroom when the kids go back to school
We would use it on paint.. we have lots of rooms to paint.
My husband would love a new drill!
I need to organize my craft room, so I would buy storage. By the way, I love your table!
I would use the gift card to help build my milkweed garden Im trying to start. I want to help save the Monarch Butterflies and I also want to try to plant a bee garden to also help save and bring back the bees we need so badly. Thank you for this opportunity to win. Love the crates and pallets!!!
What a great plan!
i would spend it on paints
Great choice!
I would buy some flooring for my new home. I would add it to our home renovations fund!
New floors make a HUGE difference, don’t they!?
I would pick up some paint for our kitchen refresh.
That is a hard decision, probably spend it on organizing stuff, baskets and tubs. OR maybe some paint to get creative…
I hear ya…I don’t know what I would choose either!
I would give it to my son who does so much for me all the time. It would be great to be able to give it to him. Thanks for a chance to win.
I love the great ideas for using crates to creating useful items to use around the home. I could really use the gift card because we are sprucing our house up to put on the market and plan to purchase a condo to redo as our retirement. Please choose me!
Oh, good luck, Suzy!
I WOULD LIKE TO GET A Easy Wring Spin Mop 🙂
Oh, those things are fabulous! I have one and LC loves using it.
Oh I would love to use it to buy materials to make an outside dry erase board to hang on our fence! I heard they have dry erase paint….and think the kids would have so much fun drawing on a board hanging on the fence in the backyard!
I would buy wood to create some window boxes.
I would use it towards the purchase of a new lawnmower
Love it!! I need to build one for myself!
I would purchase gardening supplies.
I would buy flowers for my garden.
How cute! I would use HD gift card for mulch, or maybe something more fun. Hmmm.
Work on my workshop!!
I will spend the $50 on a new blower. Mine stopped working a few months ago and I definitely need a new one for fall leaves.
I would spend it on updating something in the condo I just bough.
We to put insulation in our attic, so anything would go to that first instead of anything fun!
Buy supplies to fix the bathroom.. 🙂 thank you!
I would get some hardware for our drawers and cabinets.
I would definitely get paint supplies!
I would use it on some gardening supplies
I would get paint for our family room.
I would buy some tools.
Just saw this….Its a great idea for outside table. Have one crate going to buy rest of materials….