
Kitchen Makeover: Table and Chair Redo
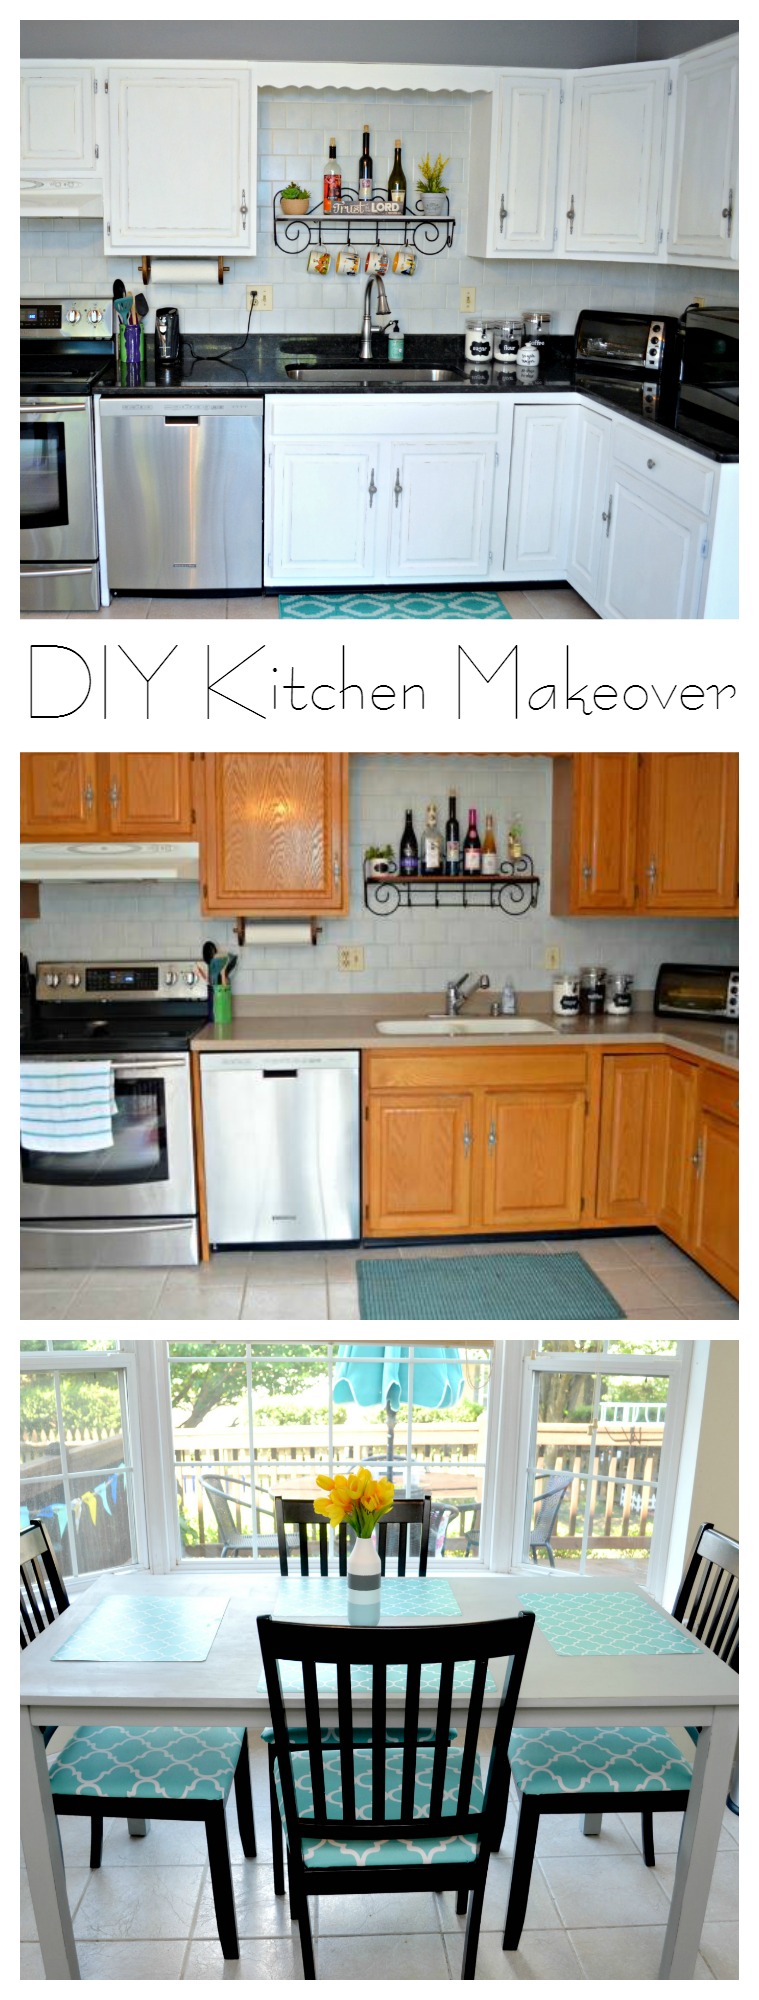
Friends, if you’ve been following along for awhile, you know that I typically enjoy projects that are quick, inexpensive, and easy. I’m a little on the impatient side, so I like things I can do in an afternoon or less, but every now and then I tackle something bigger. This summer, redoing our kitchen was at the top of my priority list and even though it’s been a lot of time and effort, I’m so pleased with the outcome!
Earlier this week, I shared about the first piece of the project: painting the cabinets. Once they were finished, the next step was a makeover for the kitchen table and chairs. Here’s how I did it…
Reupholstering the Chairs
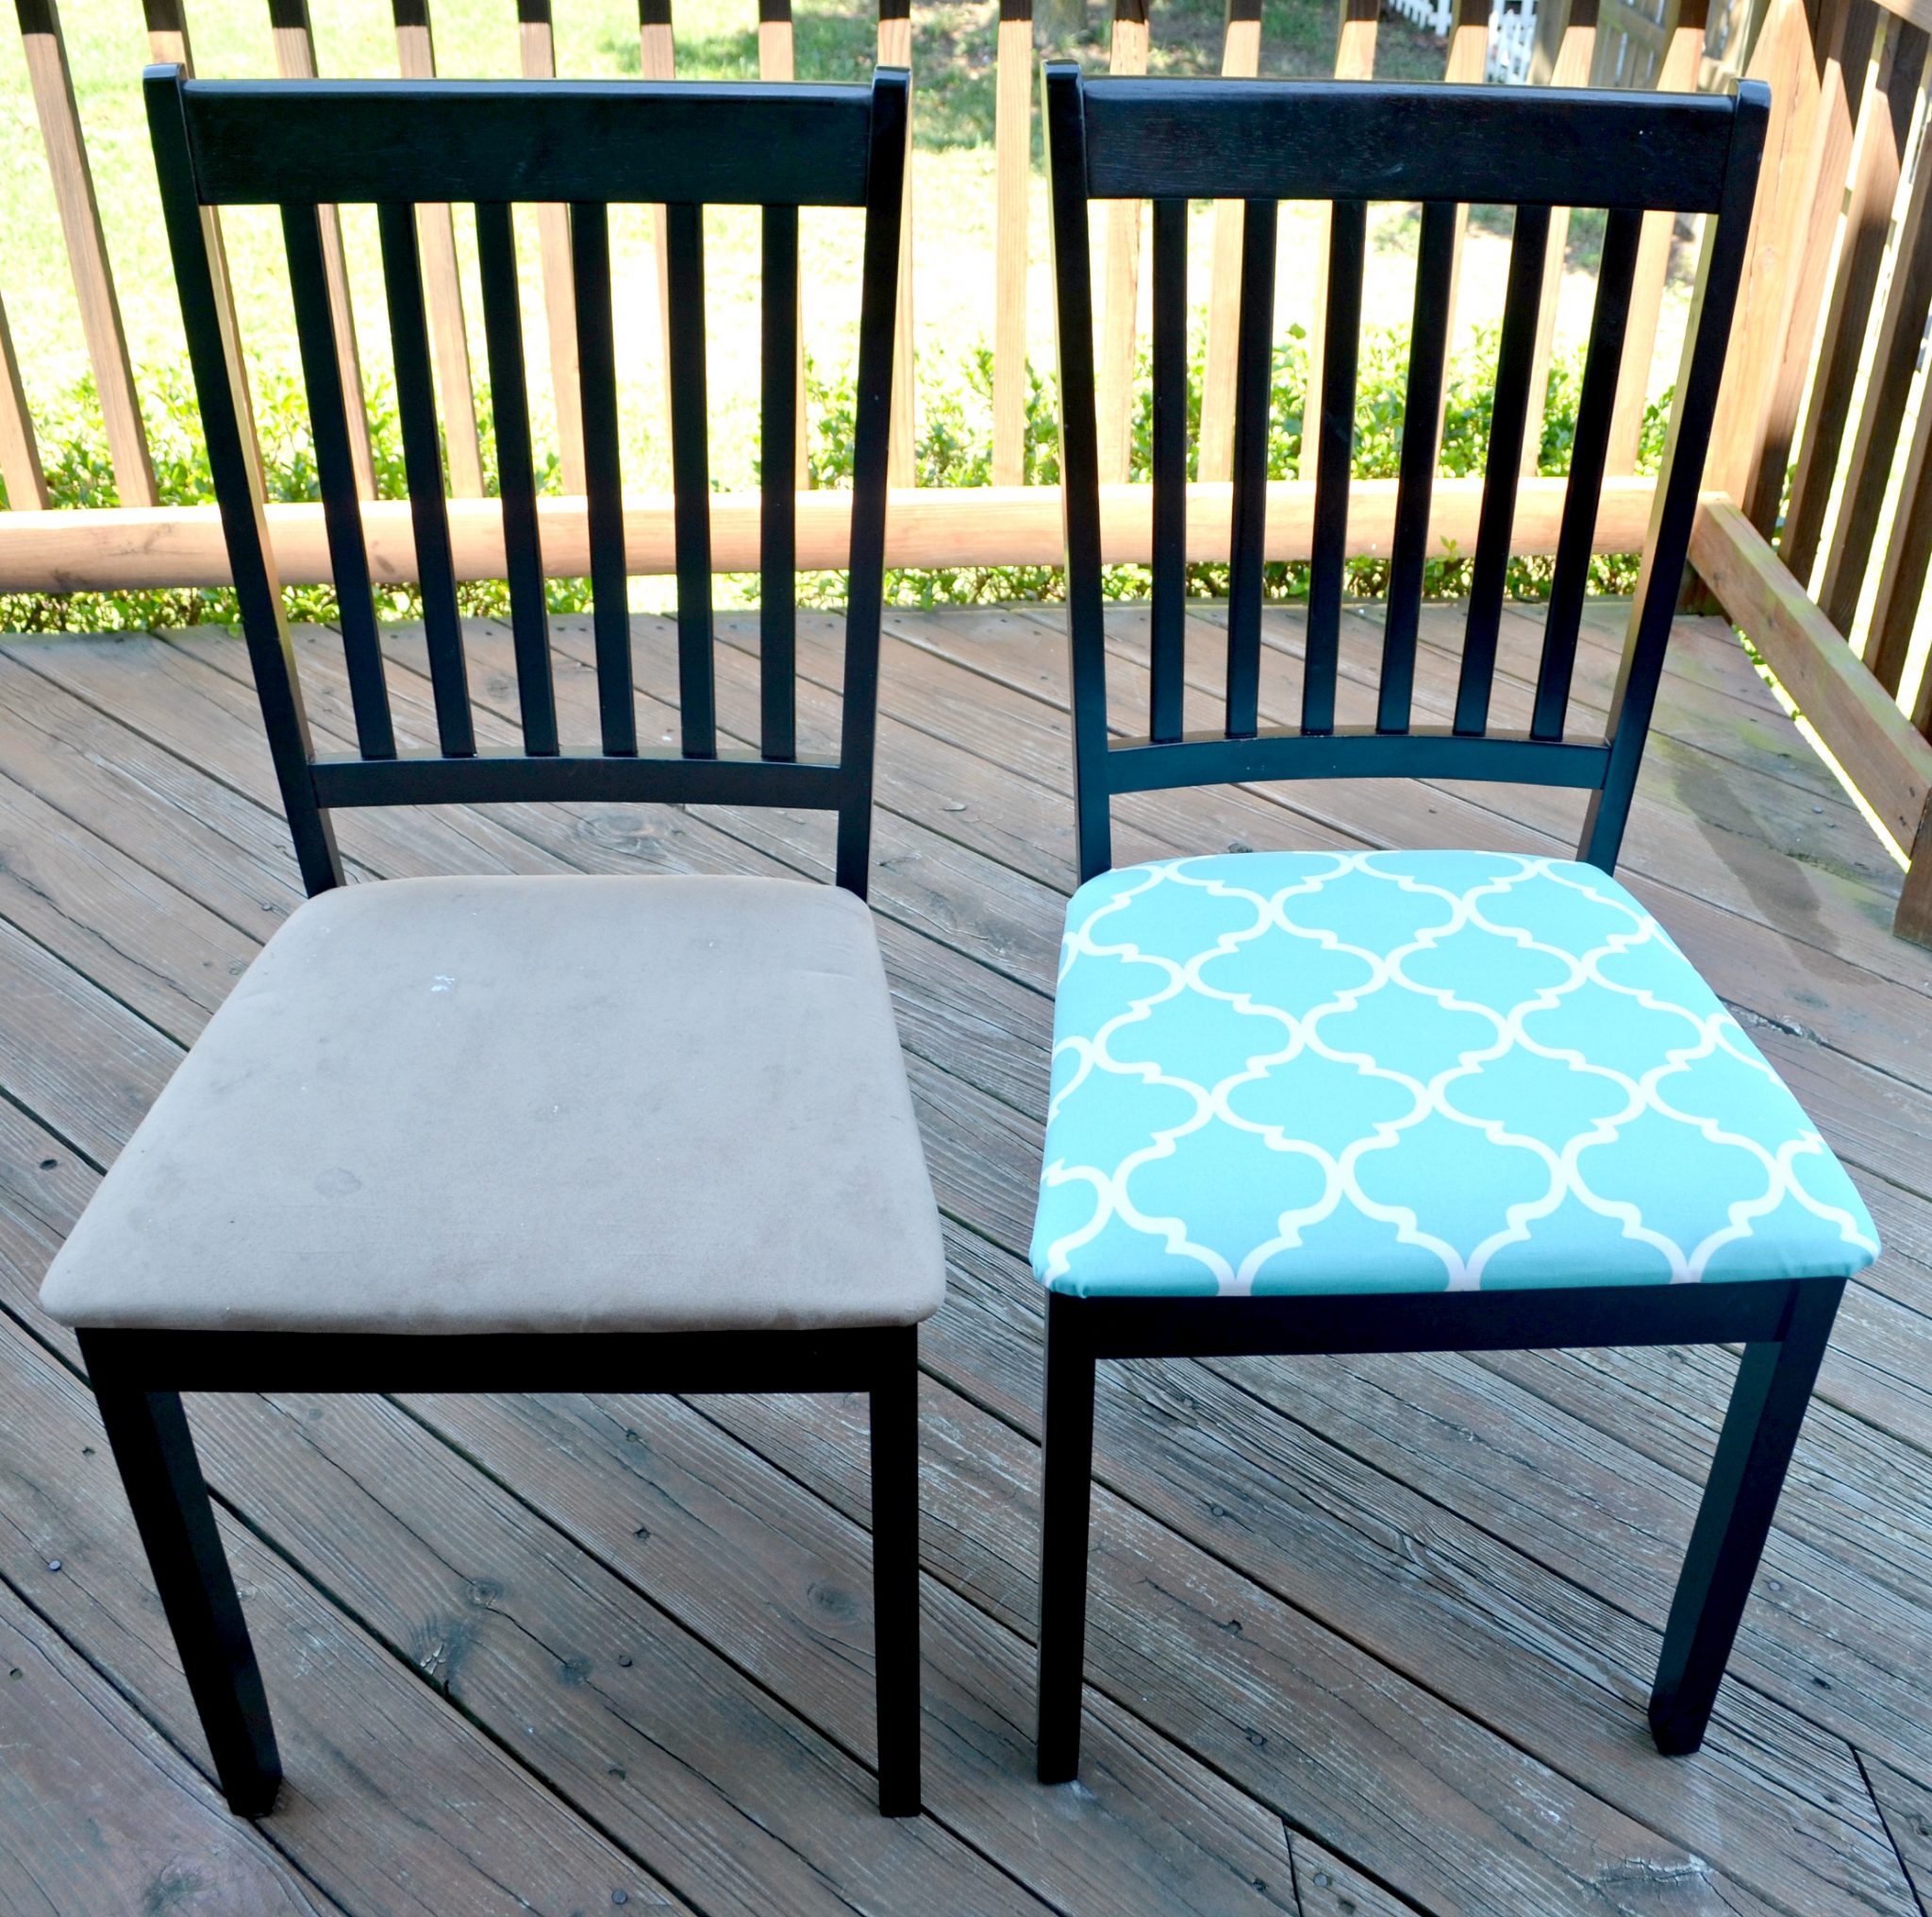
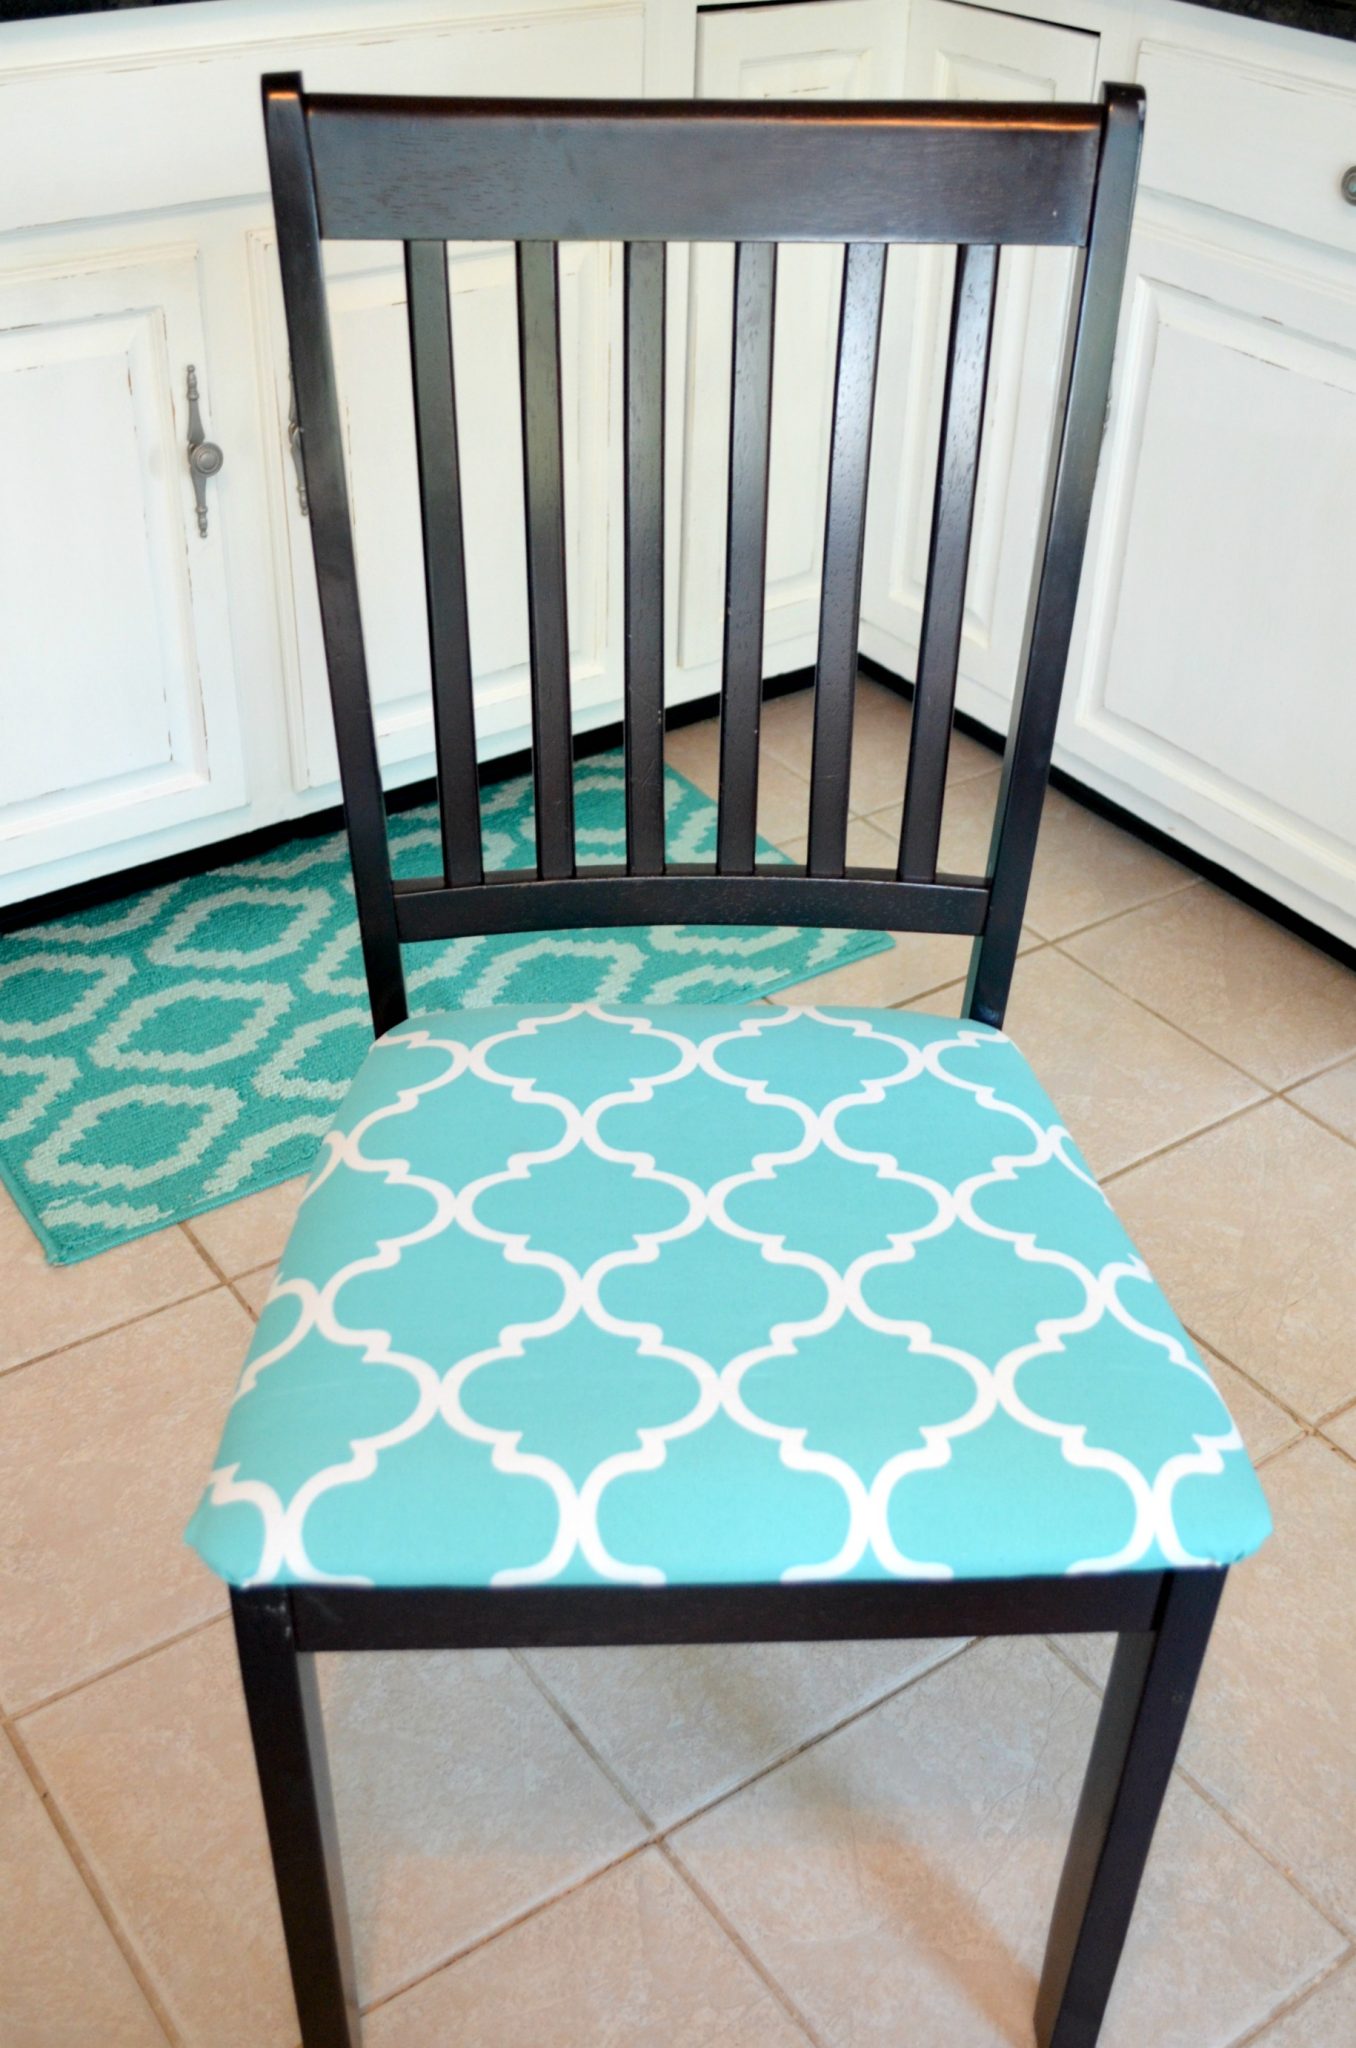
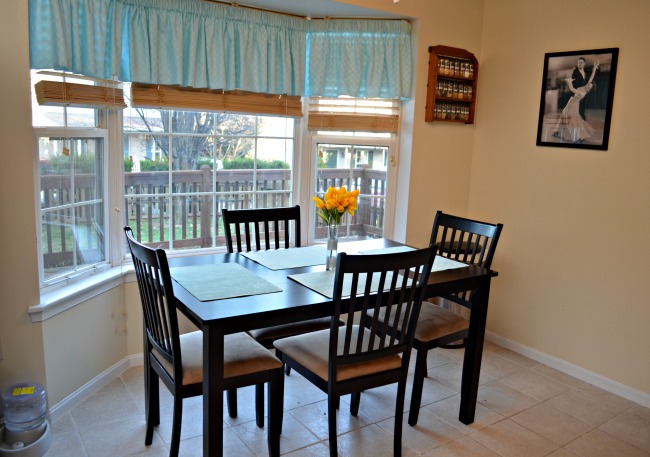
This set is only about a year old, but the chairs really looked awful. Not only were the seats a light brown that didn’t match the decor of the overall kitchen makeover, they had stains and marks all over them. The microsuede fabric on the seats seemed like a good idea at the time when I picked the set, but they were actually a terrible choice for a family with a seven year old and a cat. They were difficult to clean and just about anything that dropped on them made a stain. The chair frames were still in good condition, though, and the color mimics the dark color of our counter tops, so I wanted to keep them as is. I had never tried reupholstering anything before, so I wasn’t sure how it would turn out, but it was actually incredibly easy to do.
Materials
1 1/2 yards outdoor fabric
Oly-Fun
Heavy duty staple gun and staples
Scissors
Screwdriver
Step 1: First, remove the seat from the chair frame.
For me, all that involved was loosening four screws.
Step 2: Next, cut a piece of fabric that’s large enough to wrap around the seat on all 4 sides with at least 2″ excess.
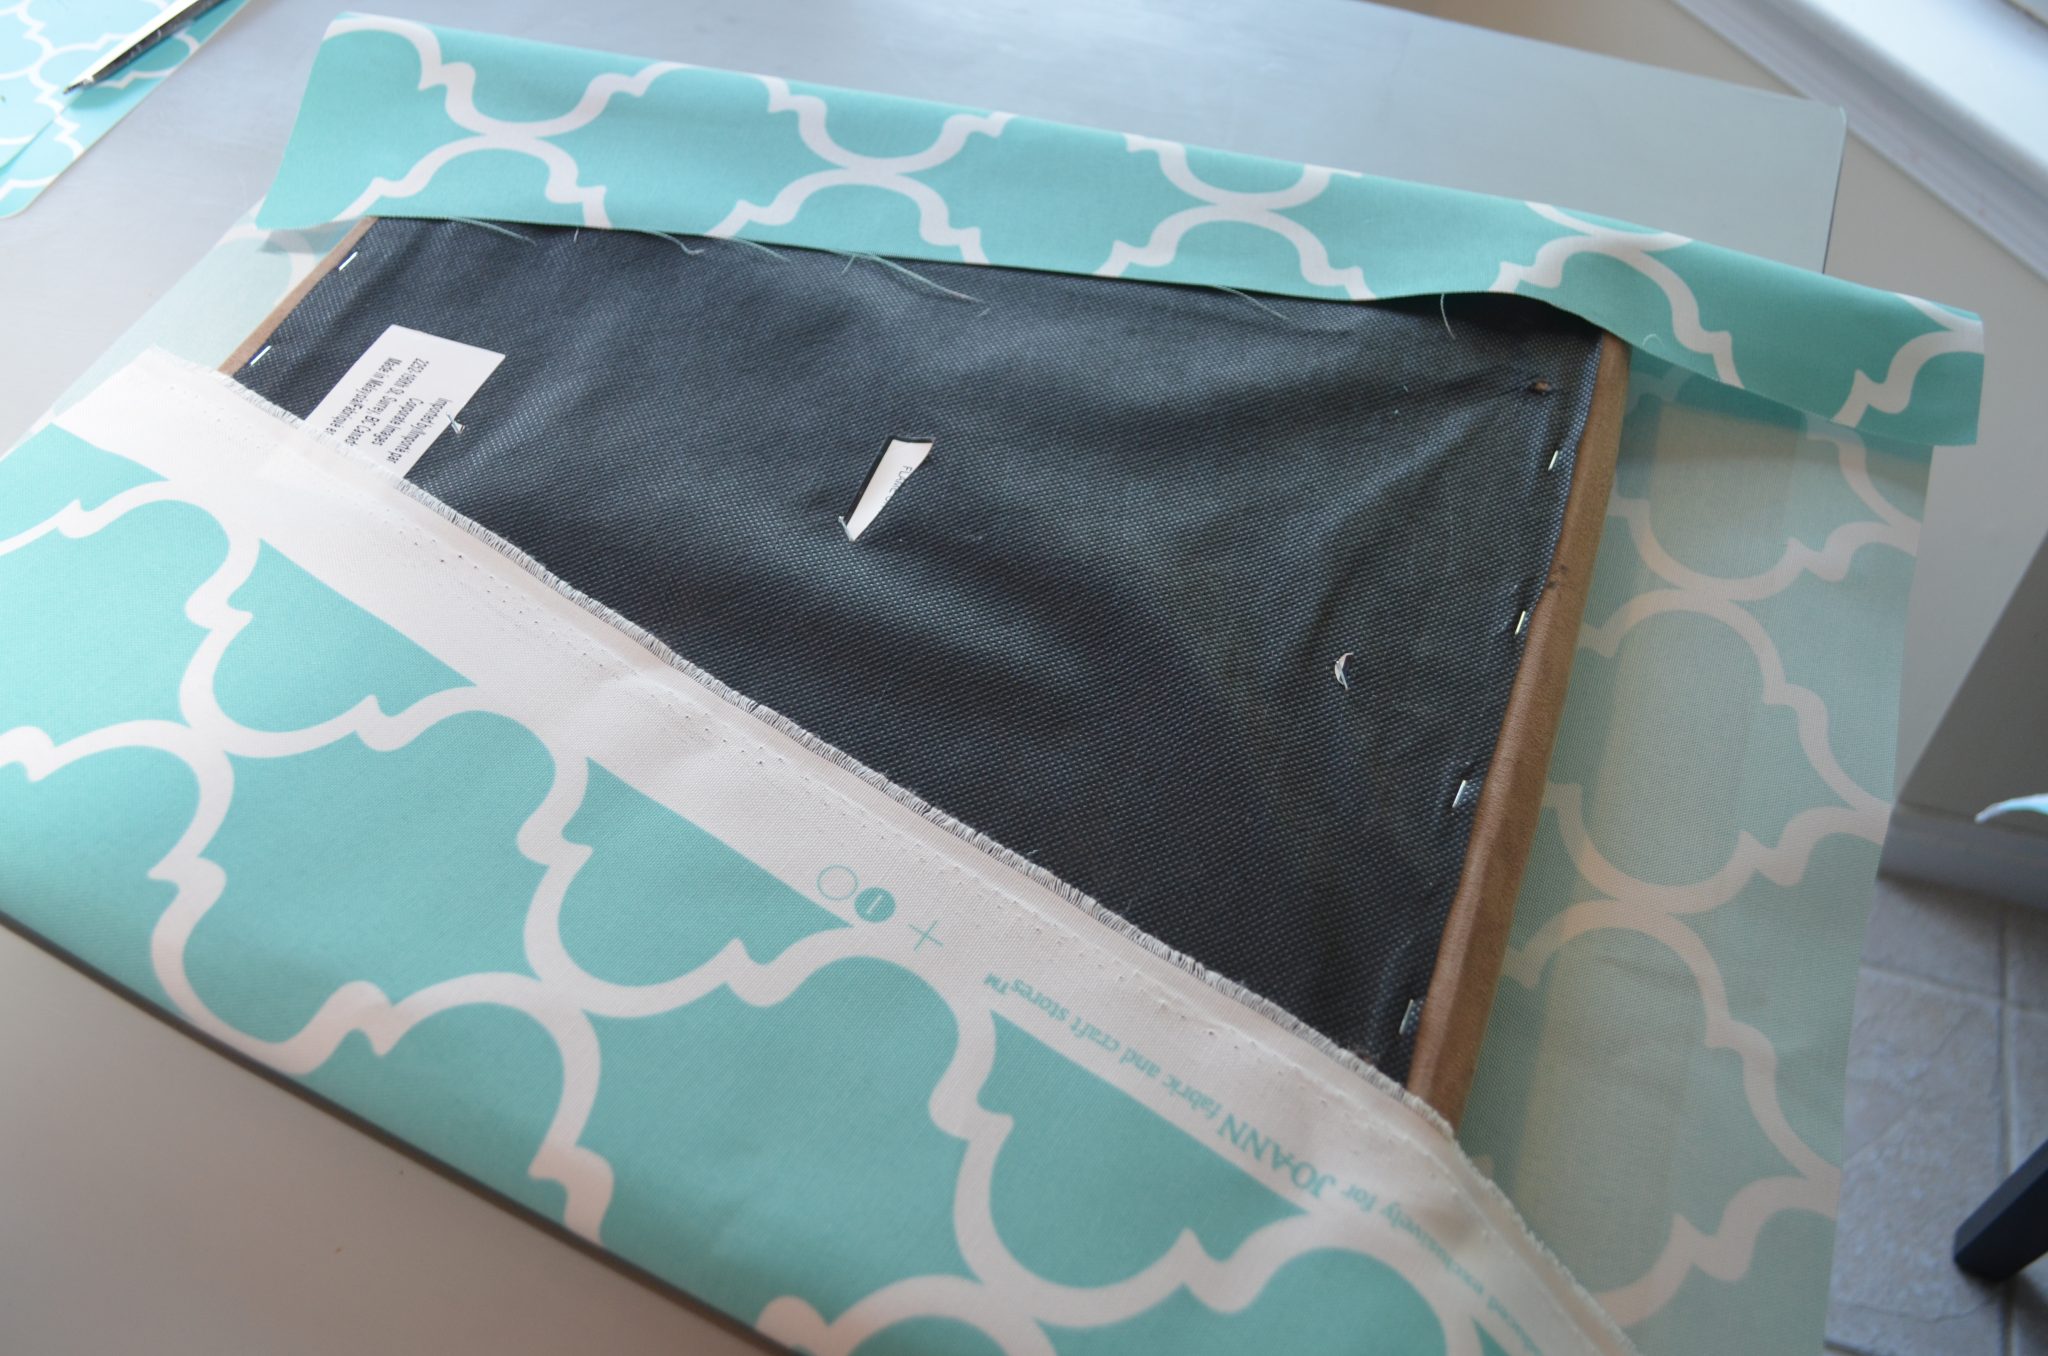
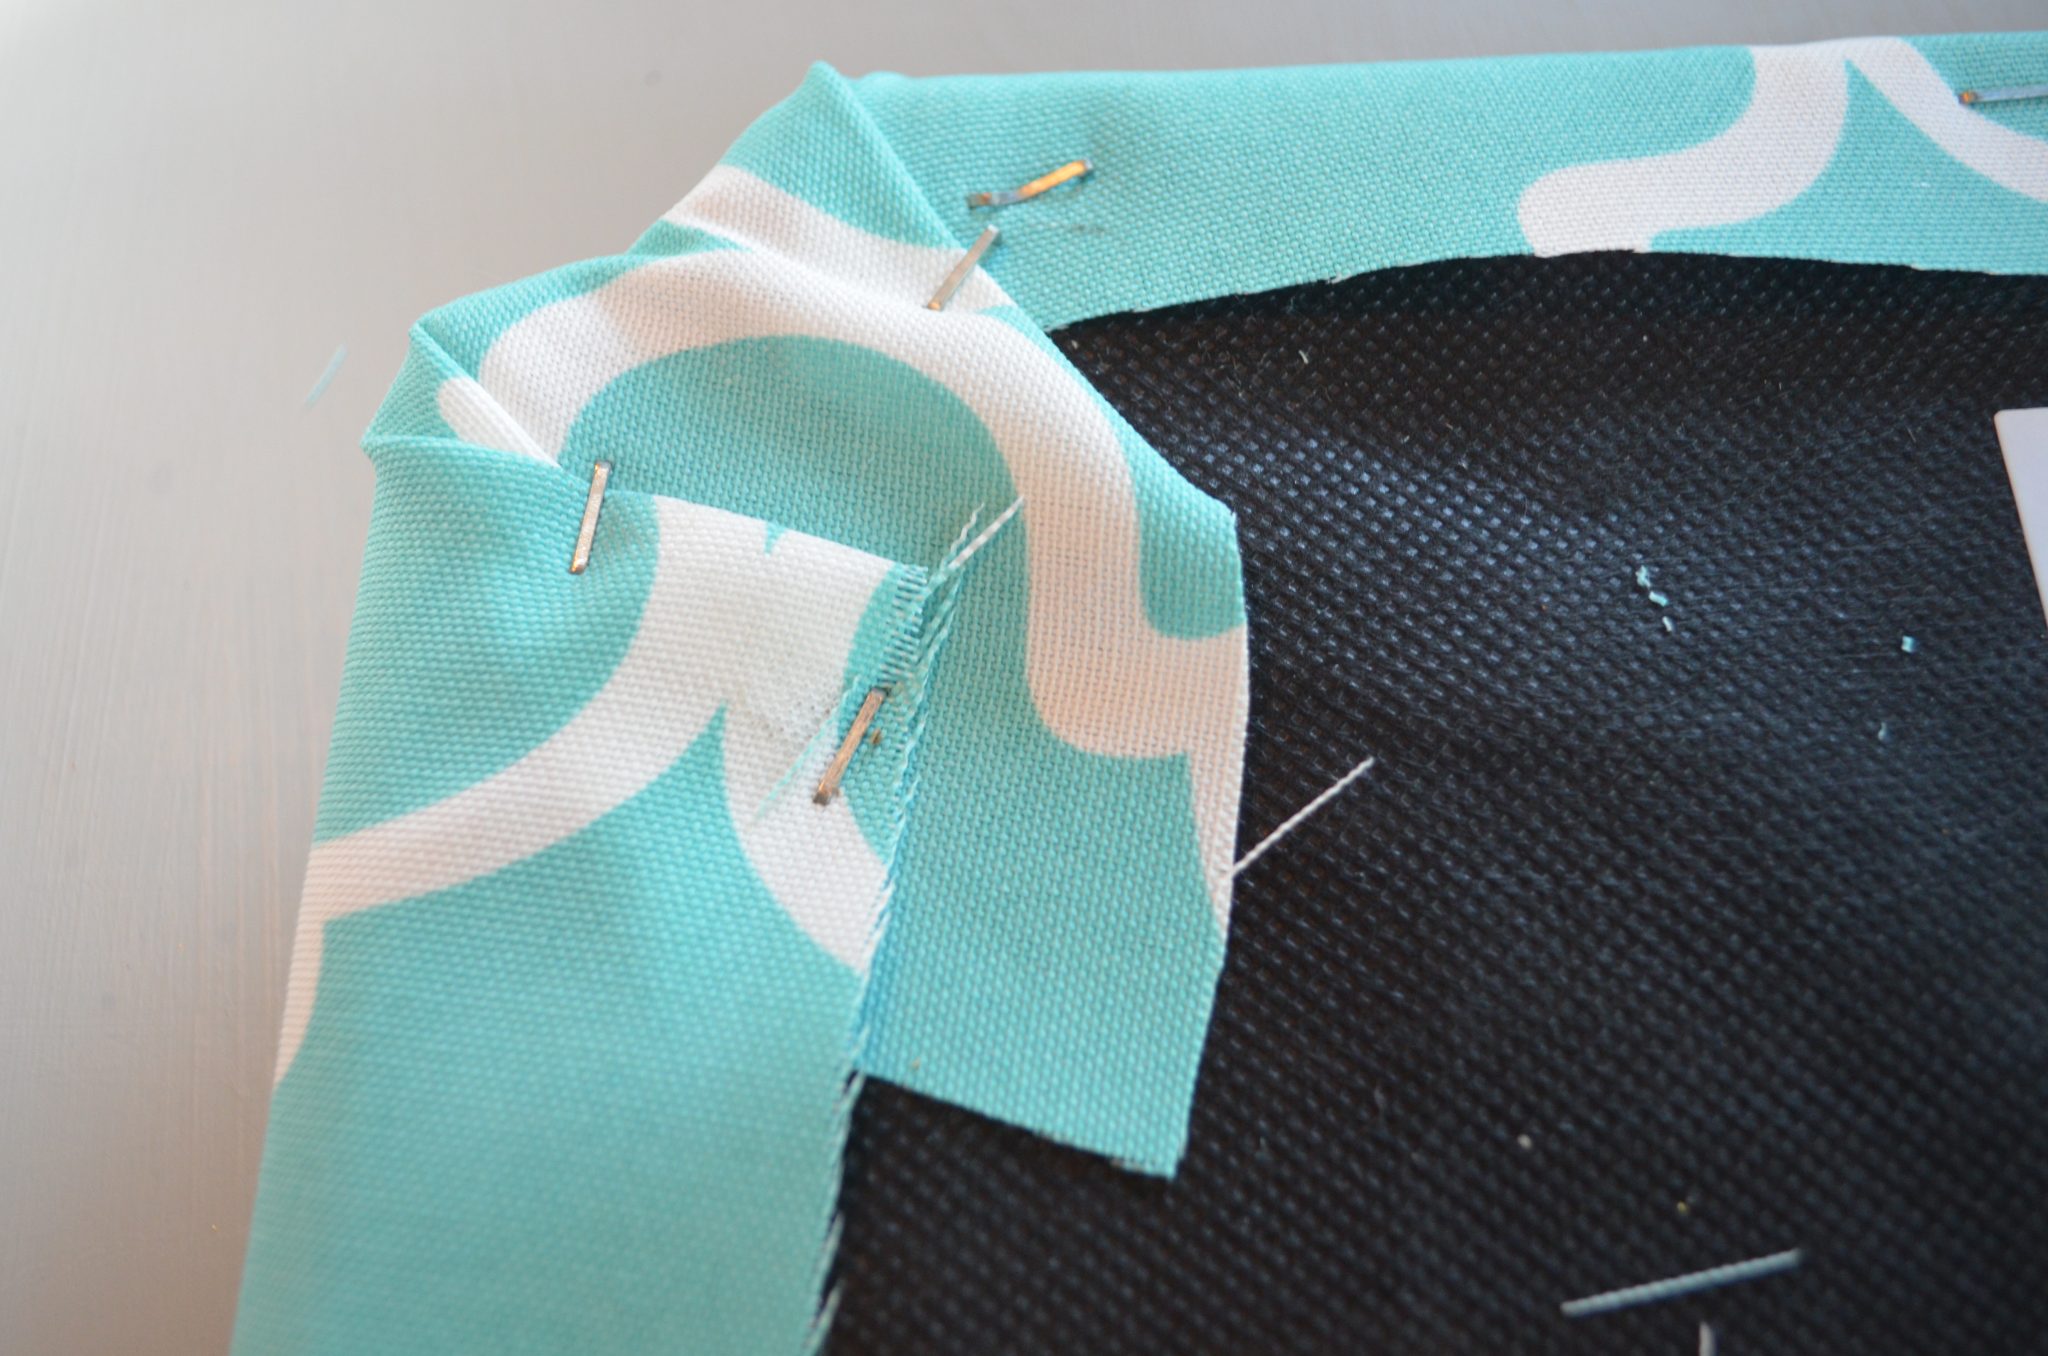
Step 3: Center your seat face down on the back of the fabric. Then, use a heavy duty staple gun to secure the fabric edges in place.
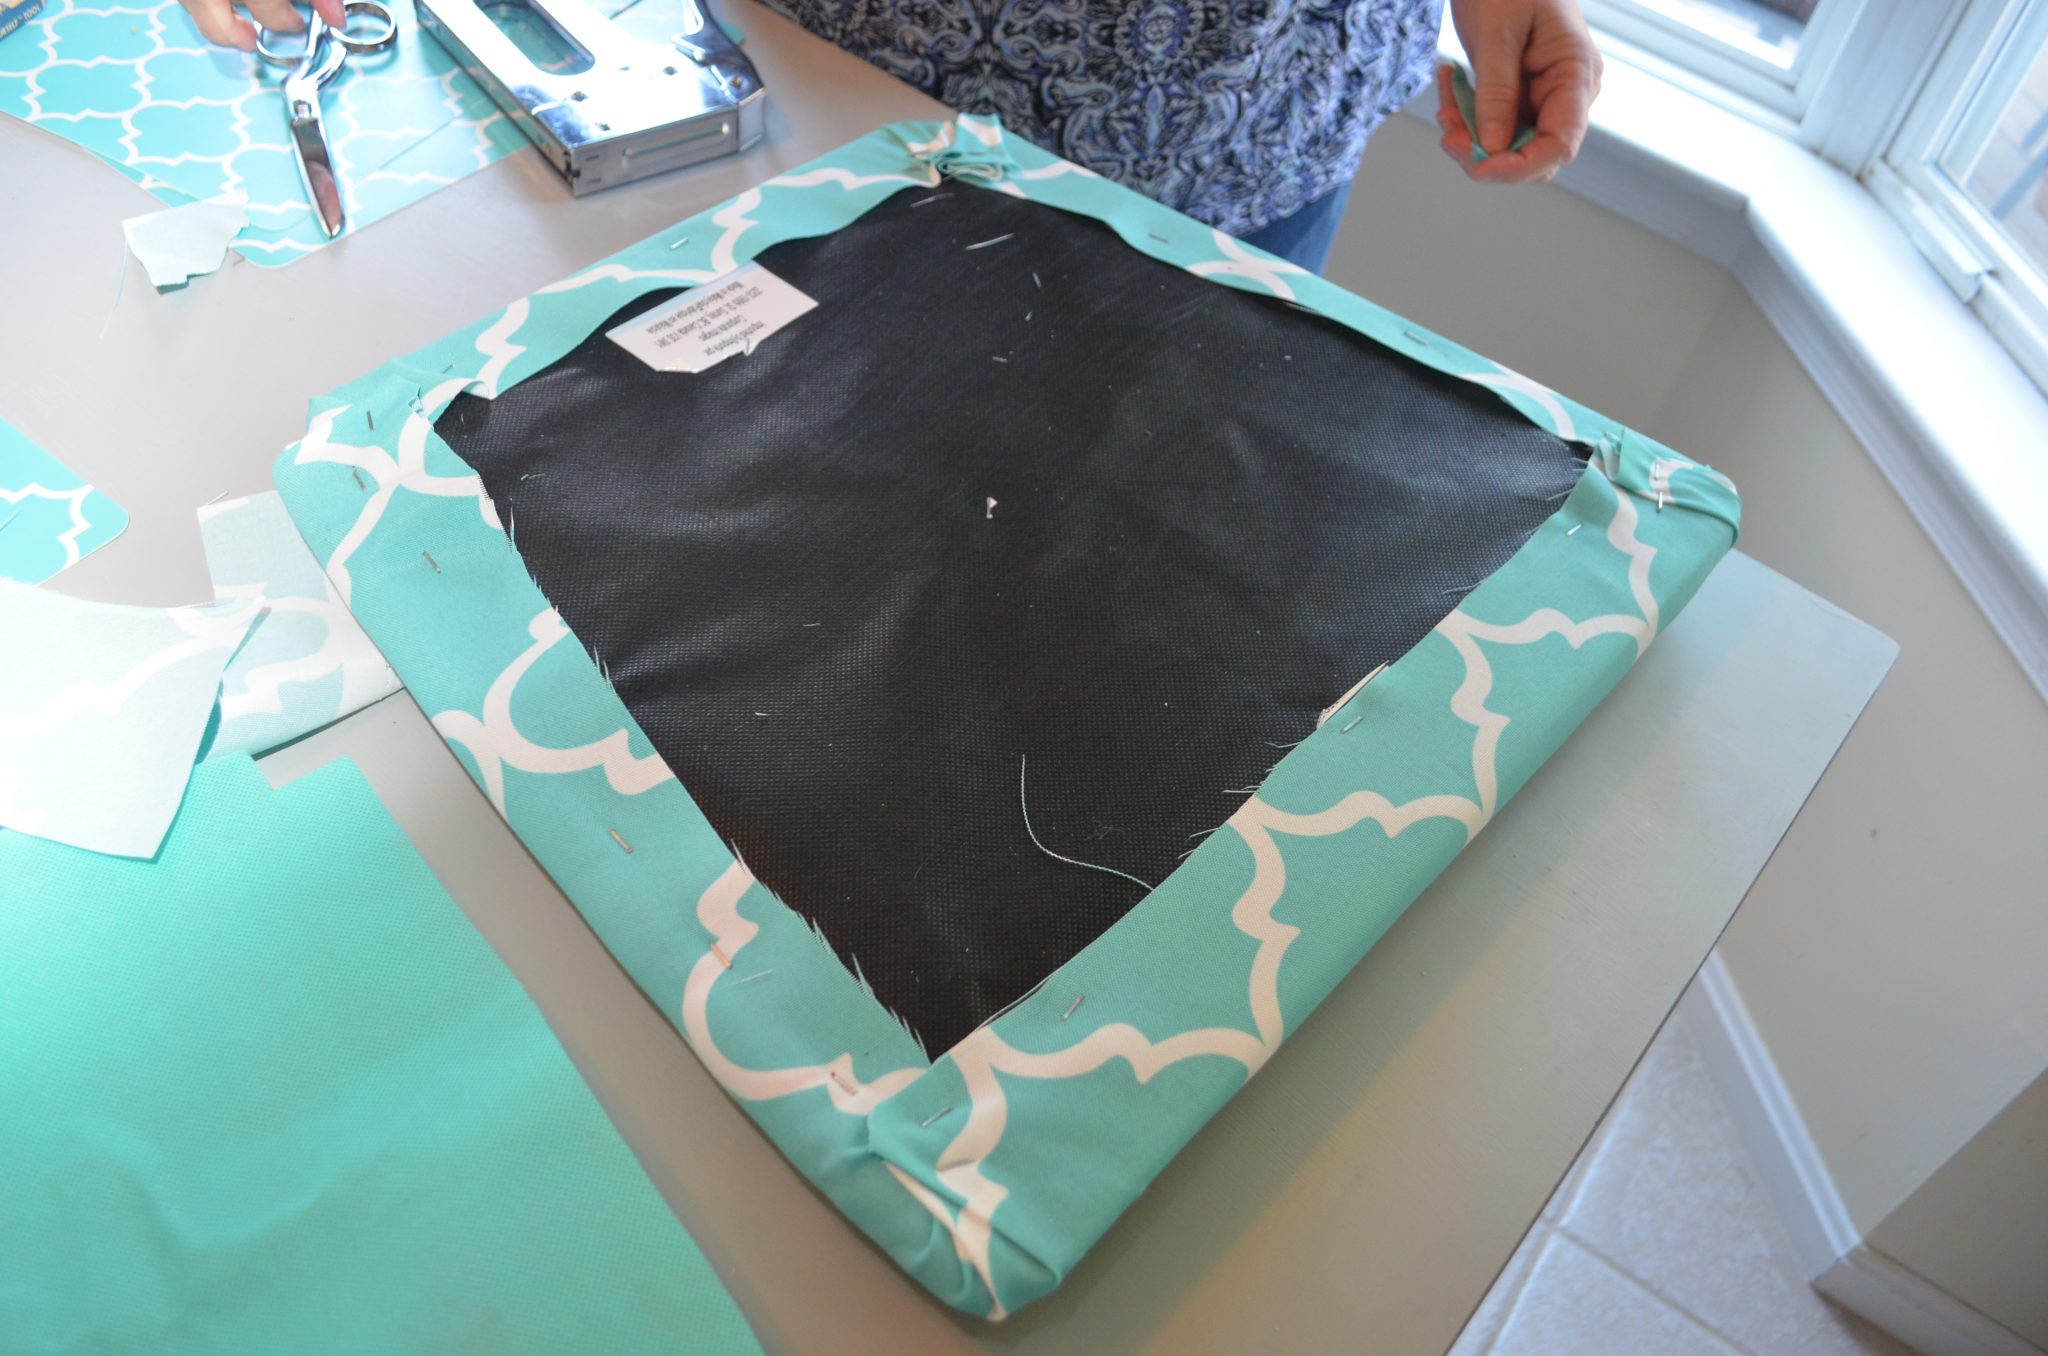
Mine was easy to center because of the geometric pattern. Pull the fabric tightly as you go. In the corners, you’ll want to trim, fold, and tuck the fabric to make it lay as flat as possible.
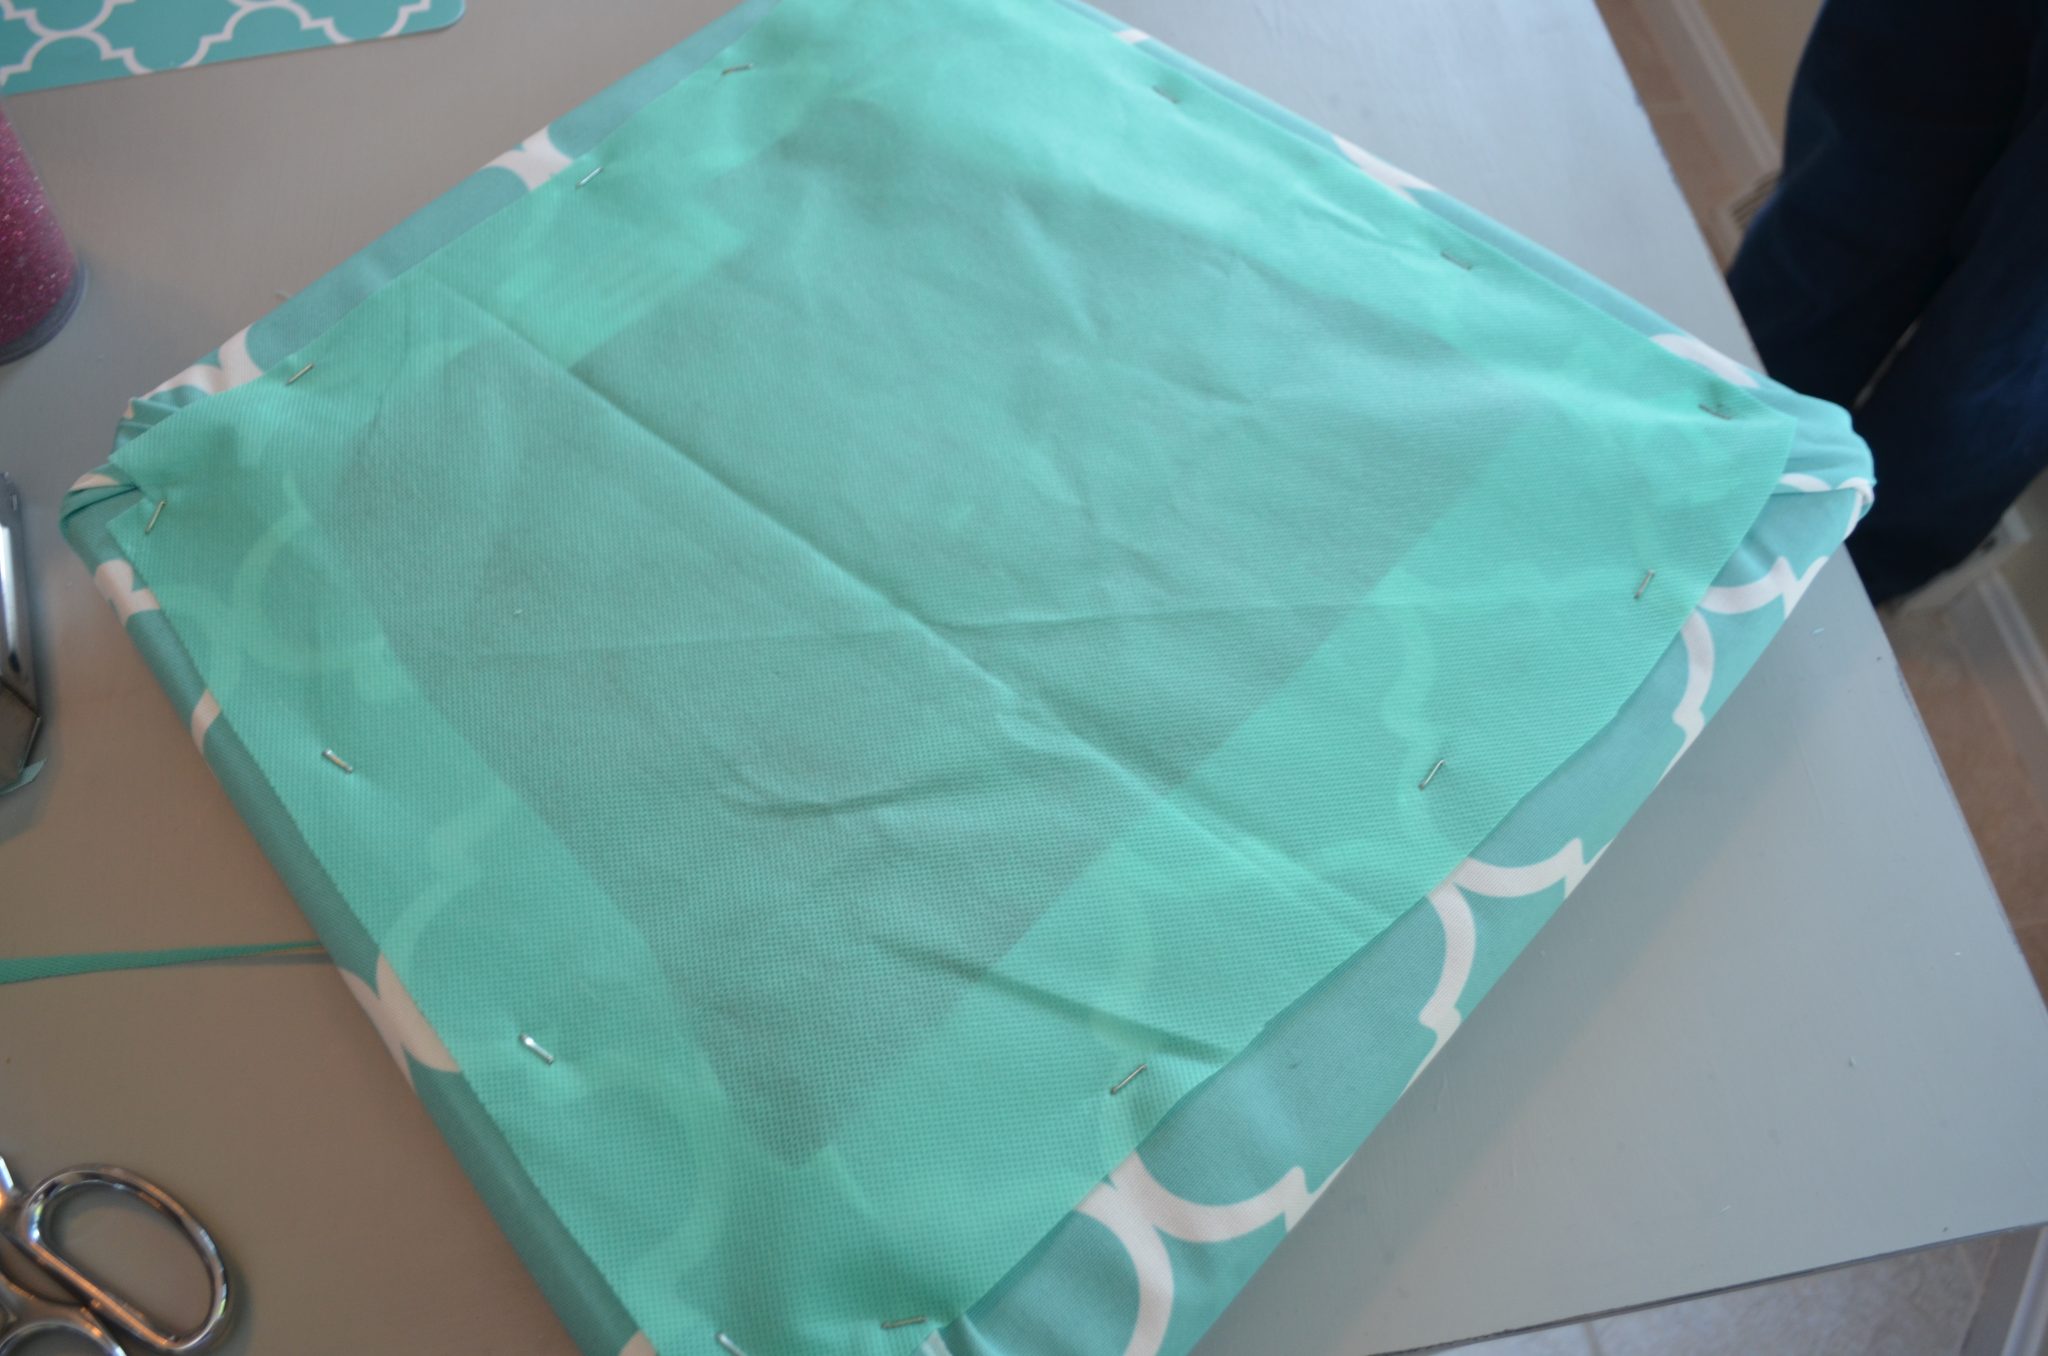
Step 4: Next, cut a piece of Oly-Fun that’s large enough to cover the bottom of the seat and hide the raw edges of your fabric. Staple it in place.
Step 5: Finally, reassemble your chair.
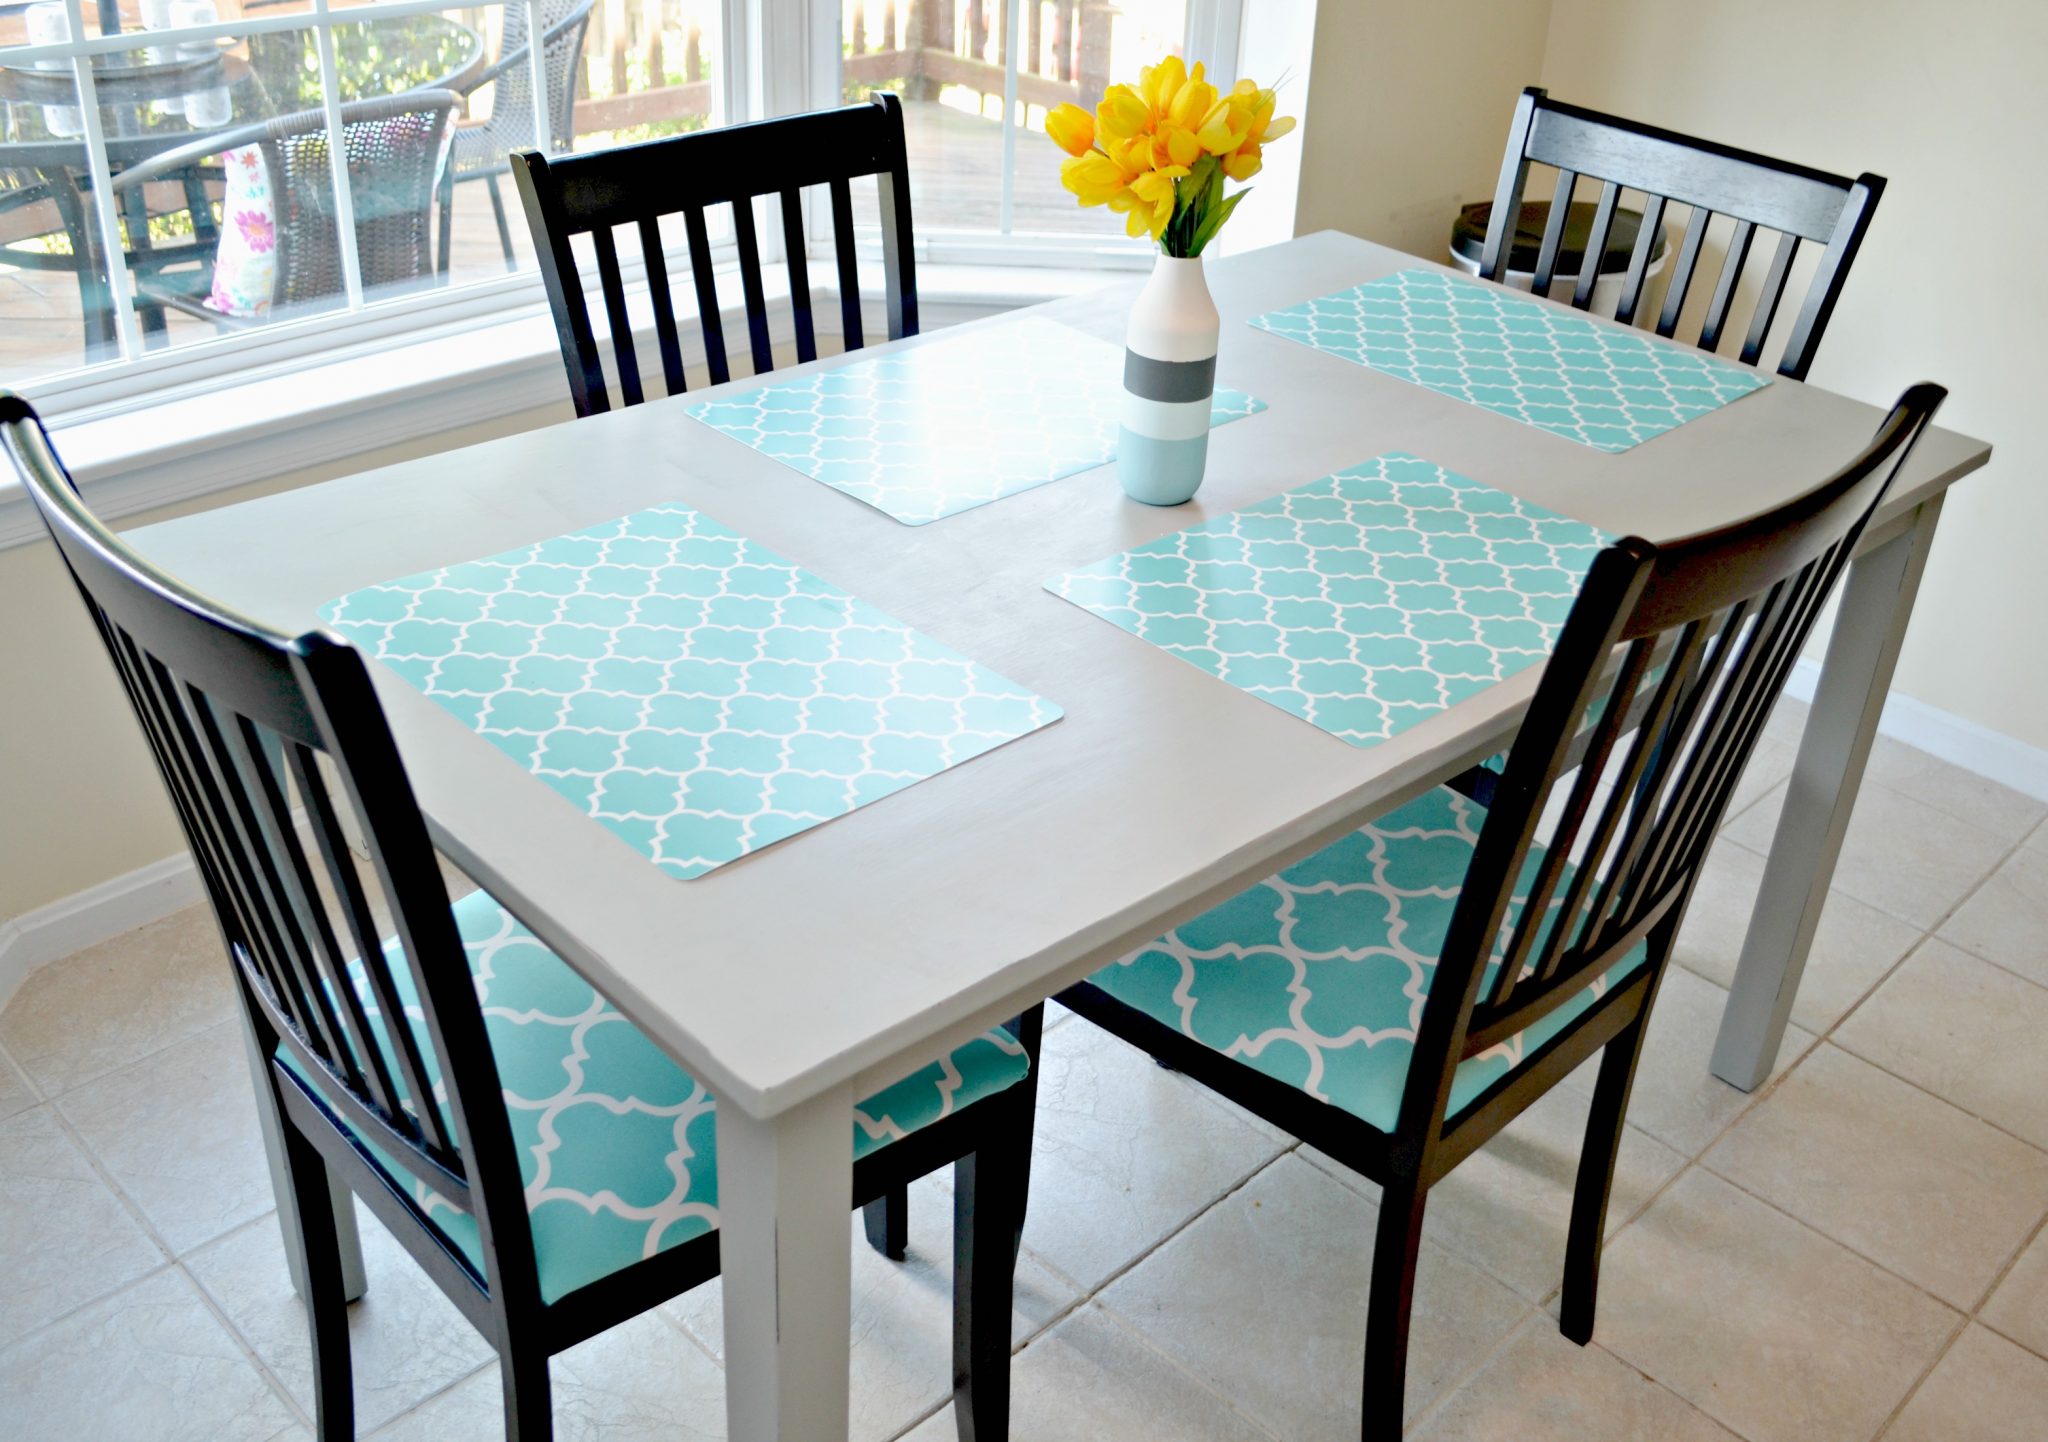
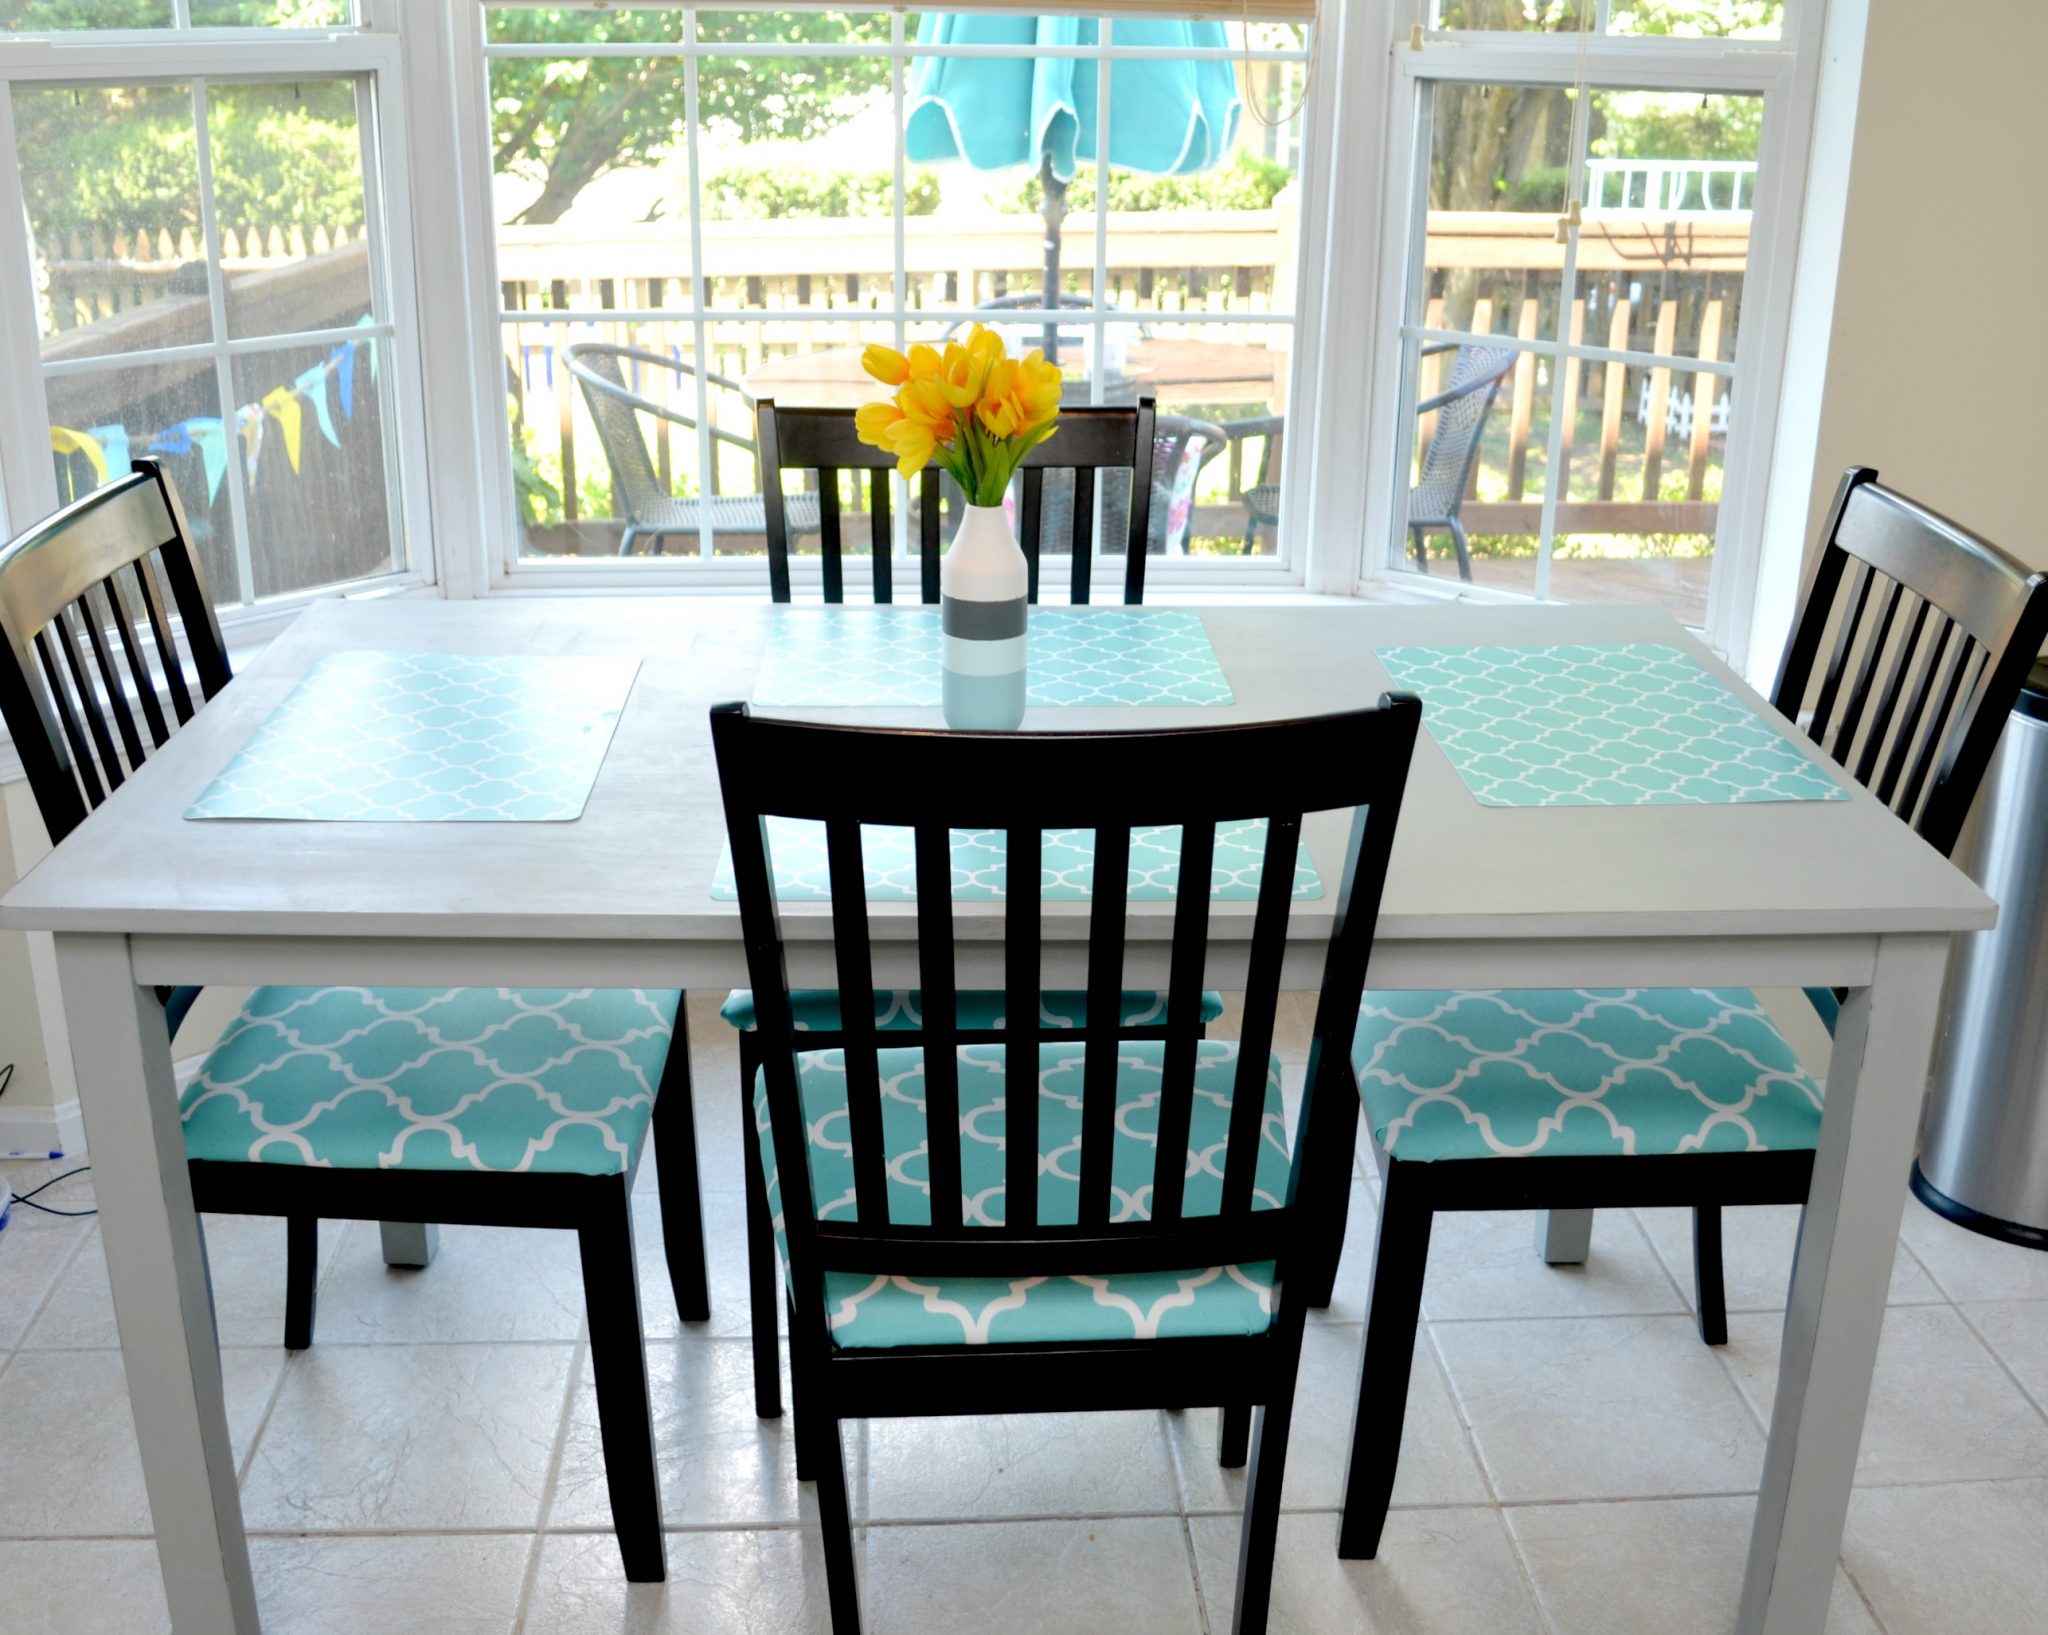
Now it’s ready to use! I’m so glad I chose the outdoor fabric because it’s proven to be really easy to clean. I’ve wiped all kinds of things right off the surface, including macaroni and cheese, sugar from powdered donuts, and more. I particularly love the cheerful fabric itself, which I found at my local JoAnn Fabrics. It’s a perfect match for my placemats, and it adds a fun pop of color to the room.
Painting the Table
The table itself was the same dark color as the chair frames, and originally I liked it quite a bit. Over time, though, there were a few spots where for some reason, the top layer of finish peeled back and exposed the particle board. When you’re the Artsy Mama, that means it’s time for a paint job. Here’s a look at the entire set before the redo.
Materials
Delta Ceramcoat Chalk paint in Cadet Grey
Delta Ceramcoat Clear Wax
Soft lint-free cloth
Paintbrush
Sandpaper or power sander
All I did was give the entire table two coats of the chalk paint, letting it dry completely in between. Next, I did some light sanding to distress the corners and edges. Finally, I gave the table a coat of clear wax using a soft cloth. I absolutely love the way the grey lightens up the room and how it contrasts with the dark chairs. I couldn’t be more pleased with the way all of it turned out.
The only thing left to do to complete the makeover is to finish painting the walls a gorgeous grey color I picked out. Stay tuned…


I love the color and pattern!! They are both my favorites!!! Looks gorgeous!!!
Love the kitchen makeover shots and think the colour palette you chose works really well. Thanks for sharing. I’ll certainly take some inspiration from these in my next blog post on my own site 🙂