
DIY Rose Garden
Friends, I am so excited to share today’s project with you! It’s a little different than my typical hand lettering and craft posts, but it’s what we’ve been working on here at the Artsy House for the past week or so and dreaming of for more than a year. I’m thrilled to show you our DIY Rose Garden and tell you all about how we created it in what was basically wasted space.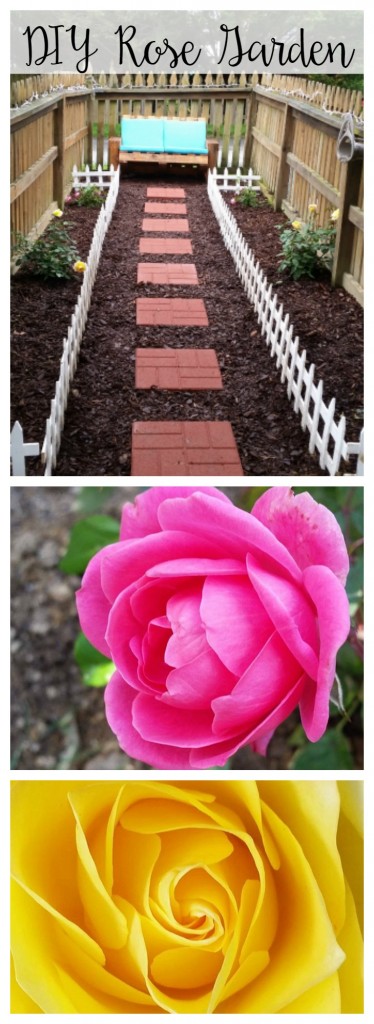
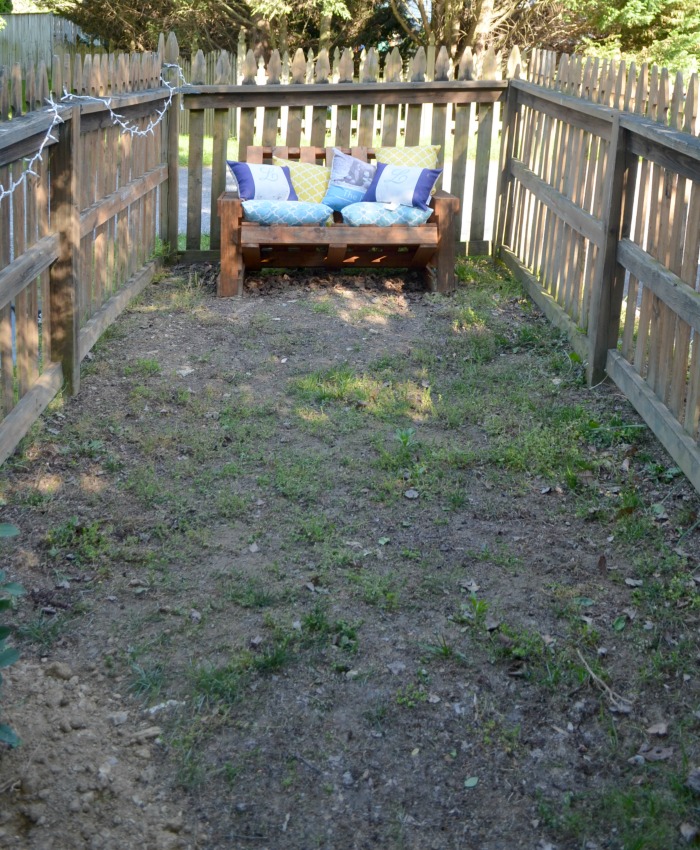
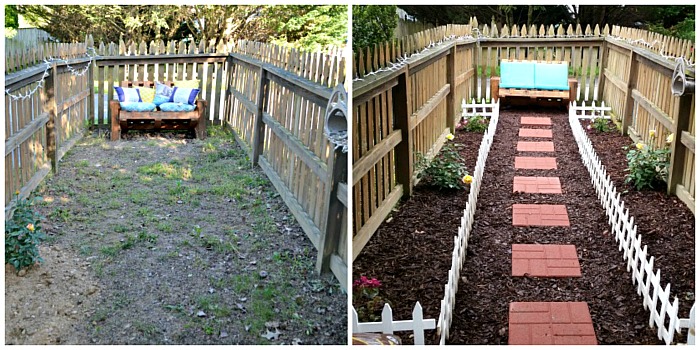
We moved into this house a year ago, and we immediately started wondering what to do with this one random part of our backyard. The yard itself is a nice size; we have a spacious deck, a shed, and then a great area where LC likes to play kickball, soccer, and more with his friends. But then there’s this long skinny little offshoot that sticks out and divides our parking area from our neighbors’. Last summer, as we were brainstorming how to turn it into a useful space, we came up with the idea of turning it into a little rose garden that would be perfect for sitting, reading, chatting, and spending some quiet time.
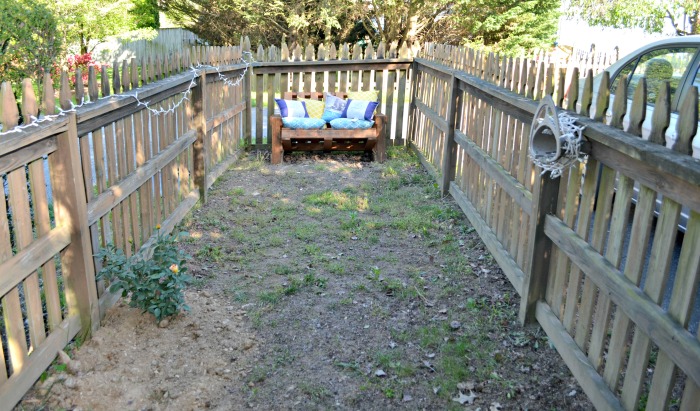
Of course, I wanted to do it right away because of who I am as a person, but hubby wisely advised that we wait until we had the time and money to put into doing it right. So, we focused on the inside of the house last year with the promise of working on the outside this year. The one thing I was able to do, though, was create my pallet bench {which I love} and place it in the space as a hint of what was to come. Otherwise, this is how the area looked. Pretty sad, huh?
Here’s how we went about transforming it…
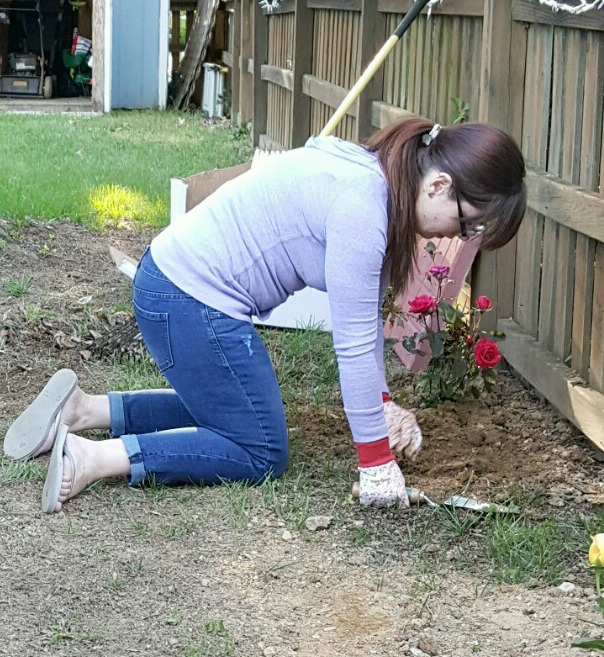
Step 1: Purchase and plant rose bushes.
We decided to start off with three bushes on each side. Even though it looks like there’s room for more now, we figure that as they grow and fill out, it’ll be just right. If not, we can always add more. Both hubby and I are the type who enjoy {and kind of need} symmetry, so I got two each of three different rose bushes from Home Depot. I chose four double knockout roses {two dark pink and two light pink} and two of a different kind of yellow roses.
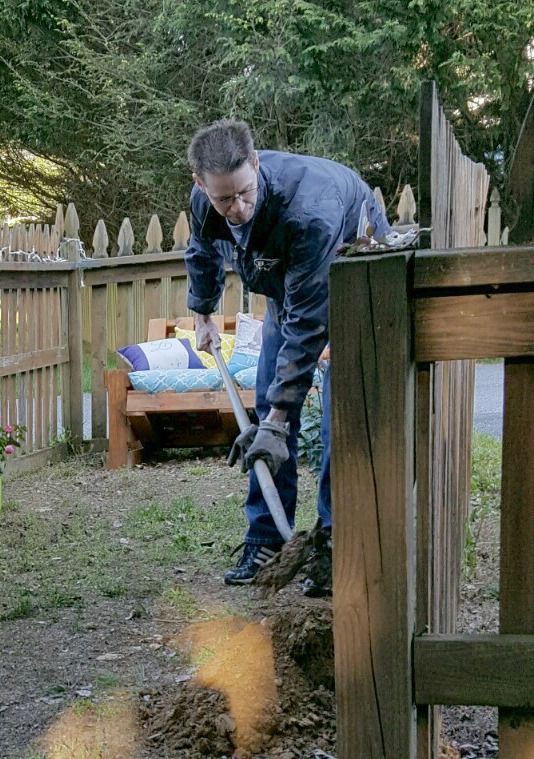
Hubby had the job of digging, while Little Crafter and I did the planting.
Step 2: Add fencing.
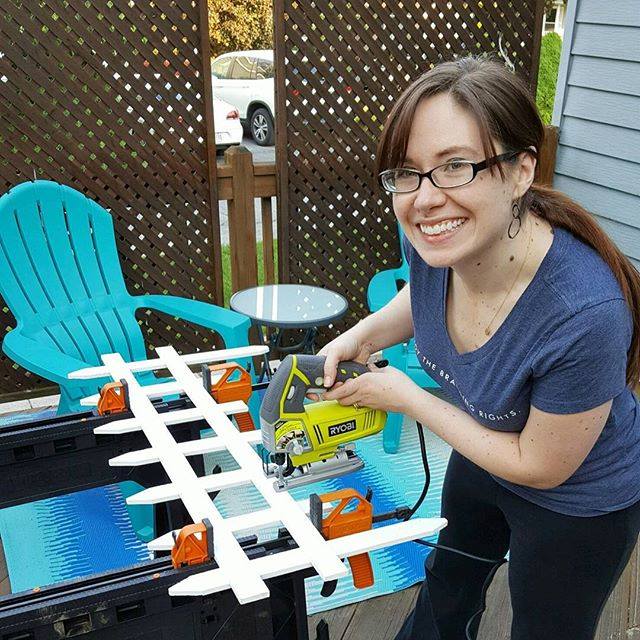
I wanted some type of divider between the flowers and the path, so I checked out the options at Home Depot. There were all kinds of choices and styles in a variety of materials: stone, metal, plastic, and wood. My favorite look was this sweet little white picket fence. It took us 16 pieces of fencing for our area; 6 on each side plus one on each end. I had to cut the ones on the ends to fit properly, so I finally got to play with the RYOBI Jigsaw I got for Christmas! I love it!
Our original plan was to measure out from the brown fence to know where we should place the white fencing. The problem, though, is that we quickly discovered the brown fence isn’t straight. At all. So, we ran a line using some metal hooks and string, a trick my dad taught us a few years ago, and that helped us keep the white fencing lined up properly. While we were doing this part, Little Crafter was literally attempting to dig a hole to China. Despite our discussions about the heat of the earth’s core, he decided he would at least dig farther than anyone has ever dug in the hopes of finding ores {thank you, Minecraft}.
Step 3: Mulch the fenced areas.
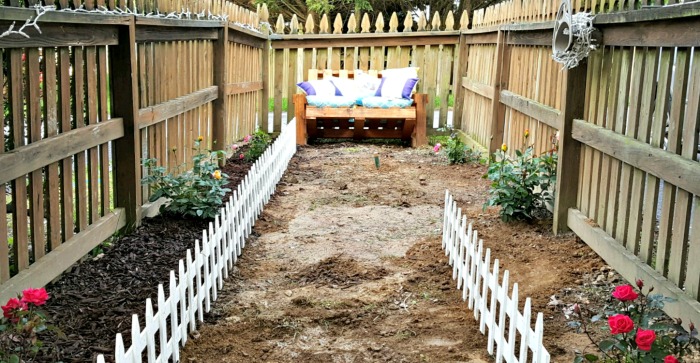
Step 4: Flatten the path and lay down landscaping fabric.
My bestie Erin and her hubby had a tamper they let us borrow, so hubby used that, along with some extra top soil, to flatten out the path. Then, he used some 3 ft wide landscaping fabric to help prevent weeds from growing. If you have extra landscaping fabric, you can use that in the garden part too!
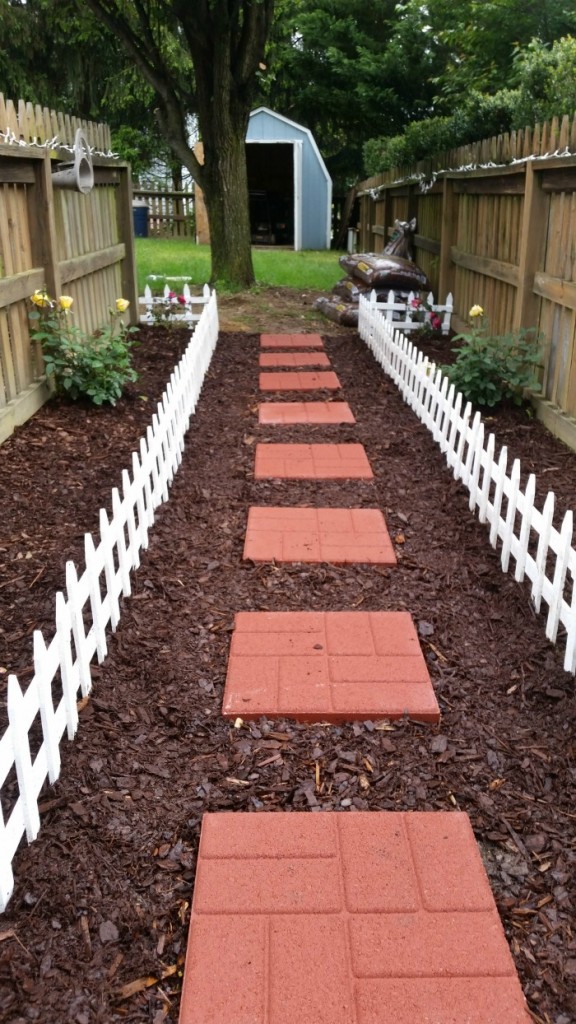
Step 5: Lay paving stones.
These also came from Home Depot. Hubby measured and spaced them, then adjusted for my stride, which is much smaller than his! We ended up using eight of them.
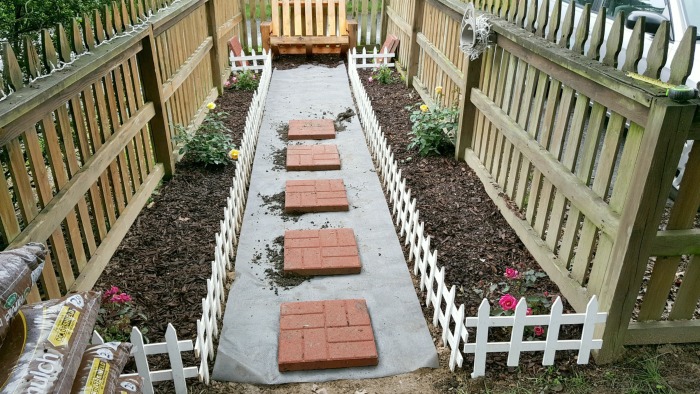
Step 6: Mulch around your pathway.
You could also use small stones or anything you like for this part. We were afraid that adding another color and texture in such a small area might make the whole thing look too busy, so we stuck with the dark brown mulch. I really like the look!
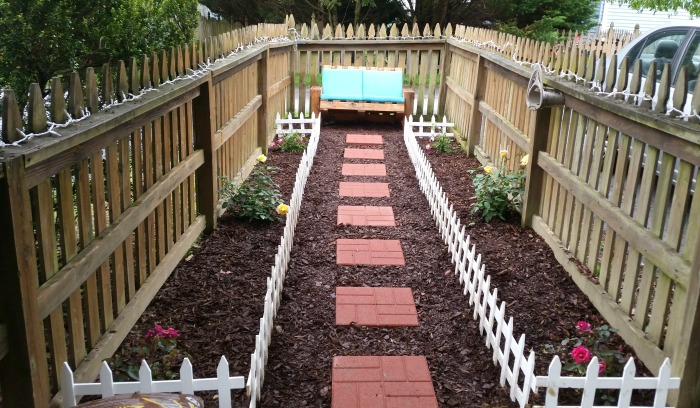
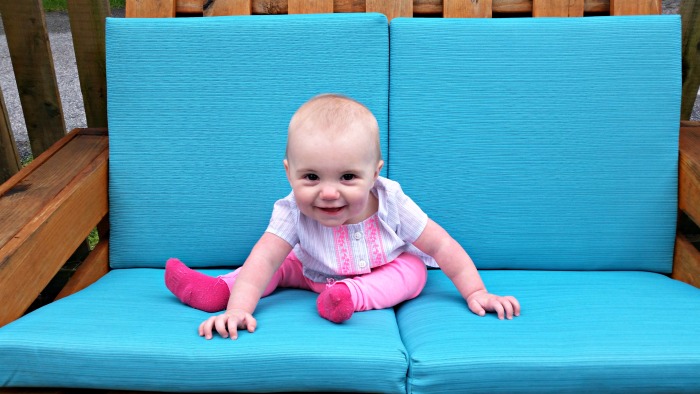
You might’ve noticed that my pallet bench got a little refresh too! I was forgetful last year and let the pillows I was using for cushions stay out in the winter weather, including a major blizzard, so they were a little worse for the wear. I picked up four of these outdoor seat cushions at Target and they are absolutely a perfect fit on the bench. I couldn’t have hoped for anything better. I happened to be babysitting my adorable niece Claire the day we finished this up, so she was the first to test everything out. It’s officially Claire approved!
Here is the view from the bench, looking out into the yard. You’ll notice that hubby strung little white lights along the fence for me too, so that we can enjoy the garden at night time as well as during the day.
I am so pleased with the transformation and so proud of us for accomplishing it together! I forsee spending an awful lot of time on that bench this summer! Special thanks to hubby for all his hard work and helping me make this a reality…we make a great team.


Oh my!!! This is a gorgeous garden! I am imagining the roses when they bloom!
This looks awesome, Amy! I would love to curl up on that bench with a good book 🙂 I bet these bushes will look gorgeous in a few years when they’re full of blooms! We have a couple of knockouts in our front yard and they have absolutely exploded with roses this year. You and your husband sound like me and mine – I have a ton of ideas for sprucing up our backyard, but my hubs is trying to talk me off the ledge; he never wants to rush into anything 😉
Wow! It’s gorgeous. You are correct that knockout roses will expand. At least the ones I have planted did.
This is super cute!! my pack yard is just plain dirt and I can’t wait till I have the time to actually do something with it.