
Let’s Be Adventurers Map String Art
One of my favorite things about being part of the Plaid Creators team is that we get sneak peeks and early access to brand new products before they hit the market. Just yesterday, a box showed up at my door with three Bucilla String Creations Stitch Blanks that will be available in Hobby Lobby stores this May. As soon as I saw the one shaped like a map of the United States, I knew what I wanted to create – a fun piece of art that would commemorate some of our favorite trips and vacations. Here’s what I made, and you can too…

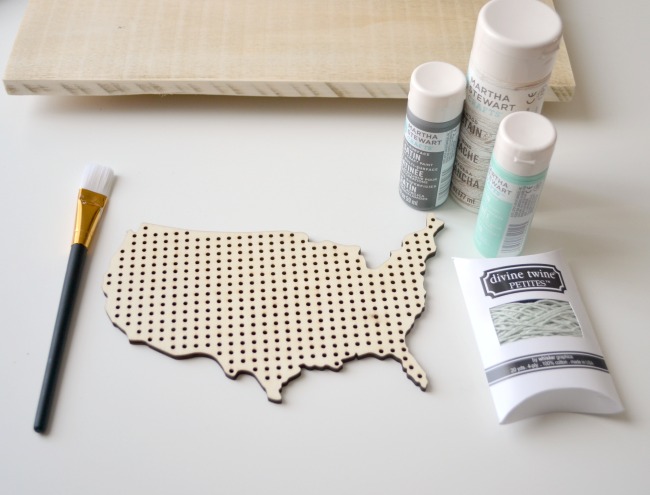
You’ll need:
an unfinished wooden sign
white wood stain
multi-surface paints {I used Martha Stewart Satin Arrowhead and Summer Haze}
Bucilla String Creations Stitch Blank, map of USA
string, yarn, or twine
paintbrush
washi tape
glue
permanent marker or paint pen
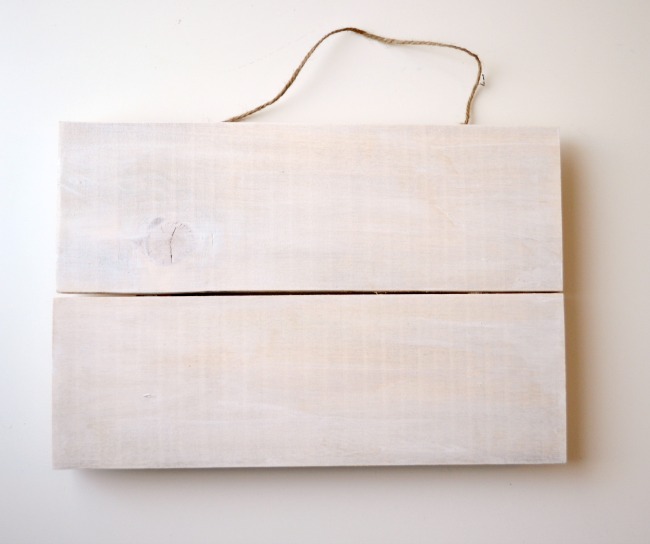
Step 1: Stain or paint your wooden sign.
I wanted to keep some of the natural wood look, so I decided to use stain instead of paint, but you can use whatever you like best. I brushed on a coat of white stain and let it dry while I worked on the next part of the project. My sign was handmade by a friend who nailed some scrap wood together, but you can easily find something similar at your local craft store.
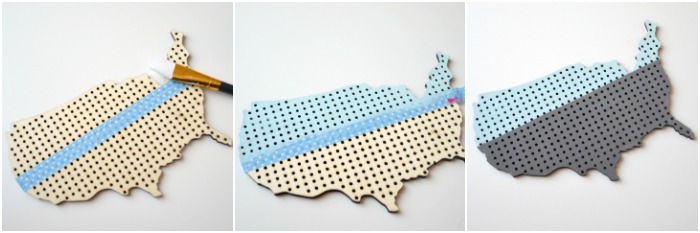
Step 2: Paint your map.
I wanted a color blocked look, so my first job was to place a line of tape about 1/3 of the way down the map. I painted the section above the tape with Summer Haze and immediately peeled the tape off. When the paint was dry, I re-positioned the tape, then painted below it with Arrowhead. The paint did have a tendency to want to drip into the holes and fill them in, so I quickly learned that only loading my brush sparingly was the way to go.
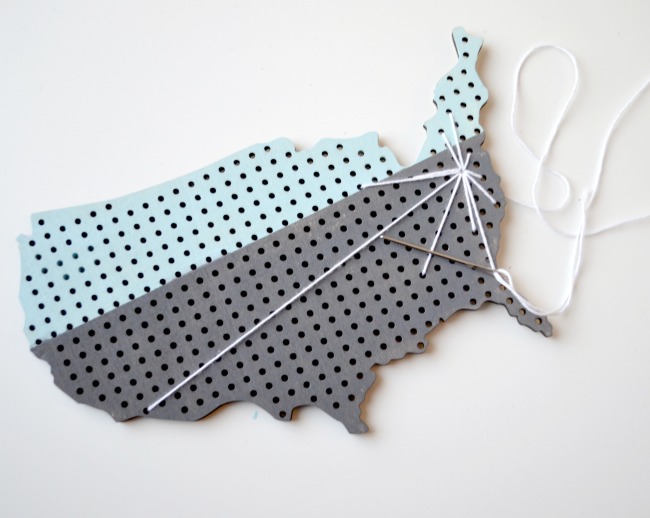
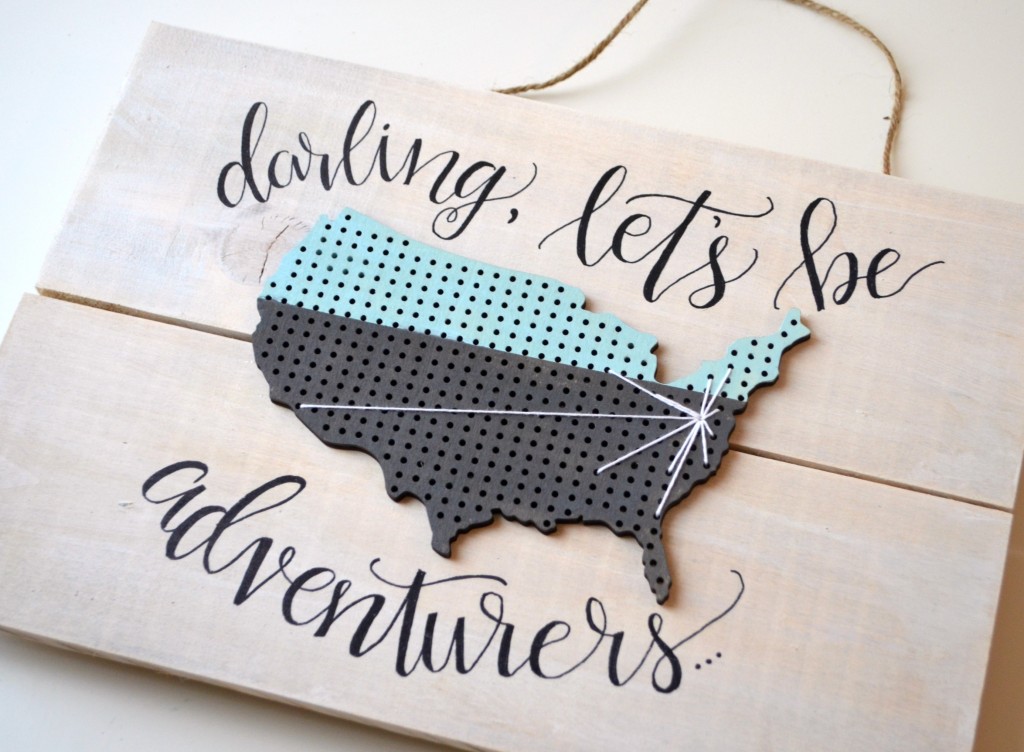
Step 3: Using a large needle and the string of your choice, create your design.
First, I tied a knot in my string and threaded it through from the back to hold it in place. I started in a hole that’s as close to where we live as I could guess, then moved outward to a place we had visited. I continued, coming back each time to the original spot so that all of the lines point back to home.
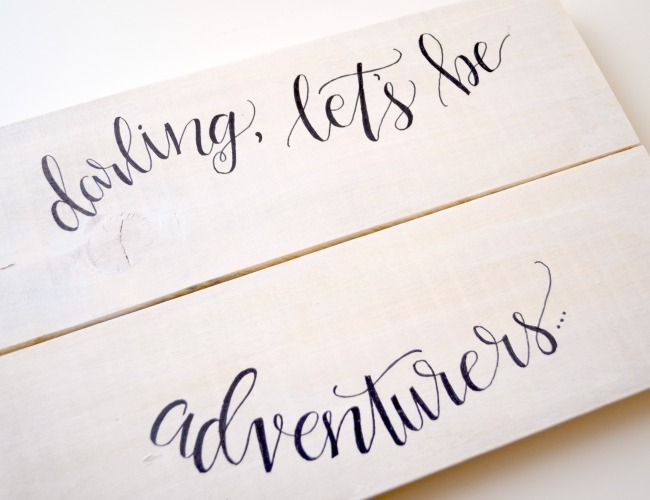
Step 4: Add your words.
I sat my map on top of the sign where I wanted it to go and used a pencil to sketch my words around it. Then, I removed the map and went back over my lettering with a permanent marker. I used a brush alphabet and the faux calligraphy technique. If you’re new to hand lettering, check out this Basic Hand Lettering post for a full tutorial on how easy this is to do!
Not interested in lettering? Other options are to use a stenciled phrase, alphabet stencils, alphabet stickers, or a vinyl saying.
Step 5: Glue your map onto the sign.
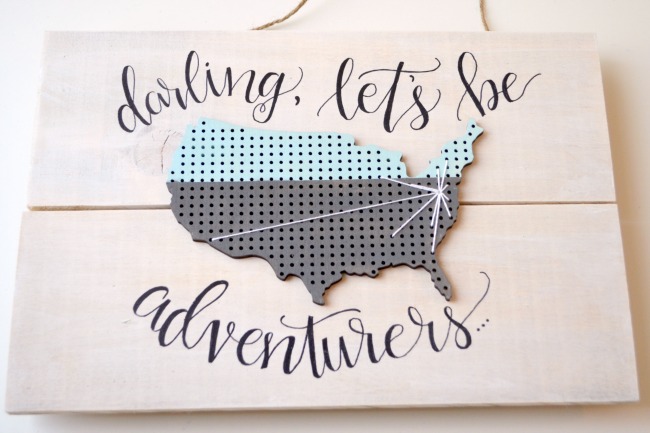
Once the glue is dry, your masterpiece is ready to hang up and display in your home! What do you think? I love how it turned out and hubby was excited about it too. It’s also super easy to customize; everyone’s would look different based on the colors you choose and the places you’ve traveled. What would your map look like? Mine clearly shows that we need to make some trips out west! Keep an eye out for these map blanks coming soon to a Hobby Lobby near you. I can’t wait to see your version of this project.


How fabulous!!! Love the string
Amy I love this…but girl, you need to spend some more time in the midwest!
Right?! I know it! That part of my map is sad and empty!!