
Making Your Lettering a Digital Overlay
Friends, I am really excited about today’s post, because it’s a game-changer for those of you who are obsessed with hand lettering like I am! A quick scroll through your Instagram or Facebook feed will prove that photos with text overlays are incredibly popular right now. How much more awesome would it be to be able to make your own lettering projects part of a favorite photograph?! Today, I’m going to walk you through how easy it is to make your lettering into a digital overlay without any expensive software, just the online photo editor PicMonkey!
Here’s what you need:
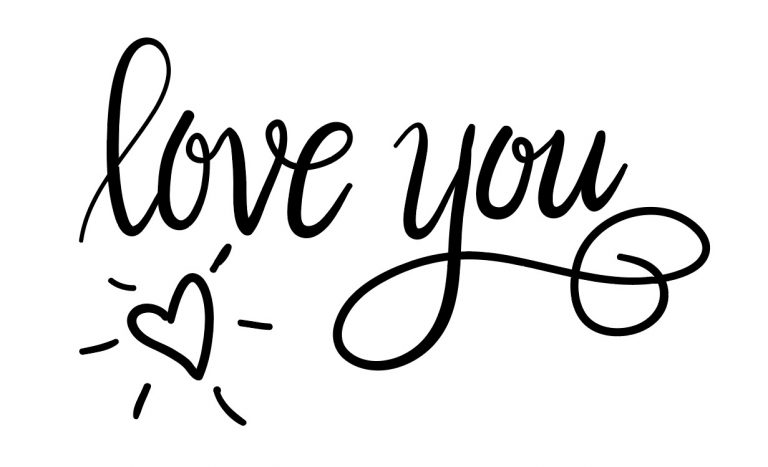
– a hand lettered design {preferably in black ink}
– a background photo
– access to PicMonkey.com
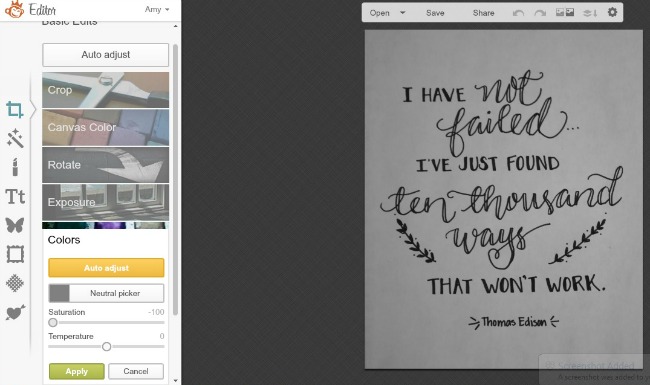
Step 1: Upload and edit your lettered design.
The absolute best way to do this is by scanning it in, but if you don’t have a scanner, a photo {even from your phone} will do. Open the photo in PicMonkey and select “Colors” from the menu to the left of your image. Slide the Saturation to -100, converting your image to black and white. Click “Apply” to apply your changes.
Then, select “Exposure” from the menu and slide the highlights level to 100. Adjust the shadows level until you feel like the text is dark enough. For this particular project, I went with -37.
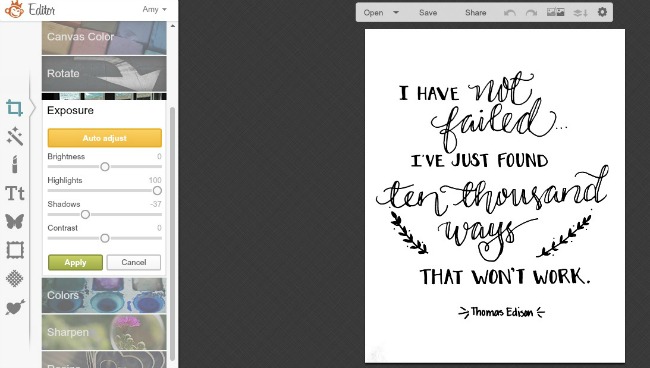
Save your image to the computer, then close it.
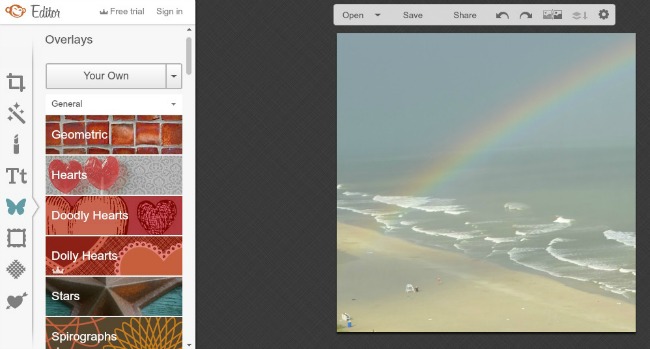
Step 2: Open your background photo.
The best kind of photo to use is something that’s not too busy or full of other text. For this example, I chose a picture I took of a rainbow during a trip to Myrtle Beach.
Step 3: Add your lettering photo as an overlay.
Choose the butterfly icon from the far left menu. Then, select the drop down menu titled “Your Own,” and click on “My Computer.” Select your lettered image.
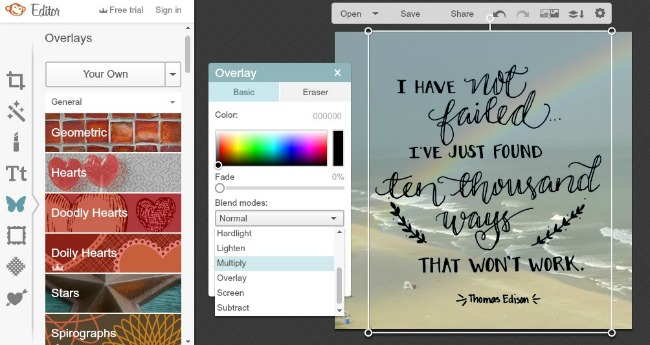
Your image will appear on top of the photo. You can resize and reposition it by clicking and dragging the corners of the overlay. A pop up box will appear that gives you editing options for the overlay image.

Step 4: Blend your overlay.
In the pop up box, click on the drop down menu below “Blend Modes” and choose either “Darken” or “Multiply.” This will make the white background disappear while the black text remains.
Save your image to the computer and it’s ready to share!
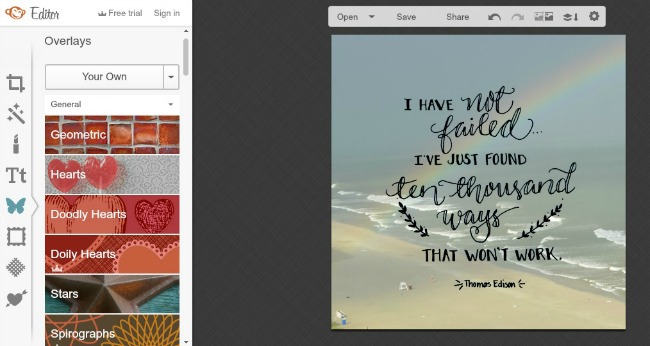
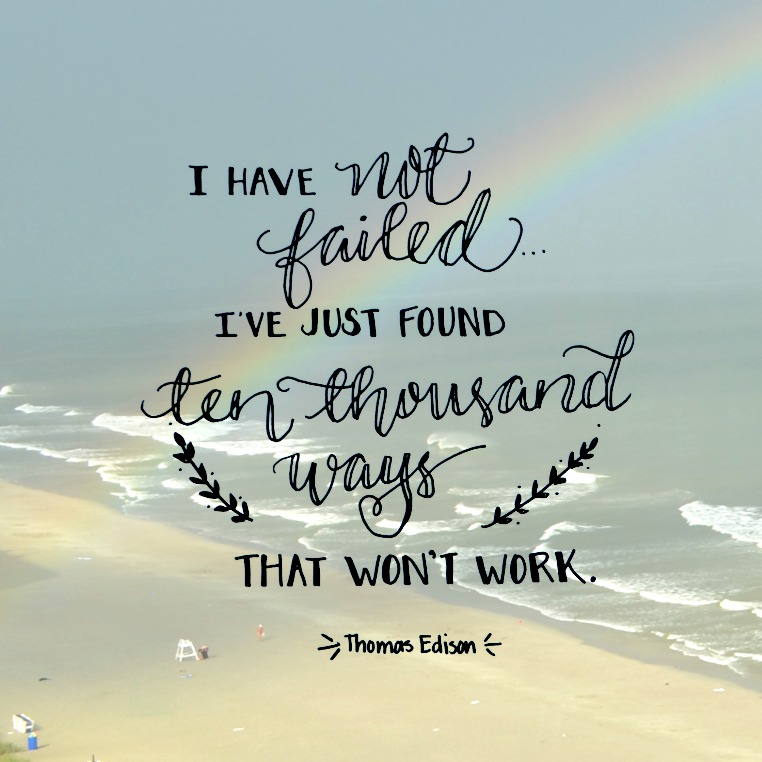
Here’s how mine turned out!
I made this image for hubby using another photo from vacation. Something like this would be beautiful printed and framed for Father’s Day. You could also upload it to a site like Shutterfly and get it printed on a wall canvas, a desk plaque, a pillow, a mug, or whatever you like.

For these light background photos, the black text really pops and is easy to read. For dark photos, though, you’ll want to convert your design to white instead. This is a similar process, but it requires one more step and a paid subscription to PicMonkey. The previous technique can be done totally free, but the tool we need for this one is a Royale feature. You can try out the service free for a month, or if you have another photo editor you like to use, you can do the same thing in that editor instead.
Here’s the extra step: Invert your lettering design so that the background is black and the text/doodles are white.
This happens at the end of Step 1, after you’ve uploaded your design and changed the saturation, highlights, and shadows. Before saving, choose the icon that looks like a magic wand from the far left menu. Then, select “Curves” and click the dropdown menu that says “Presets.” Choose “Invert” and your image’s colors will flip. Apply your changes, save, and close the image.

From here, the process is pretty much the same. Open a background photo, click the butterfly icon, and upload your own saved design from your computer. In the Overlay pop up menu, choose “Screen” or “Lighten” under Blend Modes and the black will disappear, leaving only the white text. If for some reason you change your mind and want the black text instead, you can select “Subtract” and you’ll have the same effect we originally started with.
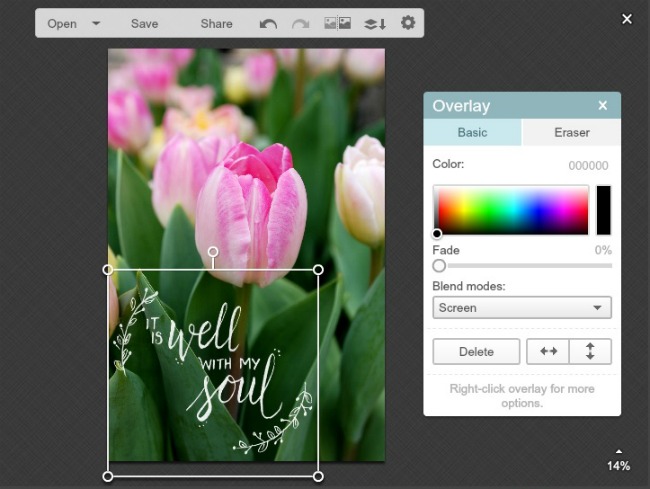
Once again, you can resize and reposition the lettering by grabbing and dragging a corner of the box. Once you like the image, save it and it’s ready to share, print, frame, or use in any kind of project you can create!

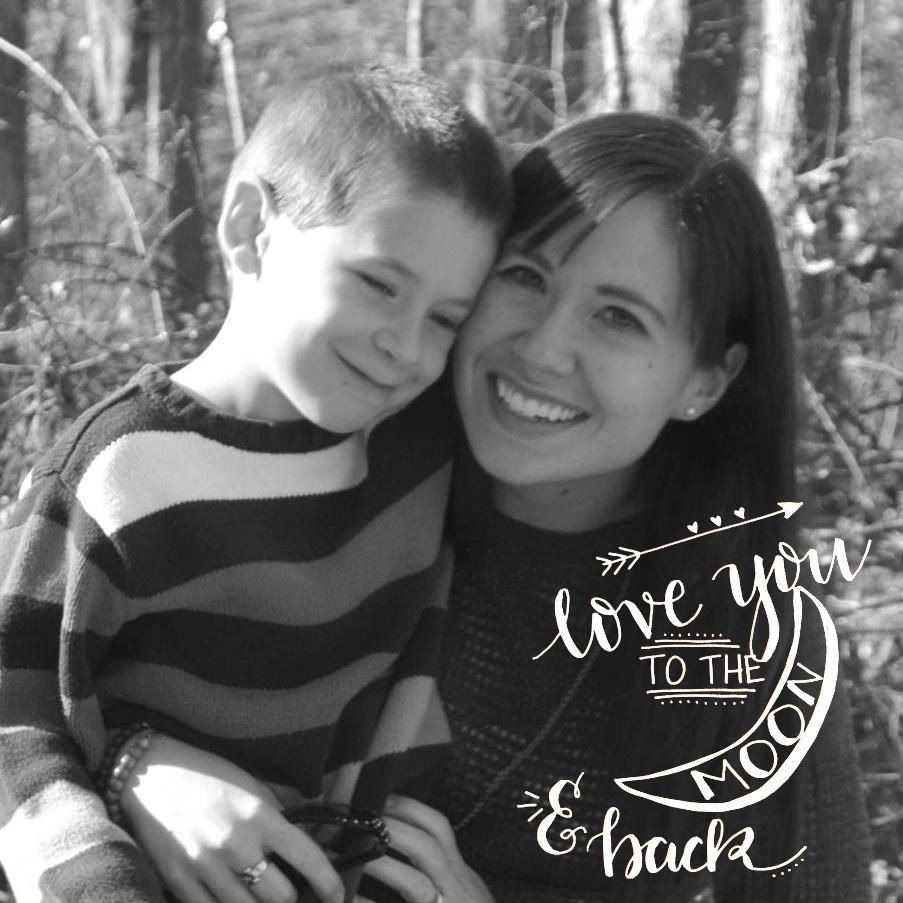
Here’s a personal favorite of mine…we say this to each other often!
What do you think? Is this something you would like to do with your lettering projects? I can’t wait to see what you create! If you get stuck, feel free to ask questions in the One Artsy Mama & Friends Facebook Group!


This is a pretty cool tips! Thansk for sharing it! Love PicMonkey 😀
I love this…What a beautiful effect… 🙂
Amy, this is awesome, and so easy to follow 🙂
This is so cool!! Great tutorial, and I had no idea you could do all that with Pic Monkey. I love the idea of personalizing photos with your own hand lettered phrases and captions.
Love this idea (PicMonkey is a fav)!!
Thanks so much I am already subscribed to picmonkey but had no idea how to do this. I will be using this a lot Thanks so much!!!!
Hi Amy I am trying this right now.. I am wondering if there is a way to save the hand drawn image over a clear background so it can be used in other programs as an overlay to an image? I do a lot of things in powerpoint and would like to make my own hand drawn boarders and then add them to images in powerpoing but I need to save with a clear background not on top of another image.
Hoping it is easy!
Hmmm. I’m not sure. You can make the canvas transparent, but I don’t know how to get rid of the white part. What if you started with a transparent canvas, opened the image, did the conversion as described in the post that makes the surrounding area transparent too and then saved it as a png? Does that make sense at all, lol?
This was SO helpful!
I’m so glad to hear it!! Thanks for stopping by!
Thank you for this really clear tutorial using a program I can use on my chrome book!! This makes me so excited!!
You are so welcome!!
Yay! This is exactly what I was looking for! Thanks!
THANK YOU SO MUCH FOR THIS! IT HAS HELPED ME SO MUCH! SO SIMPLE AND EASY 😀
Glad to hear it!