
Stamped Cubes Wrap Bracelet
Thanks to ImpressArt for sponsoring today’s post. All opinions are my own.
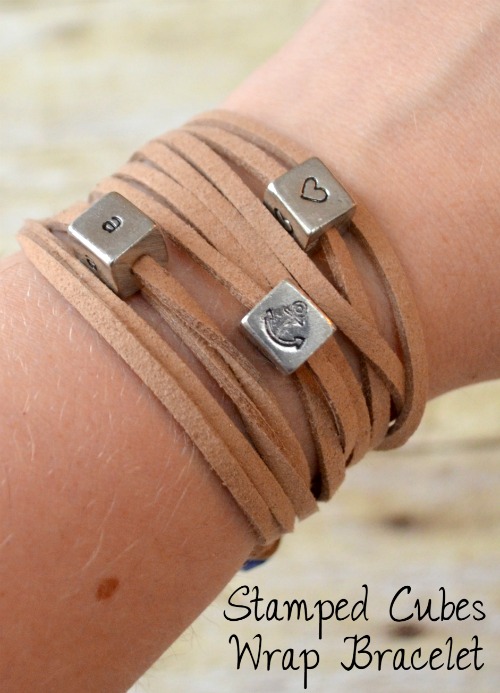
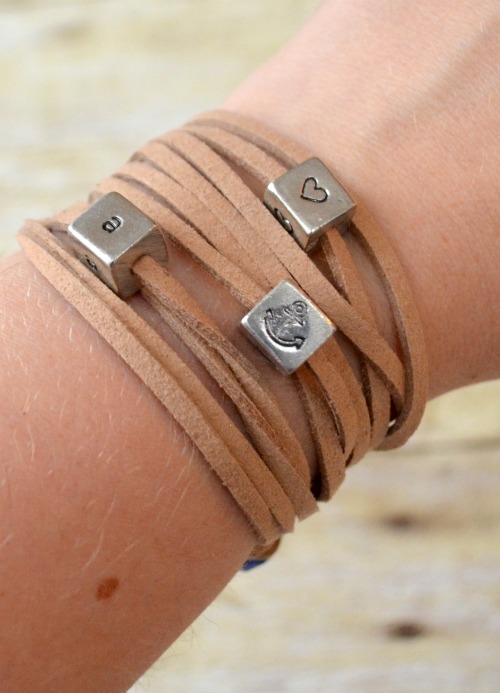
Friends, I am totally obsessed with the wrap bracelet trend right now! They’re so stylish, so comfortable to wear, and if you make them neutral enough, they’ll match literally any outfit! I was looking through my stash recently and thought it would be fun to use my small cube stamping blanks to create a totally personalized bracelet with three focal points instead of just one. Here it is, along with directions for making one yourself! I promise, it’s easier than it looks.
Materials:
3 Pewter Stamping Blank Cubes, Small 3/8″
ImpressArt Lowercase Juniper Alphabet Stamps
Design Stamps of your choice
Steel Stamping Block
Metal Stamping Hammer
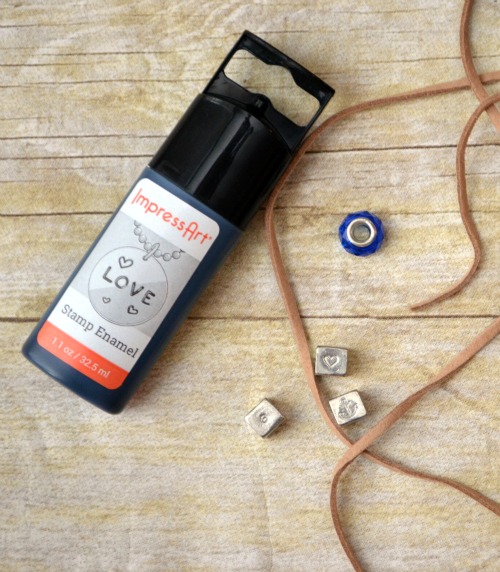
ImpressArt Stamp Enamel
Leather/Suede Cord
Large Bead
Scissors
Step 1: Stamp your cubes.
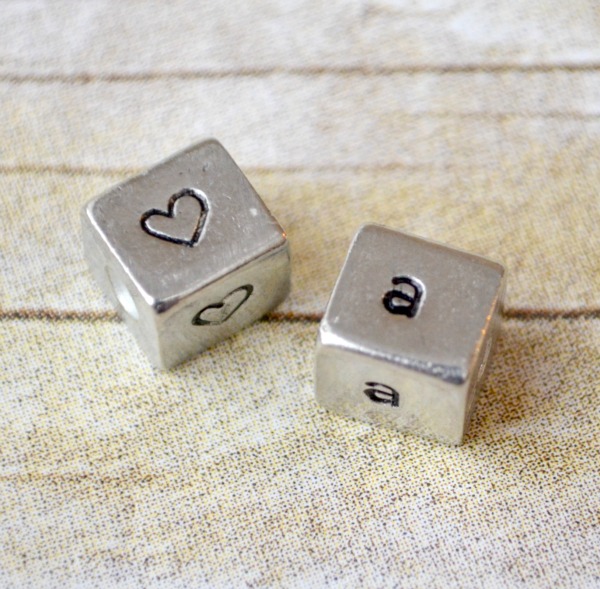
Choose whatever design/letter stamps you want to use. I chose my initial, a, along with an anchor and a heart. Place a cube on your steel stamping block and hold your stamp with the design side down in the center of the cube’s surface. Firmly tap the top of the stamp with the hammer to create an impression. Rotate the cube and repeat on all four of its solid sides. Do the same with your other two cubes.
Step 2: Use ImpressArt Stamp Enamel to darken your designs.
This enamel is one of my new favorite crafting supplies! It comes in a squeeze bottle and all you have to do is squeeze enough onto your design to cover it completely. Let it dry for 10 seconds, then wipe off the excess with a cloth or paper towel. The part down in the crevices of your design will stay!
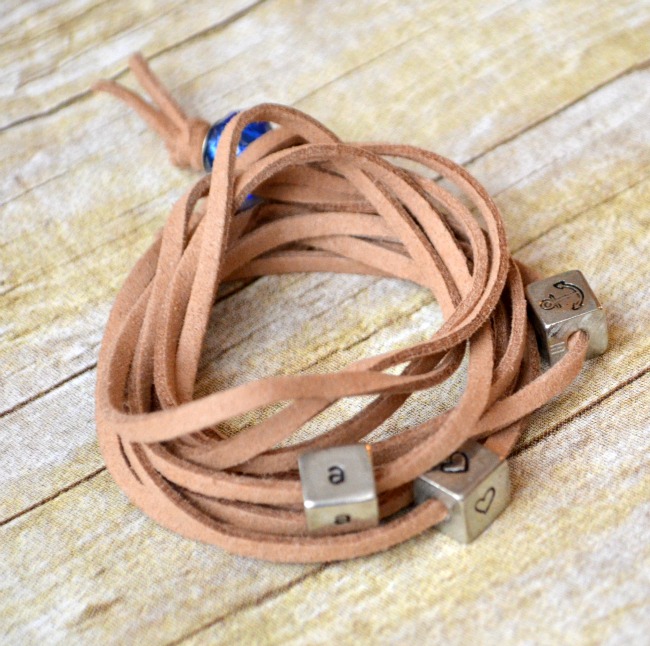
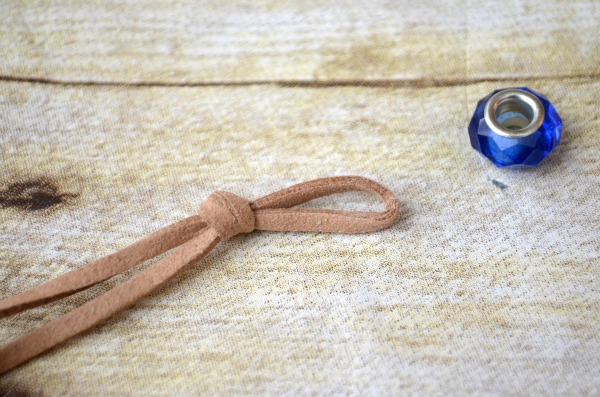
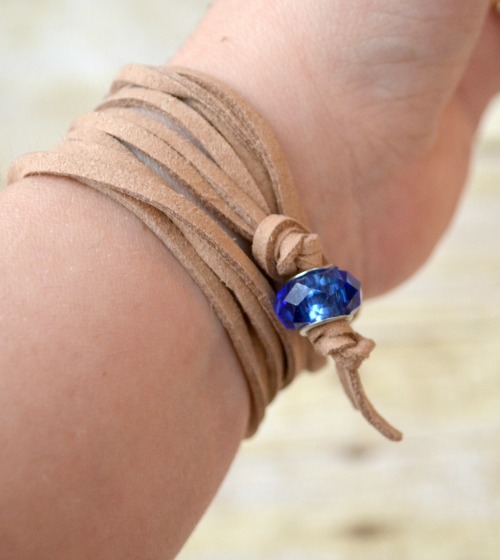
Step 3: Cut a length of cord and fold it in half. Tie an overhand knot on the folded end that is the right size for your bead to pass through.
You can make the bracelet as long or as short as you want. Just wrap the cord around your wrist until it’s a length you like, then trim it. When creating the loop, make sure your bead can fit through it, but not too loosely since this is how you will secure the bracelet on your arm.
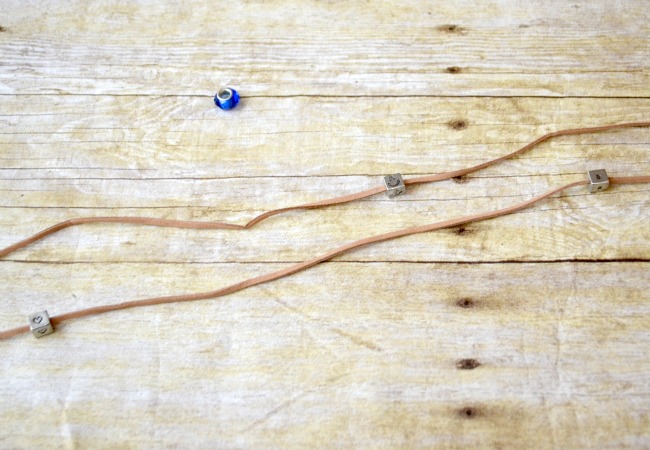
Step 4: Slide each cube onto one of the pieces of cord.
These are easy to move and position once you wrap the bracelet onto your wrist, so don’t worry too much about placement.
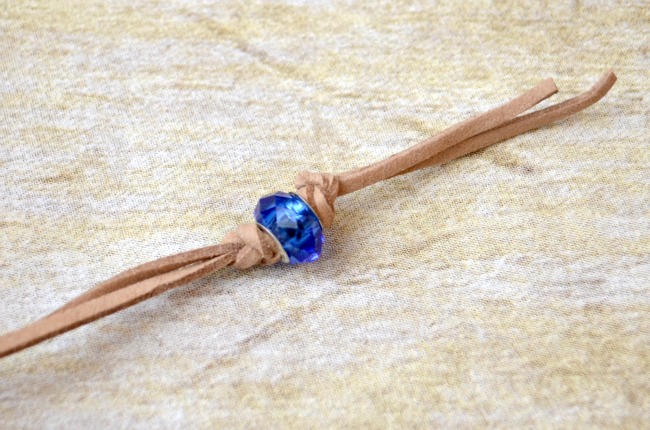
Step 5: Tie an overhand knot on the other end of your cord. Thread your bead, then tie a second knot to hold it in place.
At this point, you will want to try the bracelet on and make sure that the bead lines up with your loop. If not, you’ll need to adjust the placement of your knots. Once you get the right spot, trim the extra ends of the cord.
That’s all there is to it! Your bracelet is finished and ready to wear.
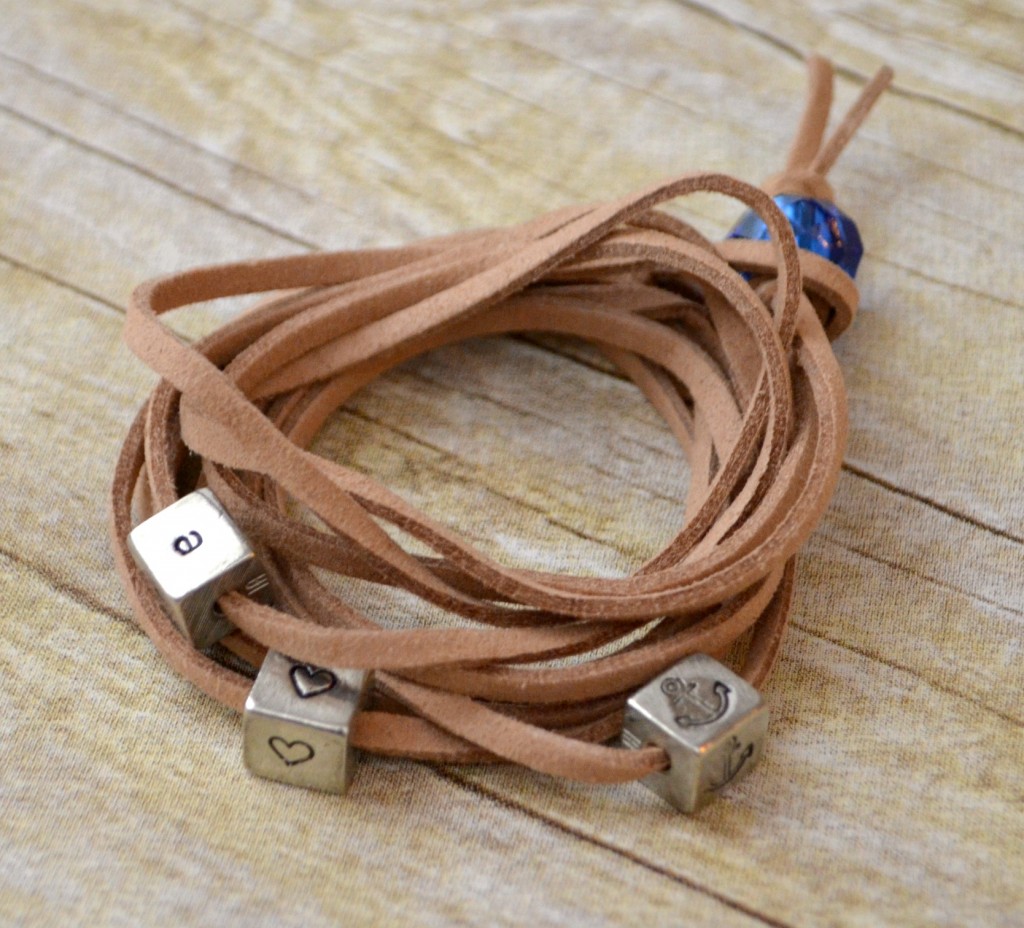
Just wrap it around your wrist and secure it in place by threading the beaded end through your loop.
Then, you can adjust the cubes as you like, spacing them out by gently sliding them on the cord.
What do you think? Is this something you’d love to create and/or wear? What designs and letters would you choose to represent yourself?


Love this, Amy!