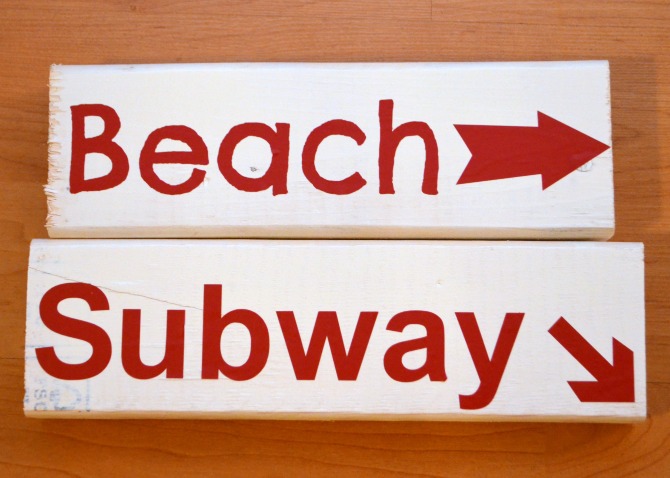
Wooden Travel Signs
The past week and a half have been really exciting for me because I {finally, after waiting for literally years!} got a new couch and loveseat for our living room. Which meant I could finally start decorating the way I wanted to! First, I transformed an end table from Goodwill, along with our coffee table, then I set to work on other décor. We found a fun little globe at Target the other day that has the teals, yellows, and greys I’m using in the room, and it inspired me to go with a bit of a travel theme. I had some scrap wood left over from another project I’d done, so I pulled out two pieces and made some travel signs that remind me of my favorite places; one for the beach and one for NYC!

Materials:
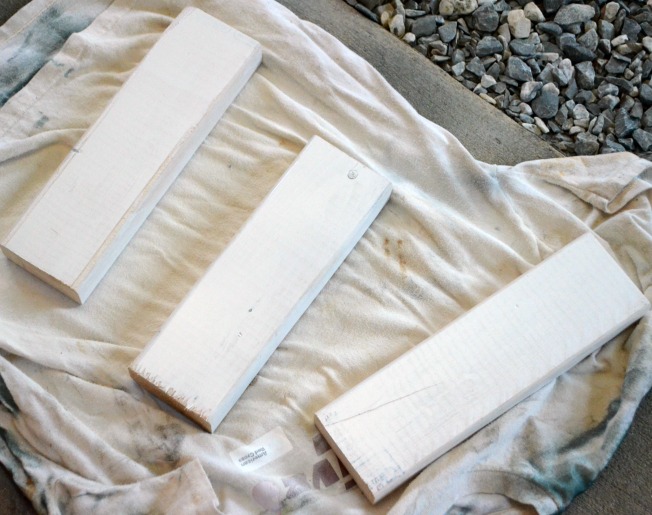
– wood blocks {mine were 2x4s cut into pieces approximately 12″ long}
– Krylon ColorMaster White Gloss
– FolkArt Home Decor Chalk, Cascade
– FolkArt MultiSurface Paint, Black
– FolkArt Home Decor Wax, Clear
– soft cloth
– sandpaper
– vinyl, any color
– transfer paper
– Silhouette cutting machine and software {you could also use scissors but it’s way more tedious!}
Step 1: Spray paint your wood white. You can do the sides and back if you like, but what’s really important is the front. Let it dry and give it another coat so that it’s a nice bright white.
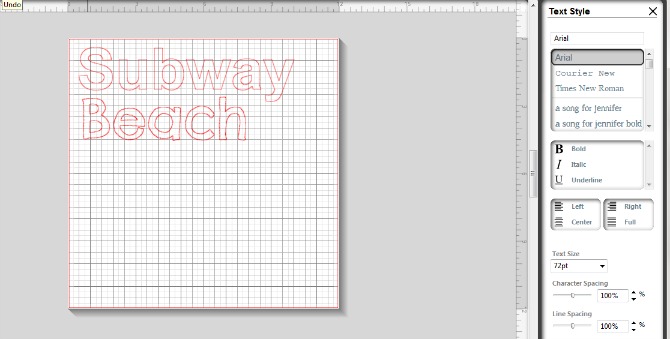
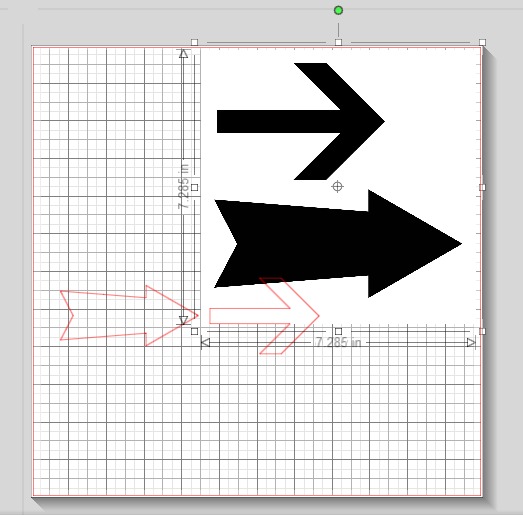
Step 2: Create and cut your words and arrow images with your cutting machine.
I started with the words first. I typed “Subway” in bold Arial font. Then, I chose Chelsea Market for “Beach.” I went ahead and cut those out of some scrap red vinyl I had.
Next, I went into PicMonkey and made a design with two arrows. I saved it to my computer, opened it in my Silhouette Studio, and chose the “Trace” feature. Once I put a box around the area I wanted traced, I picked “Trace Outer Edge” and I had my two arrows to cut. I removed the original design, dragging it off of the cutting mat area, and then cut the arrows.
Step 3: Use transfer paper to help adhere your designs to your blocks and keep them straight & evenly spaced.
Step 4: Paint the entire block. I used black paint for the subway sign and chalk paint that matches my end tables for the beach sign. I gave each sign two coats, letting the paint dry in between.
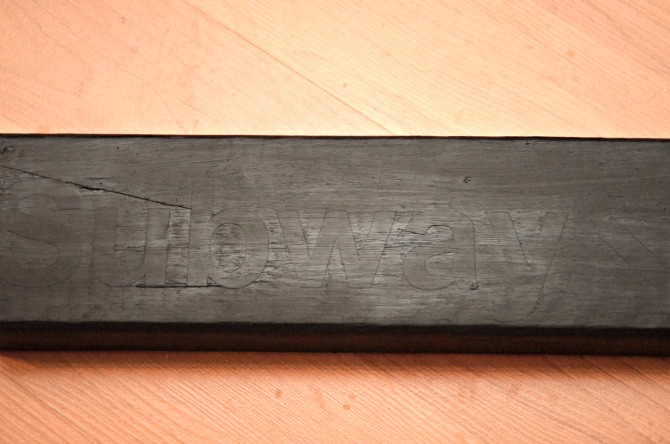
Step 5: Remove the vinyl once the paint is dry. It should peel off like stickers to reveal the white paint underneath! It’s possible that a little bit of the paint may have seeped under the vinyl; if so, just touch it up with a small brush and some white paint. I had to do that for the Subway sign, but the Beach one was fine.

Step 6: Distress with sand paper if you like. I chose to distress the Beach sign to give it that vintage, coastal feel, but I left the Subway one as is to better represent what those signs really look like in the city.

Step 7: Apply a thin coat of wax by rubbing it on with a soft cloth. This will seal the blocks as well as give them a nice sheen. You can also seal them with Mod Podge if you prefer.

All that’s left to do is stack them {or not…they’re cute separately too} and put them on display!

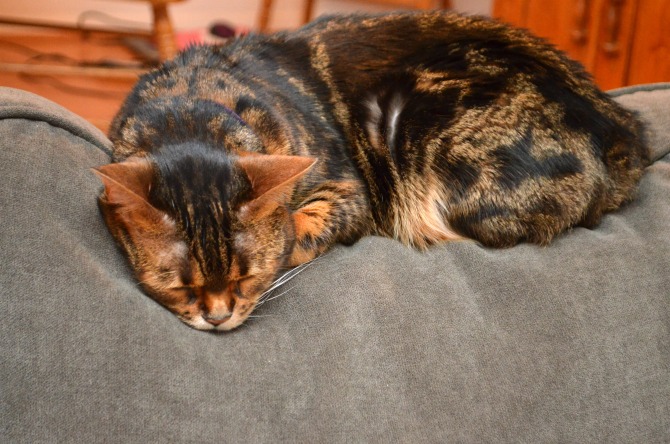
They make me smile every time I look at them…now I’m just hoping Fuzzy doesn’t decide to jump up and knock them off the bookcase every single day. At the moment she’s pretty uninterested. But I know at 4 AM that might change…
Anyway, here they are! In addition to distressing it, I also left the Beach sign a little rougher around the edges because I thought that went with the distressed look and I wanted to show the contrast between the beach and the big city.

I’m really enjoying having a daily reminder of two of my favorite places. They couldn’t be more different, but both have such a special place in my heart!

Here they are in their new “home” on the bookshelf, next to the fun globe. I love the way they help tie in the travel theme and the color scheme I’m using. Stay tuned for some more photos coming soon of the whole room!

What about you? To where would your signs point?