
Stamped Wrap Ring with the Dremel Micro 8050


Friends, I am super-excited and proud to show you today’s project because guess what…I used a power tool for the first time! Usually in the Artsy Family, if there’s a job requiring power tools that needs to be done, hubby is the one to handle it. But this time, it was MY turn. Recently, I saw a really cute wrap ring in a magazine that I wanted to figure out how to make for myself. I quickly discovered that my normal stash of tools and supplies weren’t going to do the job; I also needed something that could cut metal and sand it too. What I needed was the Dremel Micro 8050. Take a look at how I used it to make my ring a reality!

Materials and Tools:
– Dremel® Micro™ 8050 tool
– 1/4″x6″ Rectangle Copper Stamping Blank
– Juniper Alphabet lowercase metal stamps
– Black Permanent Marker
– Metal Stamping Hammer and Steel Stamping Block
– Textured Hammer
– Jewelry Polishing Cloth
– Ring Mandrel
– Scrap of ribbon or paper and scissors
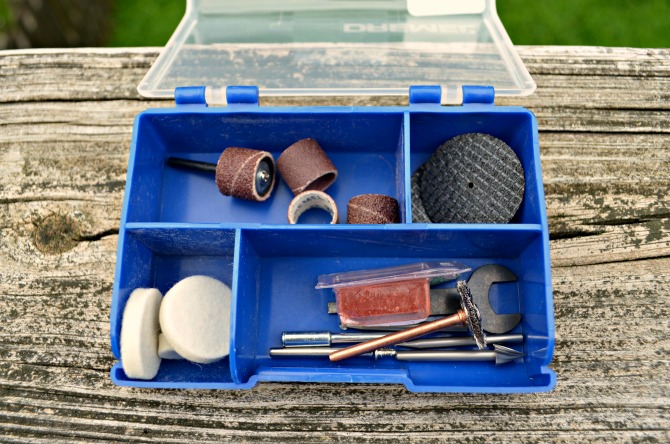
You may already be familiar with the Dremel brand because they offer a full line of tools suited for all types of craft, hobby, and DIY projects. This particular tool, the Dremel Micro 8050, is their most powerful and precise rotary tool, designed to cut, carve, engrave, sand, grind, sharpen, clean, and polish. It’s fully compatible with all Dremel rotary tool accessories, but it already comes with plenty of its own. If you look in my little accessory kit, you’ll see all the different attachments that are included, like the cutters, sanding drums, and polishing wheels. Ready to see how I used it? Let’s get on with the tutorial, shall we?
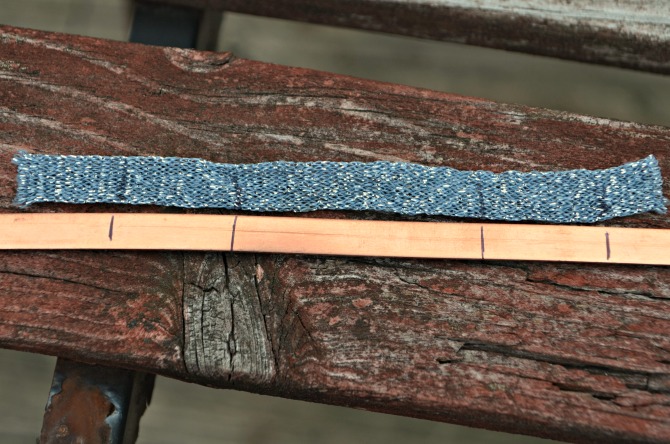
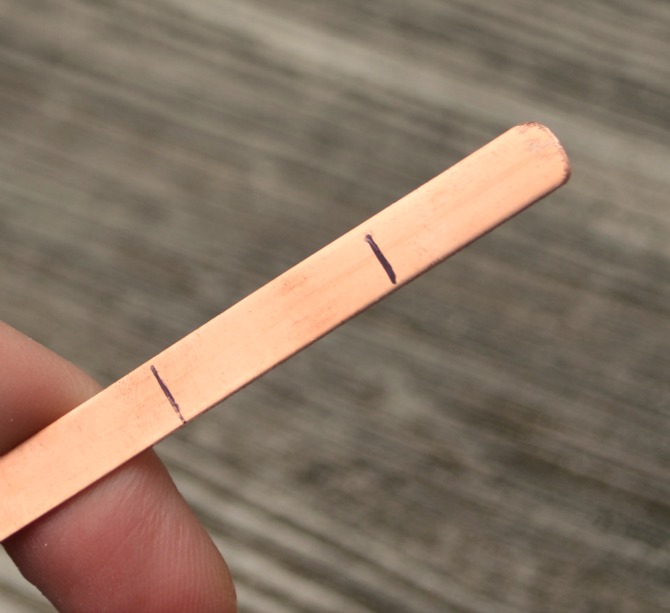
Step 1: Mark a cut line and stamping guides on your copper blank. The blank I had was 6″ long which was more than enough to wrap around my finger twice, so I needed to cut off the excess before I did anything else. In order to ensure that the ring would fit properly, I took a piece of ribbon and wrapped it around my finger the way I wanted the ring to look. I cut it to that length, and I also marked it so that I knew which two sections of the blank would end up being in the front of the ring. I laid the ribbon next to my blank and transferred those markings to it using a black permanent marker. While I was doing all that, I had my cordless Dremel tool charging on its docking station so it would be ready to use.
Step 2: Use the Dremel Micro 8050 with the high speed cutter attached to cut your blank on the line you drew. Notice the adjustable speed at the bottom of the tool. The recommended speed setting for copper is around 15, so that’s where I set it.

I followed the instructions in the manual for attaching the cutting disc as well as for how to actually do the cutting. It recommended going back and forth over the area, which is what I did. There’s LED front lighting too, to illuminate what you’re working on.

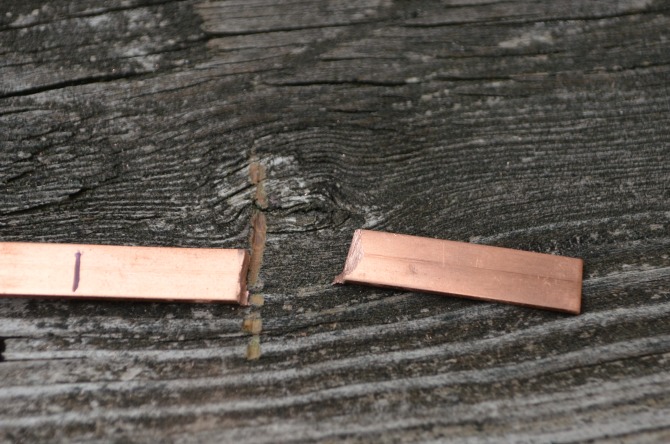
Before I knew it, I had two pieces; one that would become a ring and a little scrap piece for another project later. {…andddd I may or may not have put a little dent in the wood on the deck…my bad}.
Step 3: Use the sanding drum to smooth and round the edges on both ends of your blank. Since I’m going to be wearing this on my finger, I needed the edges to be smooth and comfortable. I decided not only to take care of the rough edge where I cut the blank, but also to round all of the corners so they didn’t poke me or catch on my clothes, etc.
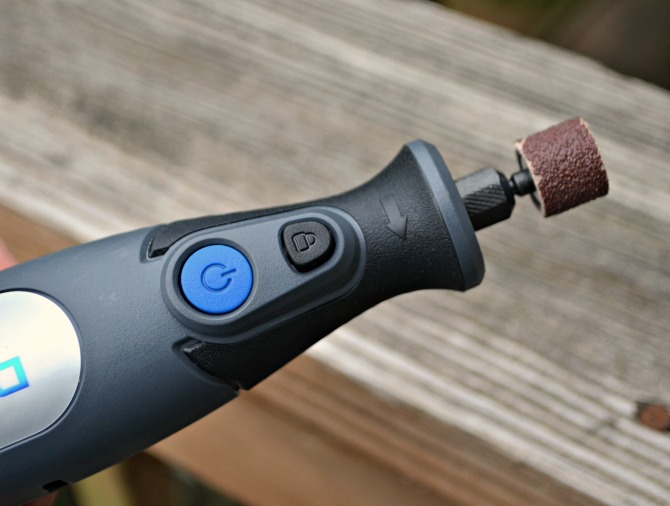
The sanding drum did the trick beautifully. All that was left was to add my words and turn the blank into a ring shape!
Step 4: Stamp your words in between the guides you marked on the blank. I asked you all for suggestions on the Facebook page, and many of you suggested the phrase, “Dream Big!” I like that a lot, as it reminds me not to put limits on what I think I can do, but to keep pushing myself to do big things! So, I stamped the word “dream” in the first marked section, and “big” in the second. If you’ve never done metal stamping before, check out my step by step photo tutorial, Basic Metal Stamping, which will walk you through it.
Step 5: Darken words with black permanent marker, then use polishing cloth to remove excess as well as your guide marks.
Step 6: Use texture hammer to create dimpled effect.
Step 7: Wrap blank around ring mandrel, using hammer to help push it into the correct shape.

I am so excited about how this turned out! It’s just what I envisioned, and it was especially fun because I got to learn about and work with a new tool in the process. I’m loving the smooth, rounded corners, and I’m already thinking about how I can do the same thing to other square blanks I have for necklaces and more.

It would also be really simple to do this same thing but with a shorter blank, cutting it just long enough to wrap around the finger once and be a “normal” ring. In the meantime, I’m thrilled with this one!

What about you? What would you make with a Dremel Micro 8050? Would you use it to cut? To engrave? To sand? To polish? You’ve got a chance to win one…here’s how:
Dremel wants to celebrate its fans’ brilliant projects, work and ideas! Now through October 12, share, tweet or post photos on Facebook, Twitter and Instagram that depict your brilliant ideas using the hashtag #MyBrilliantIdeaSweeps for the chance to win weekly prizes, including free tools and handmade gifts, or the grand prize: a custom-engraved Honda scooter and a Micro 8050. Visit www.facebook.com/dremel for rules and to learn more.
I would absolutely love to see one of you win! And if you don’t win, you can purchase the Micro 8050 online at Amazon.com and HomeDepot.com for $89 USD. Oh, and trust me, if I can use a power tool successfully, so can you!

I was selected for this opportunity as a member of Clever Girls Collective and the content and opinions expressed here are all my own.


How pretty, Amy. Now that you’ve had a taste of power tools, there will be no stopping you. 🙂
How fun! I love how you used the dremel to help you cut your ring! What a great idea.
What a fun ring….I never thought to use a dremel in jewelry making! 🙂
Your ring is very nice…You did a great job with your first power tool project…
Love your nails too… 🙂
What a fun ring!! Awesome that you made it with a dremel!! Love it!!
Adorable! I LOVE my Dremel!
I love this idea! Totally going to give it a go with my Dremel!
Love-Love-Love Dreme! Great project, Amy.
Love this ring! You totally rocked the dremel!
This is so pretty, Amy!! I love it!
Gorgeous!! Love how it turned out!
A dremel can do so much! It’s awesome!
So cute! I love the copper and the words you chose. I just tried the Dremel for the first time too… and I can’t wait to try all the other attachment tips!
Super cute, Amy! I love the wrap-ring look. And I’m a big Dremel fan; I’ve had their multi-tool for a while and I used it a LOT in the renovation.