
Textured Stamped Cuff
Hey, friends! Remember the stamped bracelet I showed you a week or so ago, and the really cool bracelet bending pliers that made it so easy to create? Today, I want to show you how you can use the same basic technique to create a gorgeous textured cuff. It takes less than 15 minutes to make and it’s a great beginner stamping project because there are no letters to line up and space out…just texture; you can’t go wrong! Take a look…

TIME REQUIRED: 10 minutes
DIFFICULTY LEVEL: beginner
SPECIAL TOOLS/SKILLS: basic metal stamping tools
Materials:
{Thanks to my sponsors GoodyBeads and ImpressArt for my materials; all opinions are my own.}
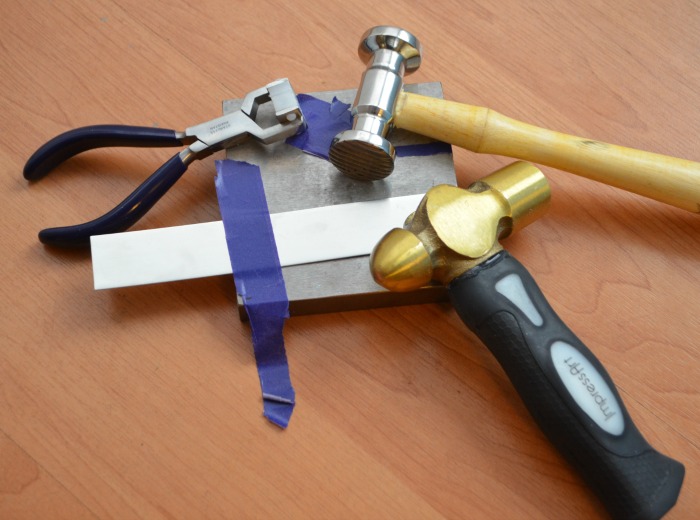
– steel stamping block
– Impress Art metal stamping hammer
– Narrow Stripes Texture Hammer
– Bracelet Bending Pliers
– Painters’ Tape
– 1×6″ Rectangular Soft Strike Aluminum Stamping Blank
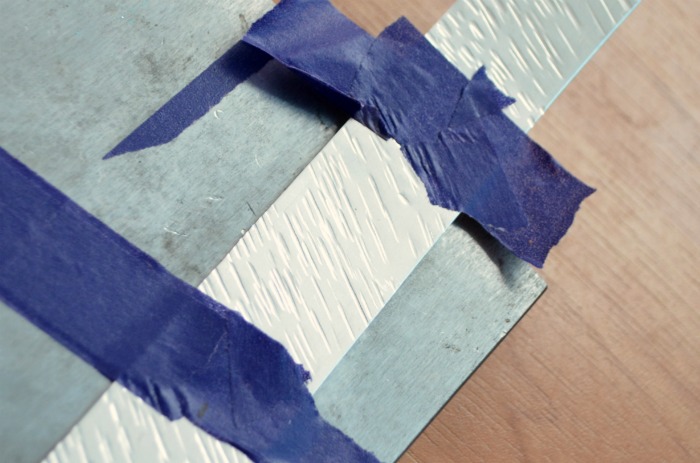
Step 1: Tape your blank to the stamping block.
Step 2: Use your texture hammer, striking repeatedly, to create lines going in one direction. You will need to move your tape and slide the metal to cover the whole thing. You seriously can’t do this wrong. Just hit it a bunch of times, and you’re good to go.
Step 3: Turn your metal piece and repeat, so that this time you are stamping lines that go the opposite direction to create a cross-hatch pattern. Be sure to tape your blank in place while you work or it will move and you won’t get clean impressions.
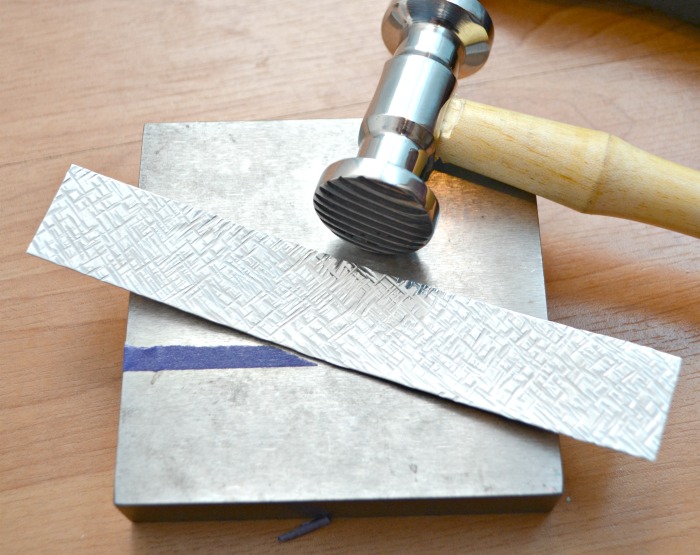
Step 4: When you’re happy with the amount of texture, use the nylon jaw bracelet bending pliers to shape your metal rectangle into a cuff! Just place it in and squeeze gently and repeat as you move around the blank.

That’s it! You’re ready to wear it!

The great thing about these cuffs is that you can easily adjust them to fit any size wrist. You can also create different looks by using different texture hammers. The other side of the hammer I used creates a dimpled circles look which is also really fun. There’s another hammer with wider stripes too, as well as small squares. Lots of options; something for everyone’s style.

What do you think? Is this a bracelet you’d add to your accessory collection?

Texture stamping is a great place to start if you want to try metal stamping but are nervous about doing the words! It’s an awesome effect and you can’t mess up; whatever you do, it’s art! That’s definitely my kind of project, how about you?!


Amy, I love this! So gorgeous and Easy! Question though… the edges of the blank, are they “sharp”? Do you need to file or smooth them down at all? Thank you for the great post 🙂
I love this…It turned out really cute…You do nice work. You make it look so easy. 🙂
Beautiful!! It turned out great!!
I really MUST try metal stamping!!! This is beautiful!
Love this! Great job!
The two hammers, not sure do you place the texture hammer and hammer that with the other hammer?
Love the fine texture achieved, looks very classy
Nope, for the textured part, you just use the texture hammer by itself and it will create the indentations. You use the regular hammer just for the letter part!
I am wondering if you can possibly stamp already shaped bracelets. I have a bunch of blanks that are already shaped and I am not going to use them all. Thank You
You probably can, but I don’t have the slightest idea how, unless you flatten them first and then reshape.
Cool idea and really neat result. Well written directions too. Someone should come up with a texture hammer that has various textured screw on heads so you only need one hammer (set) instead of numerous ones to achieve different textures. (Unless they are already available that is).