
Crafty Chaos With Erin: Love Story Sign
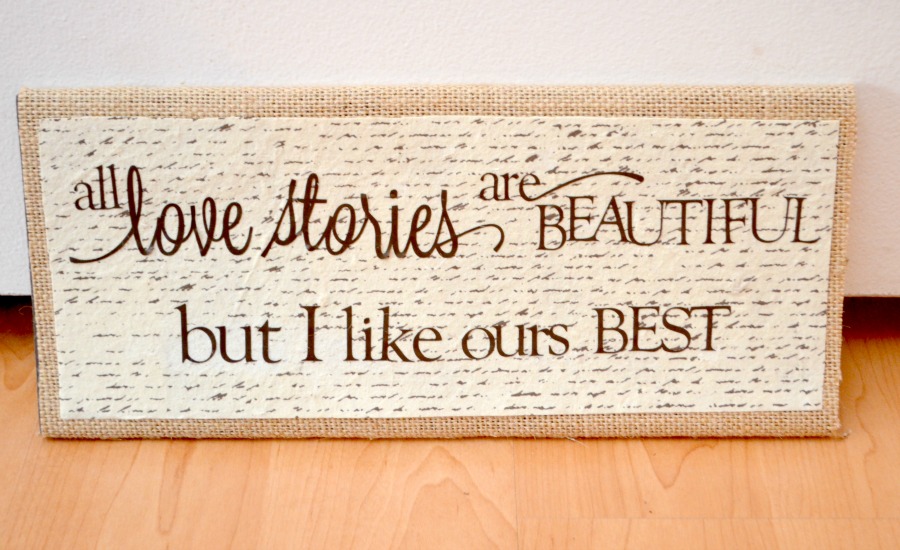
It’s that time again, friends…my bestie Erin, who is also a monthly contributor here at One Artsy Mama, is back today to show you one of her latest projects! Take a look at this fabulous Love Story Sign {and yes, she’s right when she says I was trying to figure out how I could keep it for myself}!
Happy Spring One Artsy Mama Readers! Life is, as usual, happy and chaotic, but I wanted to
show you how I finished the wall from my last post. I came up with a simple plaque, with a
saying that really ties everything together. Let’s remember how the wall used to look, ok? Oh
that’s right, super boring.

The Mixed Media Family Tree was perfect, and went along with a family picture beautifully,
but I still wanted to add a little something. I began browsing and found a saying I fell in love
with, and the rest, as they say, was history!
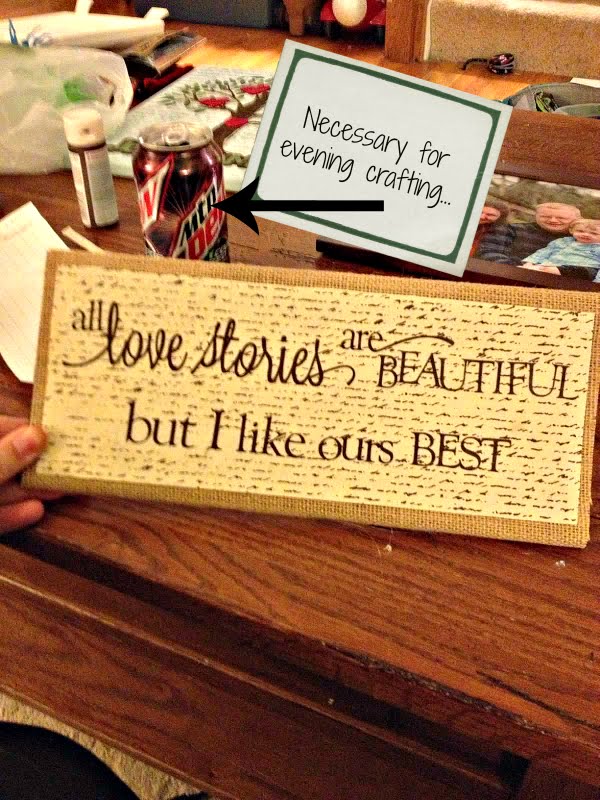
Materials:
-piece of wood or a canvas
-paint (I used Martha Stewart’s chocolate brown)
-two pieces of scrapbook paper-I wanted to play with textures, so I used a sheet of burlap
material, and a sheet that had almost a cotton feel to it
-vinyl (I used brown), you could also use paint
-hot glue or Tacky glue
-picture hanger for the back
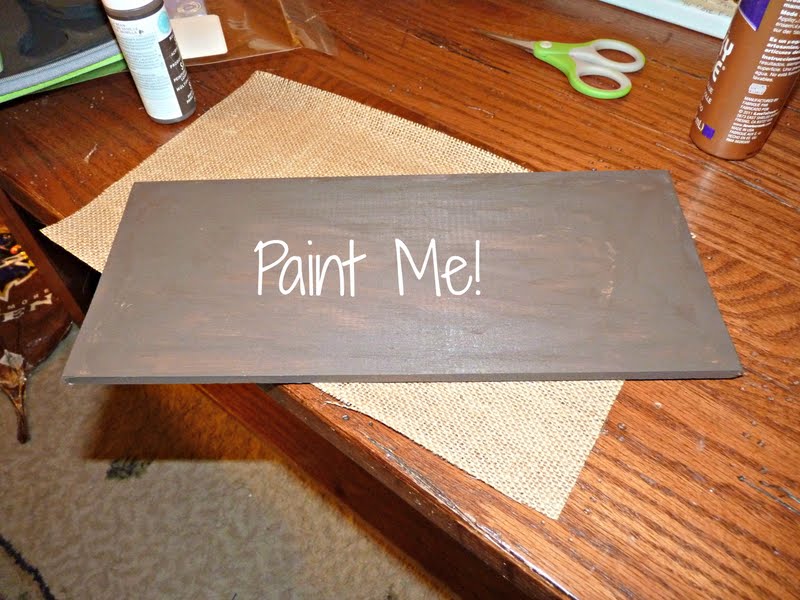
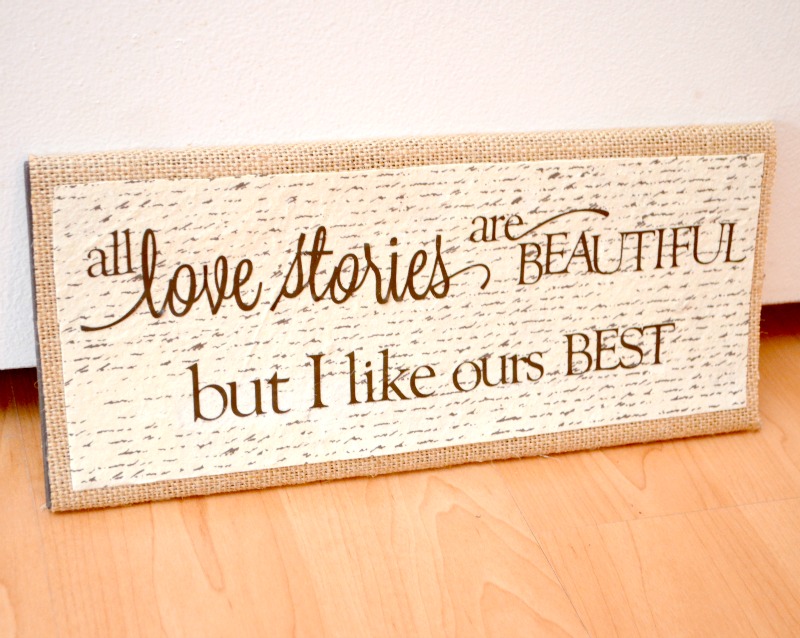
Step 1: Paint your surface
I went ahead and painted the whole piece of wood, because I wasn’t entirely sure of my
vision, but this way all my edges were covered!
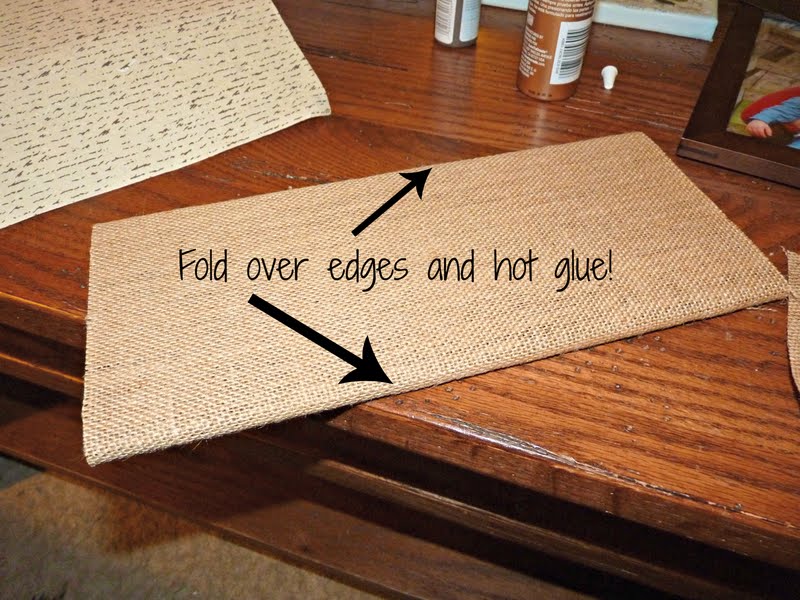
Step 2: Trim and cut the background scrapbook paper. Fold over the edges of the wood and
hot glue, for a nice, clean edge.
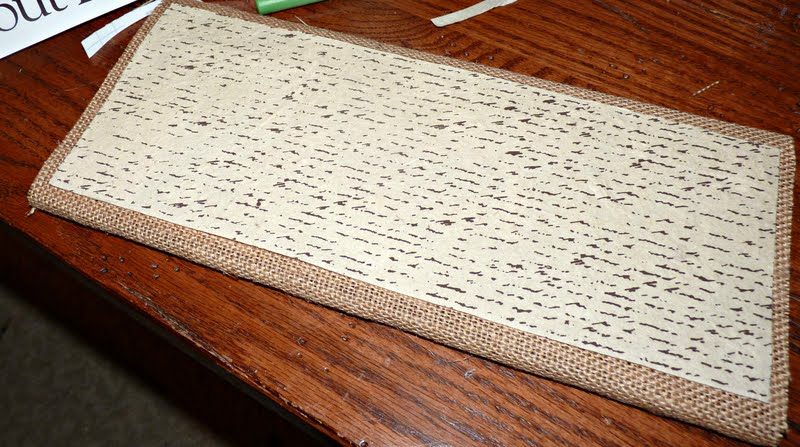
Step 3: Trim and cut the top piece of scrapbook paper, glue in place.
Step 4: Decide and design wording
I used a saying I found on Silhouette’s website, but altered it to get the look I wanted. This
easily could be done in a word processing program as well!
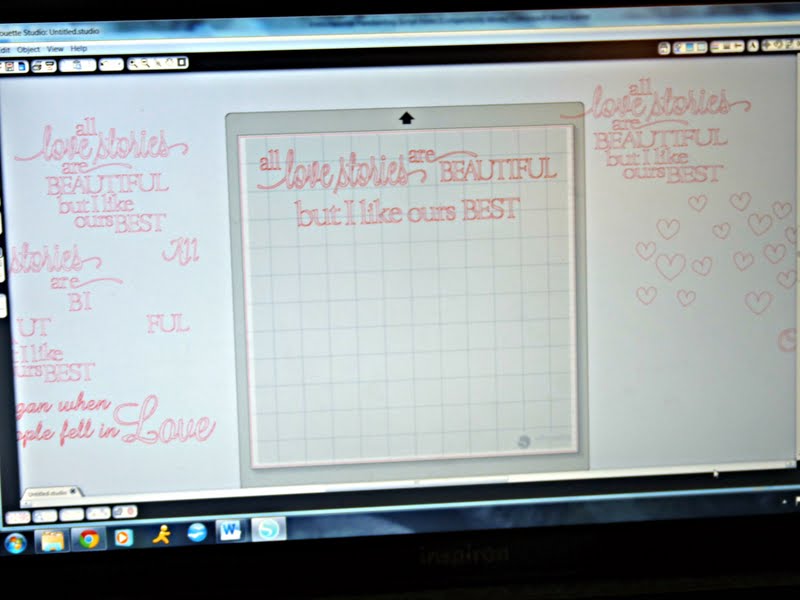
Step 5: Cut out the vinyl letters, or paint/trace/stamp letters on to the plaque.
I was able to use my Cameo to cut out the lettering and stick it on the plaque, but there are
many other variations of applying the letters!
Step 6: Attach a picture hanger on the back if you’d like to display it on the wall
And that’s it! Easy peasy, right? And look how cute my wall is!

This project only took one evening, after the boys went to sleep, and I’m so pleased with how
it turned out. I’m pretty sure I also got the “One Artsy Mama’s Husband Stamp of Approval”
when Dan saw it and I know Amy was trying to figure out how to steal it, so obviously this
project was a win! Ha! See you next month!


Love the sign!!! It looks great on the wall!! Thanks for the tutorial. I have another project now to add to my list…lol!!
I love this idea!