
Lots of Buttons: Spring Tree Canvas
Happy Monday, friends! As you know, I wear a lot of different hats: mama, wife, blogger, dancer, friend, artist… Today, I am so excited to announce one more. I’ve accepted a job where I will be teaming up with Lots of Buttons to write weekly blog posts about the projects I {and sometimes Little Crafter} create using a variety of the fabulous buttons they have to offer! Of course, I’ll still be sharing my usual variety of other tutorials too, just as you’ve come to expect here at One Artsy Mama. The only difference is, Mondays will now be Button Days! Each Monday, you’ll find a brand new tutorial here {as well as on the Lots of Buttons blog} for art, jewelry, kids’ projects, or home decor made using one or more buttons! I’m excited and I hope you are too!
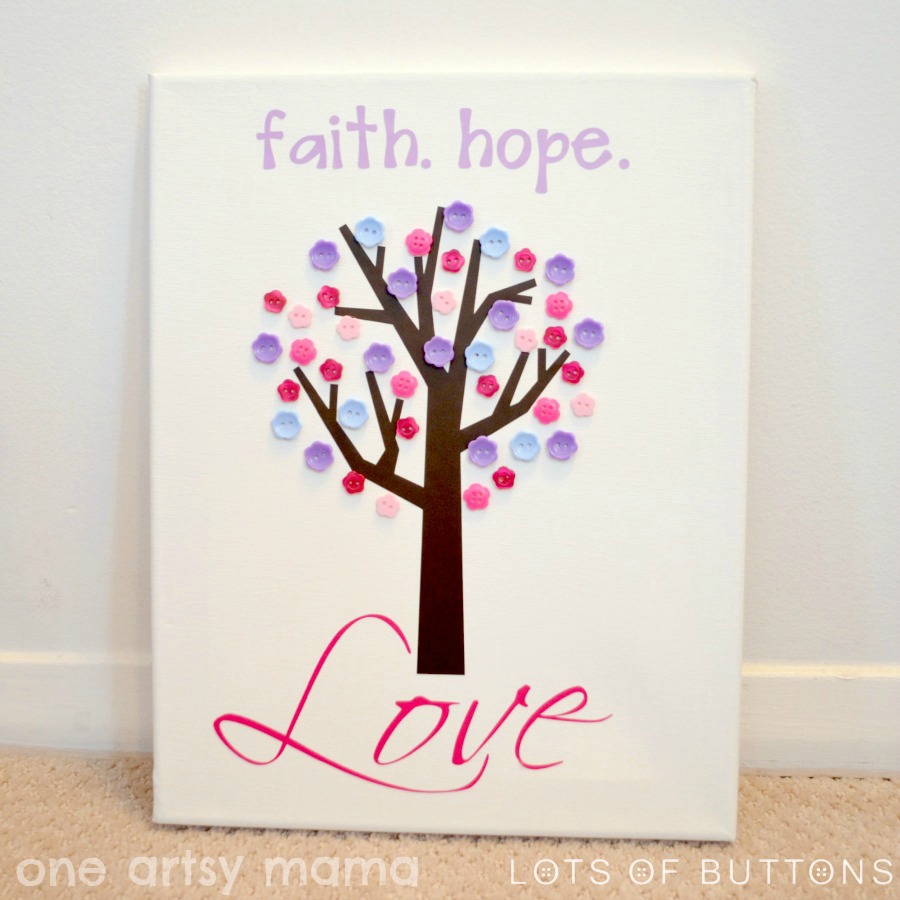
For my first project, I wanted to make something bright and full of springtime cheer. I seasonally rotate the artwork in the entryway of our home, so I decided to make a canvas for this Spring using buttons as the blossoms on a tree. Here’s how I did it:
Materials:
– assorted buttons
– 11×14″ Canvas
– adhesive vinyl
– vinyl cutting machine and software {or scissors and a lot of patience!}
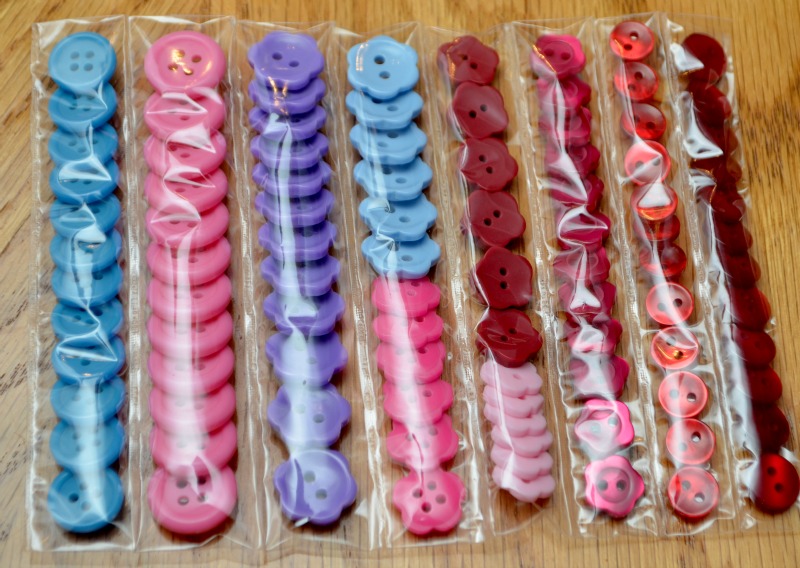
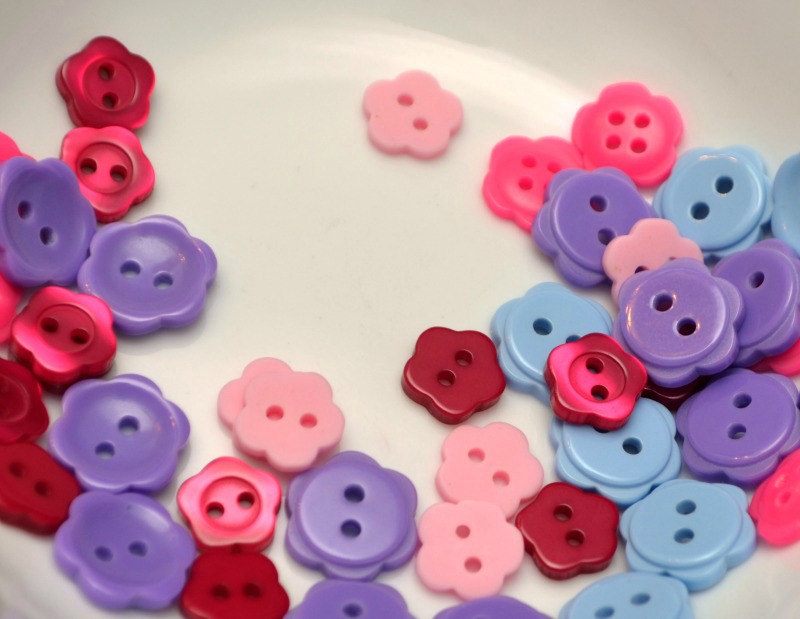
The specific buttons I used for this project are:
“Karen” {6, 14 mm}
“Josie” {12, 14 mm}
“Abe” {6, 14 mm}
“Marisol” {12, 10 mm}
“Naomi” {6, 11 mm}
I loved that they came sorted by type and sealed in individual rows!
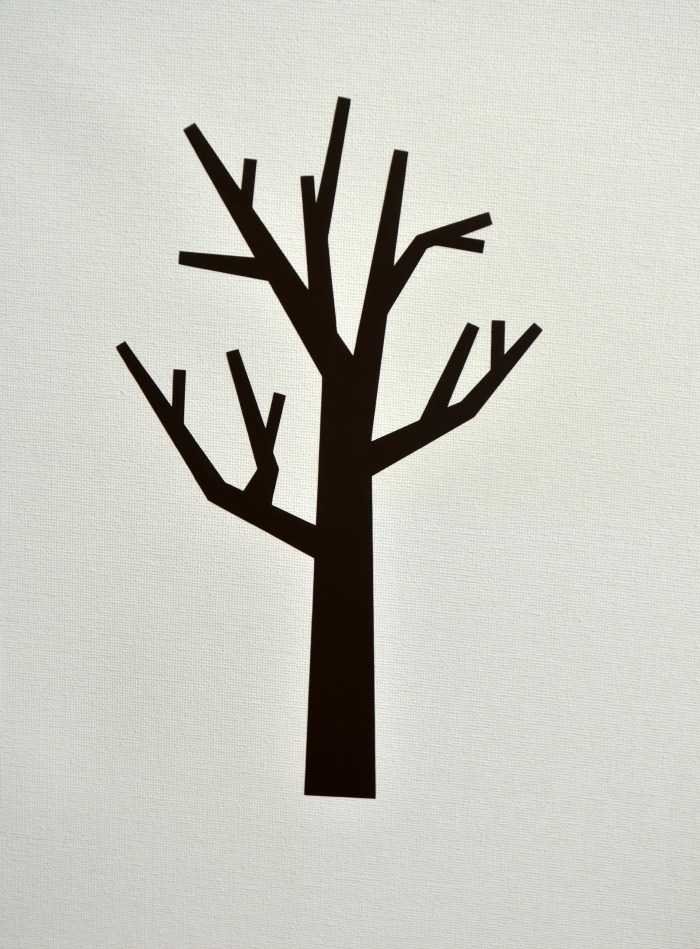
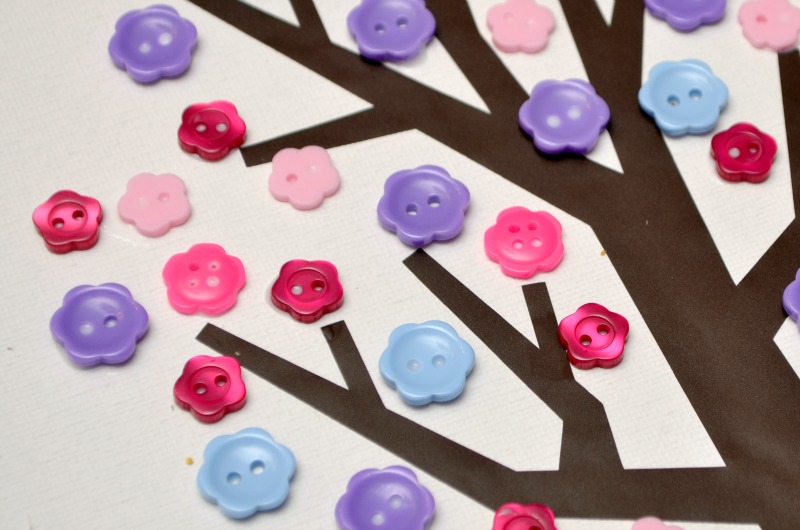
Step 1: Cut tree shape from brown adhesive vinyl and adhere it in the center of your canvas.
If you don’t have vinyl or a cutting machine, another option is to sketch or trace a tree shape onto your canvas and fill it in with brown paint.
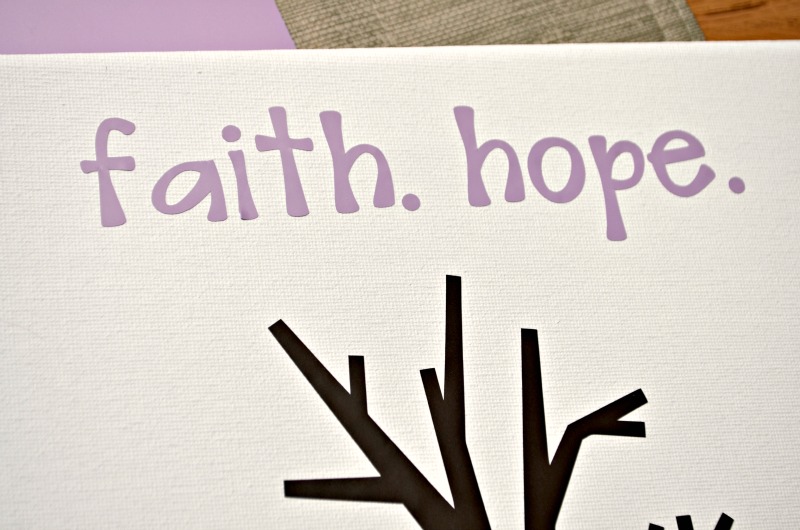
Step 2: Cut words from adhesive vinyl and adhere to your canvas. I chose “faith, hope,” and “Love.”
Once again, you can opt to paint the words instead, if you prefer.

Step 3: Add your buttons to the tree branches, attaching them with craft glue.
My “Little Crafter” really enjoyed helping with this part. He liked deciding where the “flowers” would go and placing them down on the glue.
Once the glue has dried completely, you’re ready to hang your art and enjoy it all season long!
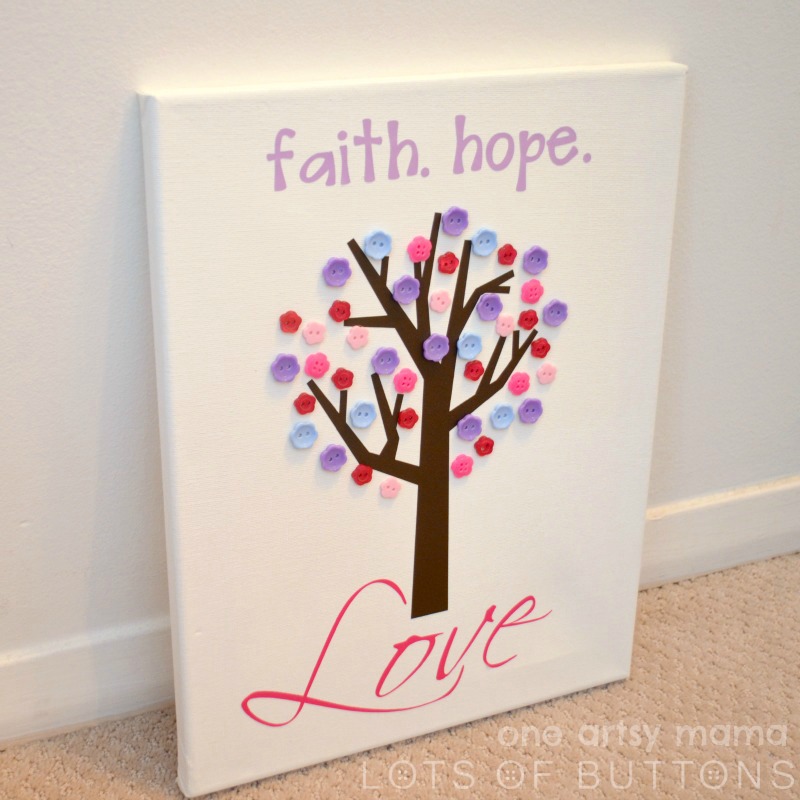
I think it would be beautiful to make one of these in fall colors too! I just may have to put that on my to-do list…
Thanks for stopping by! I hope you enjoyed this week’s button project! While you’re here, don’t miss out on the big Silhouette Giveaway…help me celebrate two years of blogging and enter for your chance{s} to win!
Hugs & Glitter,


Amy,
Congratulations! I am jealous, these look like beautiful buttons and I am a button girl. Your canvas came out beautifully and I can’t wait to see what else you create.
Hugs,
Maureen
How pretty!!! The buttons are perfect for the tree – just loving it!
Thanks for sharing!
Hugs,
Suzan
This is absolutely adorable! I’ve seen a lot of button trees, but yours is definitely in my top favourites! 🙂
Thanks for sharing!
Olivia Xx
http://www.myfavouritethingsblog.com/
How adorable! Those little buttons are adorable as the flowers. Cute!
Love this project, and the quote to go with it. Very spring-timey, but I could also see how you could use harvest colors and have a super fall tree!
~Emily
http://tossedsaladlife.com
That is too precious Amy! Great job! I love all the fun things you and LC create together – such an awesome momma!
What a fun project, Amy!
I just love this…it’s so colorful and happy.
Makes me want Spring…
Amy, this is so cute! I love it! I love the addition of the cute buttons that make it pop out and add that little flare.
Love it!! So cute!! Congratulations on your new writing assignment. Cant wait for Button Mondays!!
I have been wanting to make one of these! I love trees anyway, and I love these little flower buttons! Would make for super cute nursery art. 🙂
What a fun project! I’d love to have all those buttons organized by color 🙂 So pretty!!
How fun! This would go perfect in my girls room , and those buttons are SO cute!!
Very cute! This would be great wall-sized too!
Mackenzie 🙂
I love this! So pretty 🙂
I found your cute post at Happy Hour Friday! I love this. The colors are festive and the buttons are perfect! I love the variety you have here. Very cute! Krista @ ahandfulofeverything.blogspot.com
This is so beautiful and simple. The canvas would look great in my bedroom. Thanks for sharing.
I would LOVE to make one of these, but I am such a frugal crafter that I don’t think I could part with that many buttons on one project!!! lol
http:// Your button tree is unique!
I have a plan for my huge stash of buttons. I am saving it for the winter project.
Too much to do in the garden right now. Plus I am 75 and I have to conserve my energy.
I do not let my age effect my projects I just pace myself.
My sweet husband helps me with some of the household chores. ;-O
Hi, Amy!! This is so pretty! I went out and bought the brown vinyl for the tree trunk and pretty buttons. I’m trying to find a tree trunk in the Silhouette design library to use, but am not finding this one or one I like. Can you possibly share a link to the one you used, if you remember which one it was? Thanks so much! 🙂
Hey, Courtney! It’s called the Love Grows Stronger tree and it’s on sale for 50 cents right now! http://www.silhouettedesignstore.com/?page=view-shape&id=38741
Thanks so much, Amy! 🙂 Can’t beat that it’s on sale, too!