This is a story about two adorable boys with the same name and a special friend called Owlbert.
{Plus how you can make one too!}
Part 1 of the story begins shortly before Little Crafter’s second birthday…almost two years ago! My good buddy Brandee {who is an artsy mama herself} had made some cute little stuffed owls for her kids and I decided to try and whip one up for LC. I showed him a picture of the ones Brandee had made, then took him on his first ever trip to JoAnn Fabrics!
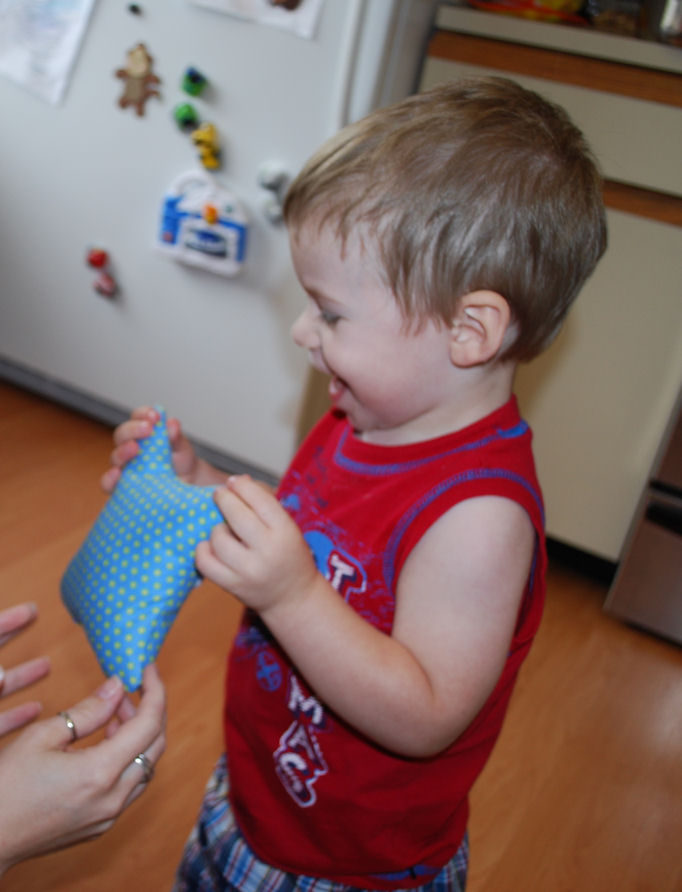
He chose a blue fabric with green polka dots all by himself.
While he napped, that day, I made what would become an instant friend, Owlbert. The first time he saw it was just priceless.
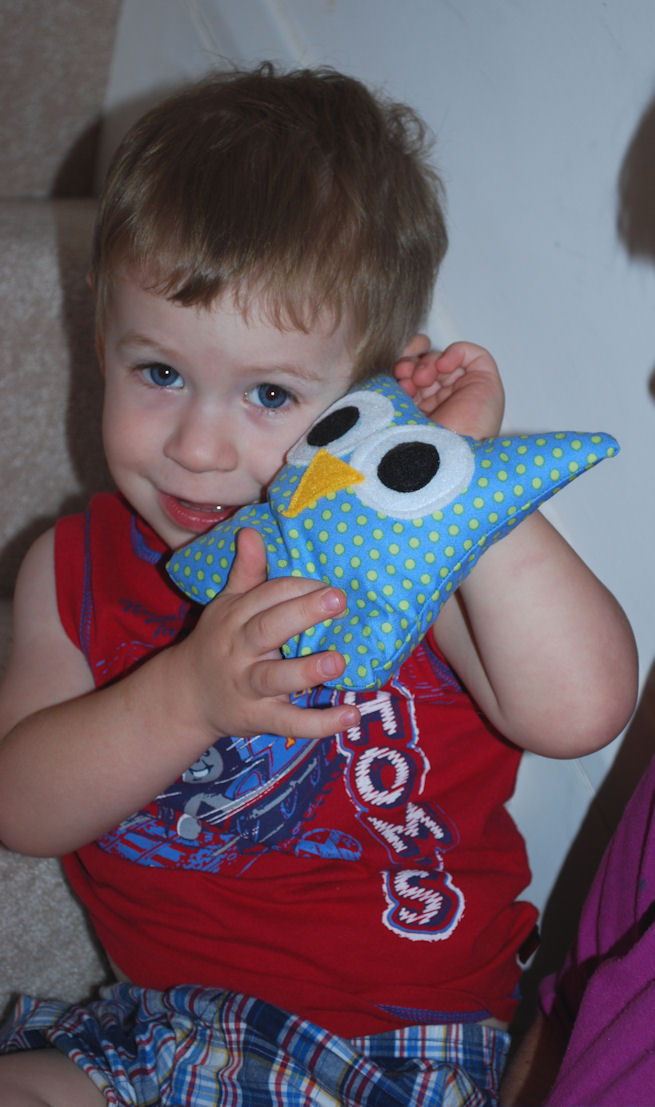
Look how tiny he was then! LC and Owlbert bonded immediately and have been good buddies ever since.
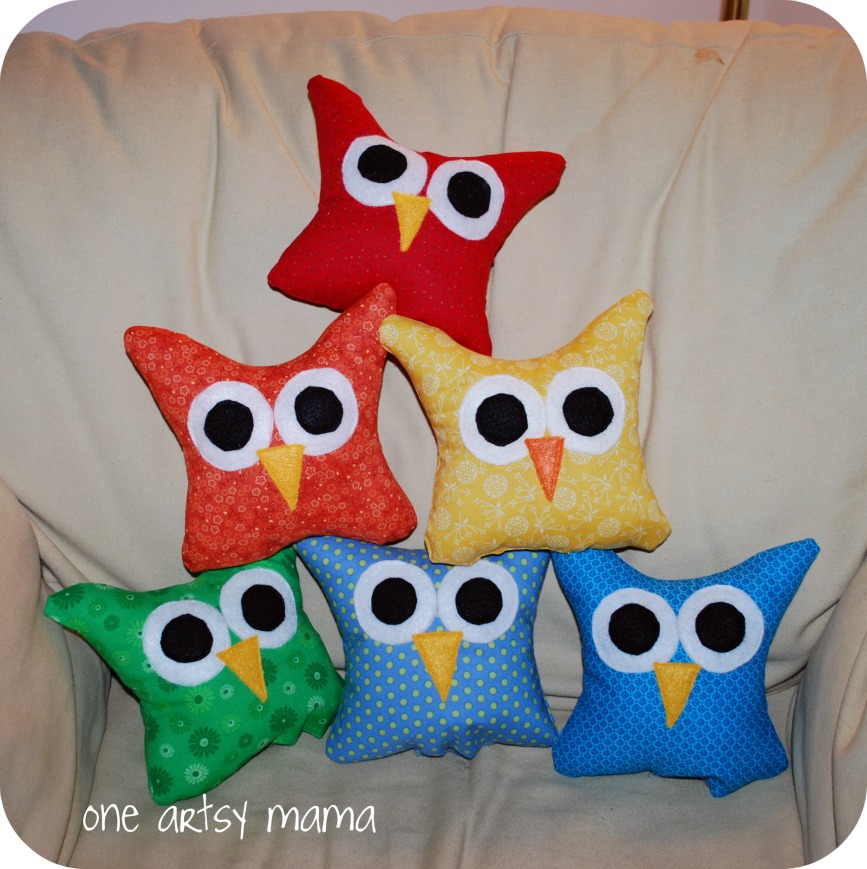
While I was at it, I whipped up a few more, which ended up being given as gifts to some of LC’s buddies like Mr. L, Lil’ Miss M, Baby A, and Princess R.
Part two of the story begins last Sunday when we arrived at church. Little Crafter always likes to take a stuffed friend with him, and this time he’d chosen Owlbert. The girl who was on nursery sign-in duty happens to have a 5 1/2 month old son with the same name as LC, and when she saw Owlbert, she asked where I’d gotten it because her little guy’s room theme is owls and she wanted to get him one. I told her I had made it and she asked if I sold them on Etsy {which made me wonder if perhaps I should…}. I told her I’d just made it for LC for fun a few years back. But, I tried to casually ask her about the room colors {blue and grey} then made a covert mission to Walmart for some grey fabric. I whipped one up for LC to give to his little namesake as an Easter gift! Here’s what I did:
PLUSH OWL
Materials:
– fabric of your choice and matching thread
– black, white, and yellow felt and thread
– sewing machine
– polyfil
– pins and needle
– paper, scissors
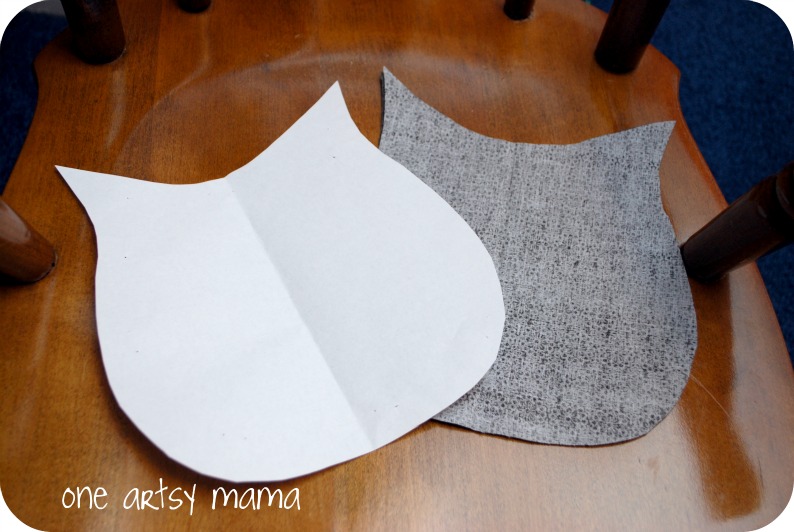
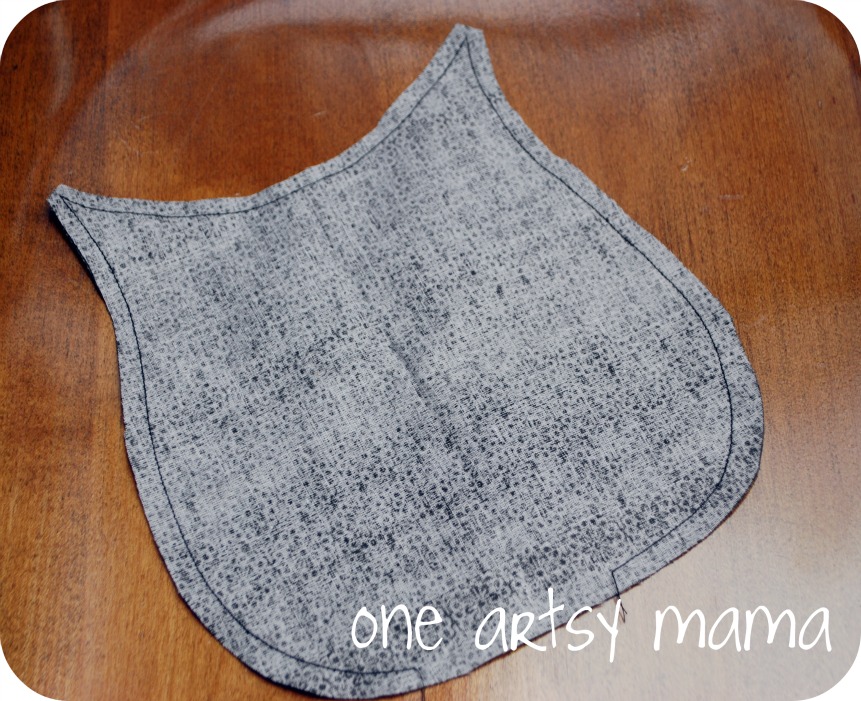
STEP 1: Sketch a pattern. Fold fabric in half, pin pattern on, and cut so that you have two pieces; a front and a back. I wasn’t totally happy with the original shape, so I made this one a little rounder and fuller and I like it better.
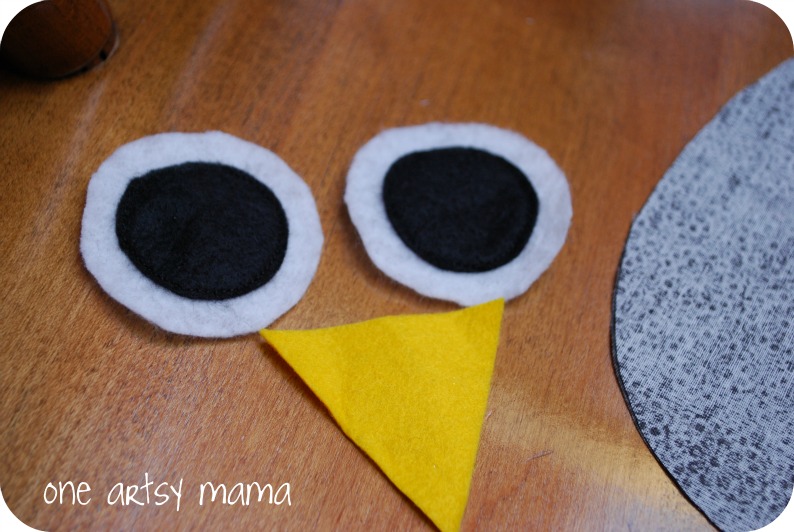
STEP 2: Cut two circles from white felt, two smaller circles from black felt, and a triangle from yellow felt. I traced a tape measure and the end of a spool of thread for mine so I’d get even looking circles.
STEP 3: Sew black circles in the centers of the white circles. You can do this by hand or by machine, or if you prefer, you can use craft glue instead. I like to sew them so they hold up better and won’t be a choking hazard for infants.
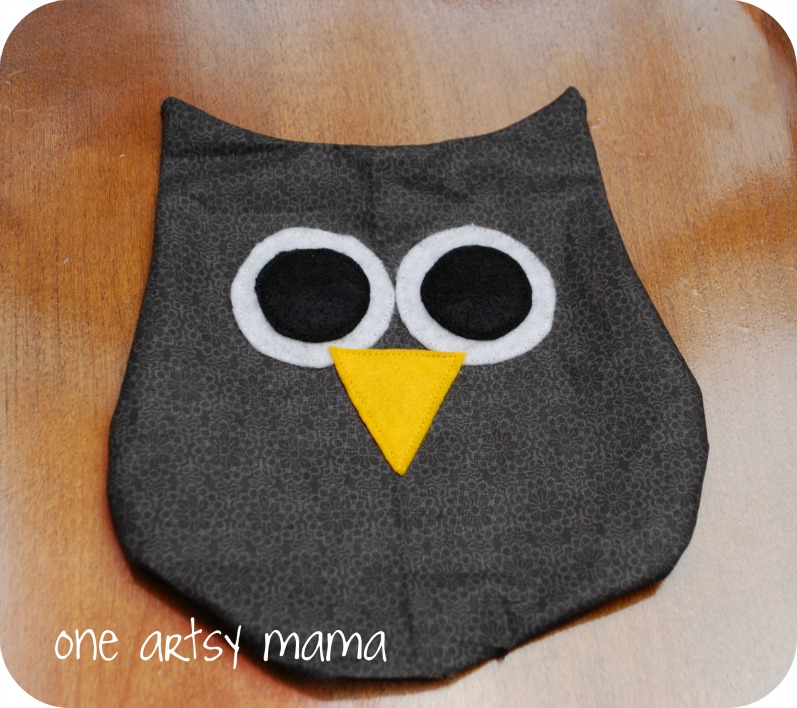
STEP 4: Position eyes and beak on the right side of one of the fabric pieces. Pin in place, then sew. Again, you can use the machine or do it by hand; up to you. Mine is done on the machine. This is the most tedious part, but it’s well worth the effort.
STEP 5: Pin fabric pieces together with right sides in and sew around the edges, leaving about 2 inches at the bottom unstitched. Clip your corners.
STEP 6: Turn right side out.
STEP 7: Stuff with polyfil {LC helped with that part} and hand stitch the opening at the bottom closed.
Whoo’s cute? Me!
I’m hoping the little guy will like his owl as much as LC does! If you make one, I’d love to see how it turns out!
PS- The fabric in the background is what I used for my new valances in the master bedroom…likey?
Owlbert is adorable! Owls seem to be quite popular- I think you should definitely be selling them. One of my first projects for my blog was Christmas stockings from an owl print fabric last year.
This is so sweet! My living room has a substantial amount of owl decor and I’m wondering if I could make a large pillow like version of this. =D As always, you are too too talented. 😀
These are absolutely adorable!!! I’m a new follower and pretty new to blogging, but making some great friends…stop by and visit 🙂 Thanks so much for this tutorial, now I know what my next project is going to be!
I followed you over from Somewhat Simple’s Link Party and these are adorable.
I would love to invite you to share this, and any other posts you would like to, at my Creative Thursday Link Party (opens at 9 pacific tonight) at http://www.michellestastycreations.blogspot.com. Have a great day, Michelle
My little “LC” still loves his Owlbert :). I looked this up because I’m going to follow this guide to make Owlbert bean bags for his birthday party coming up! Thanks for inspiring me to become one artsy mama too, and for helping me get started. Can’t wait for our craft date in a couple weeks :).


I plan on having an owl nursery one day and I absolutely love this! Will totally be making a few of these! :] So cute!
So cute, love them! Especially the bright coloured ones. Thanks for the tutorial 🙂
I find softies so intimidating but this looks like a really easy project. And who doesn’t love these little owls!!
I love these little owls! do you have the pattern as a printable?
Owlbert is adorable! Owls seem to be quite popular- I think you should definitely be selling them. One of my first projects for my blog was Christmas stockings from an owl print fabric last year.
What an adorable little owl, and so simple to make. Thanks for sharing the tutorial!
Yes, I likey… so cutie…
I love this! I may have to try it out soon. Thanks for the adorable tutorial.
Those owls are just adorable!
Oh how cute! I love that photo with all the owls in different colours.
So cute! Owls seem to be the rage right now, and I love that you’ve found a simple and fun way to make one.
I love this project! And it’s a level of sewing that I might just be able to handle.. I will surely be making an owl buddy for my little one!
This is to stinking cute. What a great job. I would love it if you showed it off at my new linky party @ Kampenlane.com.
I can’t wait to see what else you create.
~Taylor
So cute, and so easy I could make it with my niece. Great job!
This is so sweet! My living room has a substantial amount of owl decor and I’m wondering if I could make a large pillow like version of this. =D As always, you are too too talented. 😀
These are absolutely adorable!!! I’m a new follower and pretty new to blogging, but making some great friends…stop by and visit 🙂 Thanks so much for this tutorial, now I know what my next project is going to be!
Owlbert! Thats cut!! So glad you linked to Things I’ve Done Thursday!
What a cute story and cute gift. I just added it to the Pomp Party Board… though I would have pinned this anyway:)
How sweet! Hand made toys stuffies are always more loveable!;0) Thanks for partying with us this week.
Hi,
I followed you over from Somewhat Simple’s Link Party and these are adorable.
I would love to invite you to share this, and any other posts you would like to, at my Creative Thursday Link Party (opens at 9 pacific tonight) at http://www.michellestastycreations.blogspot.com.
Have a great day,
Michelle
Super cute owl Amy and I love the fabric for the valance too!
My little “LC” still loves his Owlbert :). I looked this up because I’m going to follow this guide to make Owlbert bean bags for his birthday party coming up! Thanks for inspiring me to become one artsy mama too, and for helping me get started. Can’t wait for our craft date in a couple weeks :).