
Salt Dough Ornaments: Learn from my mistakes!
Let me tell ya, we are really starting to get into the holiday spirit here in the Artsy Family! Little Crafter and I have been busy little elves all month long. We’ve been making and buying gifts in the hopes of being finished by Thanksgiving so that we can just enjoy the holidays, focus on their meanings, and experience all the joy and family time they bring. Recently, we decided to be bold and adventurous and try our hand at salt dough ornaments!

I’d never worked with salt dough before, but Mom on Timeout had a great tutorial back in July and it looked easy enough. Naturally, I pinned it {what else would I do with a great idea?!} and saved it as an idea for ornament making with my Little Crafter.
***I learned something important from our experience: just because something looks easy doesn’t mean you can’t screw it up! So, I’m going to show you not just the pretty perfect blog tutorial, but how our process really went. Take a look, have a laugh, learn from my mistakes, and have fun making some personal ornaments of your own!***
EASY PEASY {if you follow directions} SALT DOUGH ORNAMENTS
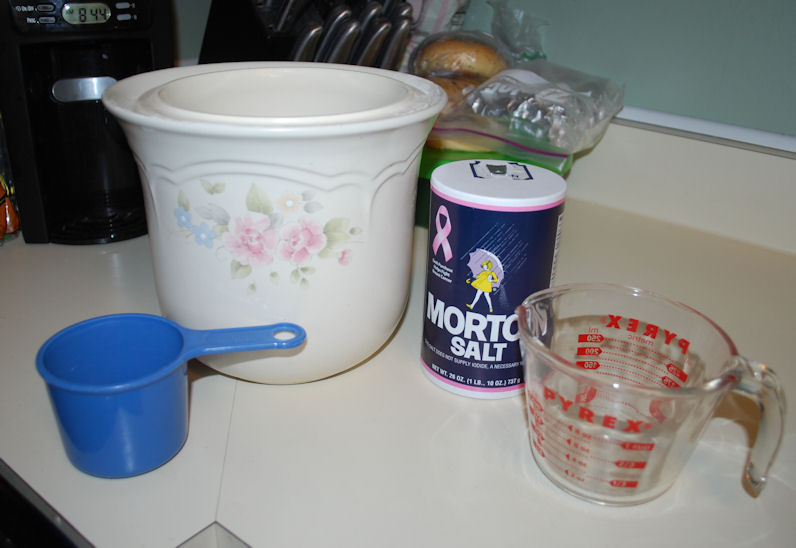
You’ll need:
1 cup all-purpose flour
1/2 cup salt
1/2 cup lukewarm water
cookie sheets and parchment paper
cookie cutters
Optional:
acrylic paints
paint brushes
glitter
clear sealer
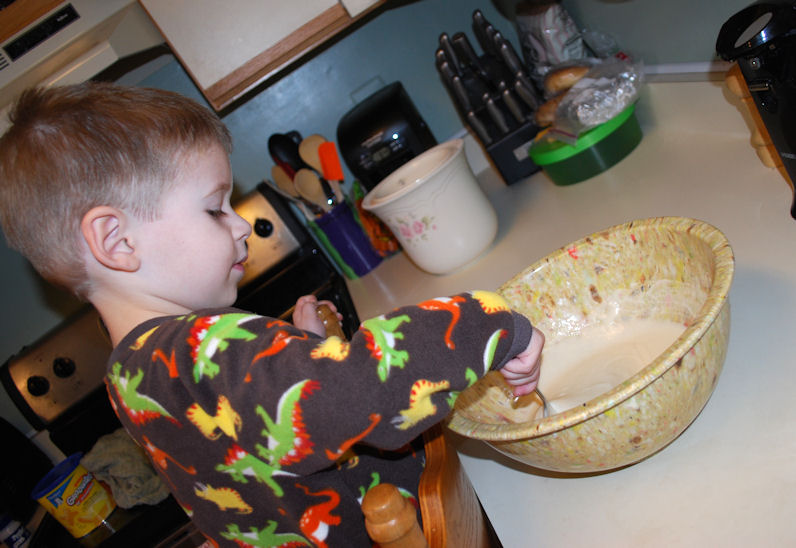
STEP 1: Add flour and salt to your bowl. SLOWLY add water, stirring until dough forms.
Mistake 1: Ok, so here’s what happened. When I skimmed Mom On Timeout’s directions, I apparently missed the part about adding the water slowly. I just dumped it all in and we started stirring and stirring…and stirring. The next step is to knead the dough for 10 minutes. But what we had was the consistency of cake batter. How do you knead batter? So, genius me decides that maybe it means to stir for ten minutes and the dough will eventually form {this is why I normally post crafts, not recipes}. Eventually, it became obvious that no, that was not the case.

Even LC knew something wasn’t right. This makes me laugh…it’s like he’s saying, “Seriously, Mom? This isn’t dough.” Soooo, I went back to the original post and realized my mistake. We dumped out the first batch and started from scratch, with Little Crafter telling me, “Do it right this time, ok, Mommy? Make it doughy. Put the water in slow.” {yes, he really said that}
STEP 2: Knead dough for 10 minutes.
My helper, despite what you see here, did not enjoy this part because “It makes my hands too meffy.”
He absolutely hates having anything on his hands…just like Daddy.
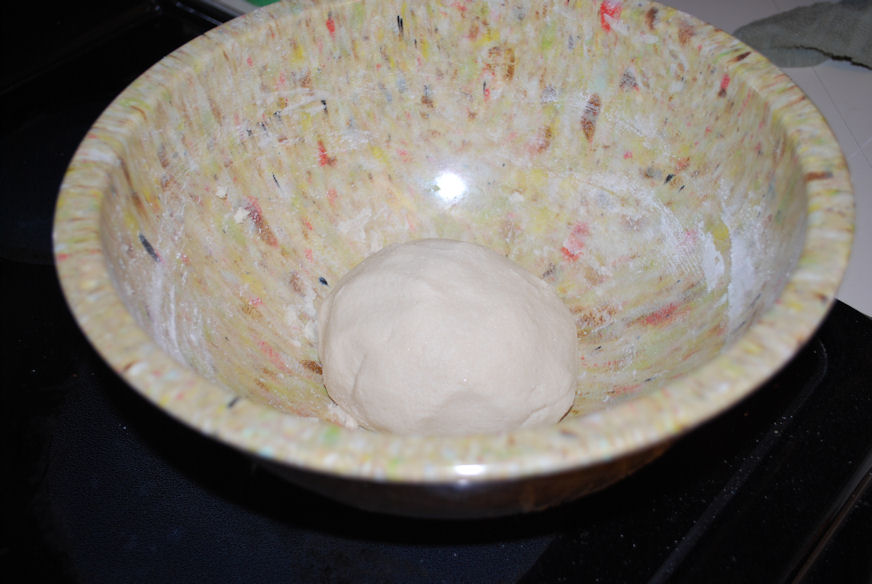
STEP 3: Let dough sit for 40 minutes.
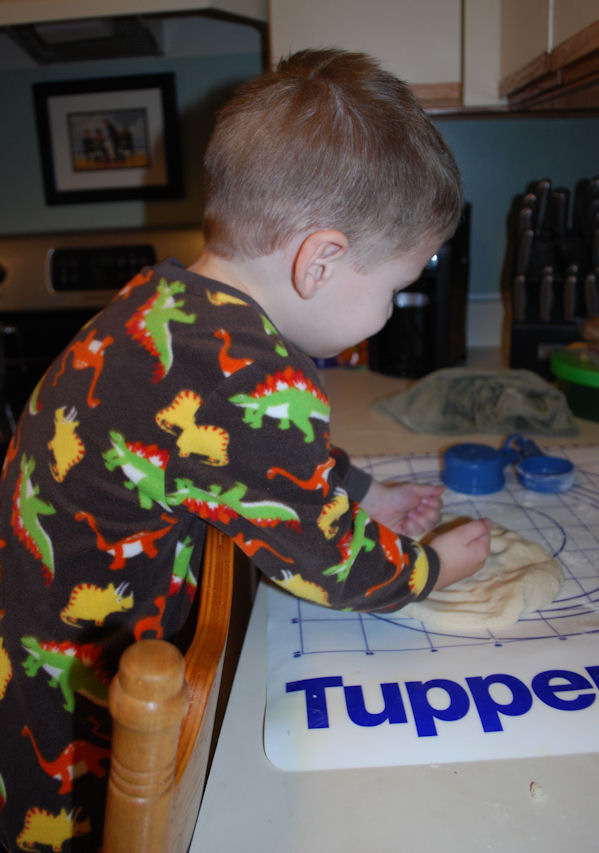
STEP 4: Roll out dough to about 1/4″ thickness and cut out shapes. Place on baking sheets lined with parchment paper. Poke holes in the tops of each shape if you are making ornaments.
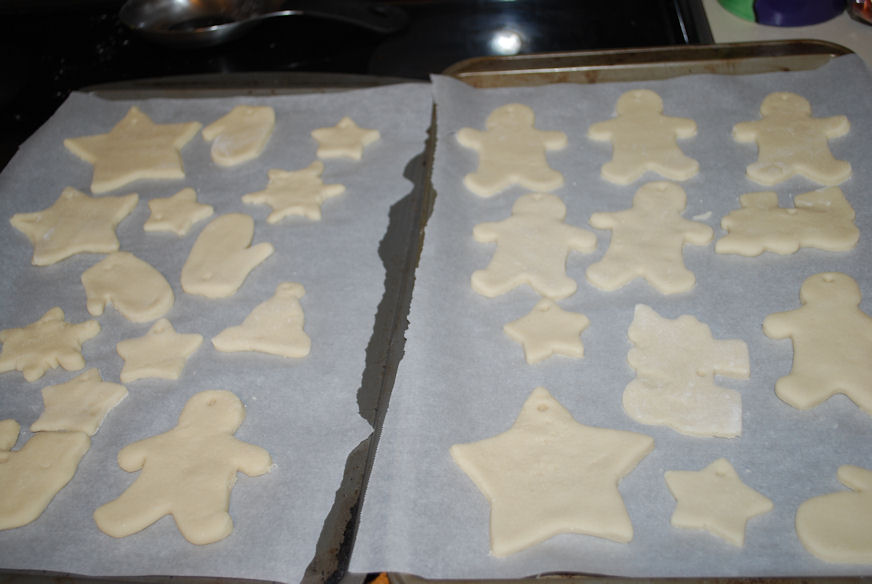 Mistake 2: At this point, we hadn’t gotten out the rolling pin or cookie cutters yet. Hey, we had time, right? So the timer beeps to tell us 40 minutes have passed, and I realize that I can only find two cookie cutters; a train and a gingerbread man. Which is apparently unacceptable to a little boy who wants stars and snowflakes and mittens too. We have more somewhere, I know this. But they’re nowhere to be found. I call hubby, who says that his best guess is that they’re packed away in one of the Christmas boxes. Which are in a closet under the steps, allll the way in the back. Behind and under things I couldn’t move if I wanted to. Poop. I decide we should run to Walmart and grab a few more. Meanwhile, Little Crafter is terrified with a capital T of Walmart because they sell those awful Baby Alive dolls which make him scream incessantly. Last year he walked past one and the motion sensor made it start talking and crying…he’s been traumatized ever since. So now that they’re out again for Christmas, he won’t go in Walmart. Sigh. We go to the grocery store where six cookie cutters cost us more than $8. Mama fail.
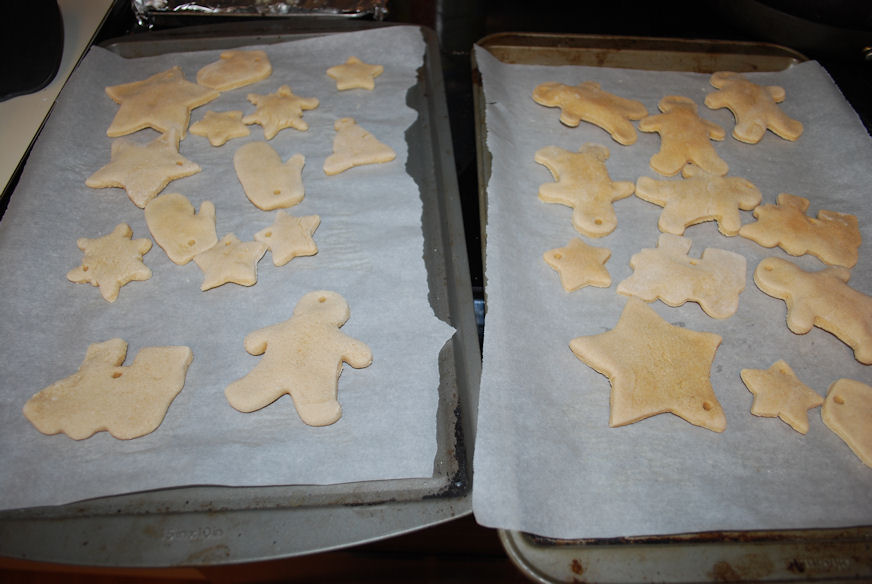
STEP 5: Bake at 250 for 4-6 hours.
This is to get all the moisture out of them. I flipped them twice, after about an hour or so each time. Ours seemed really hard and dry after the 4 hour point, and my grandmother {who was visiting at the time} declared them done, so out of the oven they came!
STEP 6: Decorate!

This was the part a certain someone looked forward to all day long! It’s really an extended project; we started it at 8:30ish in the morning and didn’t finish until 9:00 PM…and even then only half of them were painted! Little Crafter adamantly wanted to finish them all in one sitting, but we managed to convince him that it was twice as fun if he got to do it again the next day.
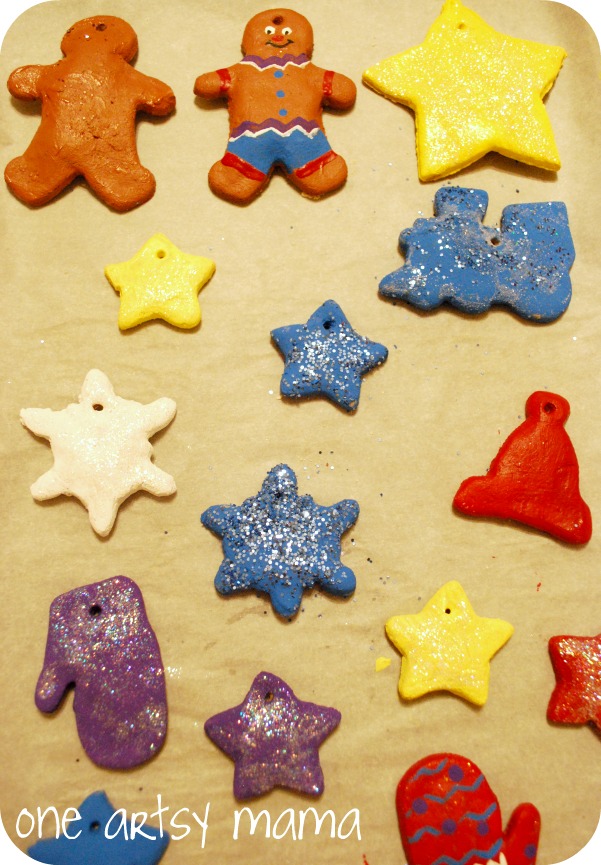
I was excited that he told me I could paint three of them: a snowflake, a mitten, and a gingerbread man.
Here’s my gingy:

STEP 7: Seal with clear acrylic spray. Add ribbon or cord for hangers when dry.
Have you ever made salt dough ornaments? Or are you going to give it a try this year? Our first batch yielded 26 ornaments for us, and since we already had the ingredients on hand {well, except for the cookie cutters} you can’t beat the price! I think these will look adorable tied onto gift packages this year! By the way, I’ll give you three guesses what Little Crafter’s favorite color is…

And believe it or not, he convinced me that we needed to make another batch less than a week later. This time, I tried another technique too, using some clean rubber stamps to stamp some messages into the dough before baking. I found that the alphabet stamps worked best and the ones with small cursive fonts were tougher to read. I really like the effect though! Here are some painted by Little Crafter {with a little mama-assistance on the detail work}. He’s really getting good at doing the base coat though, and he loves choosing which ornament and color he wants next.
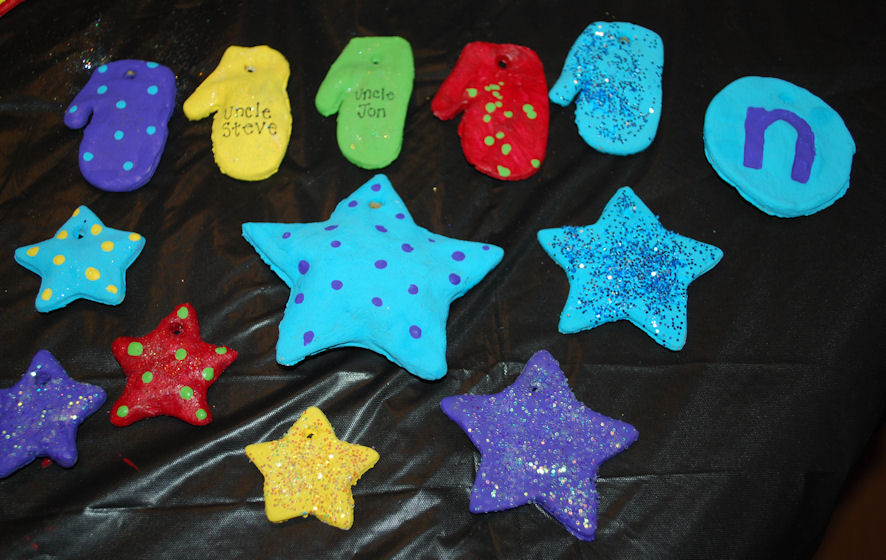
Here are a few of the stamped ones that I painted:
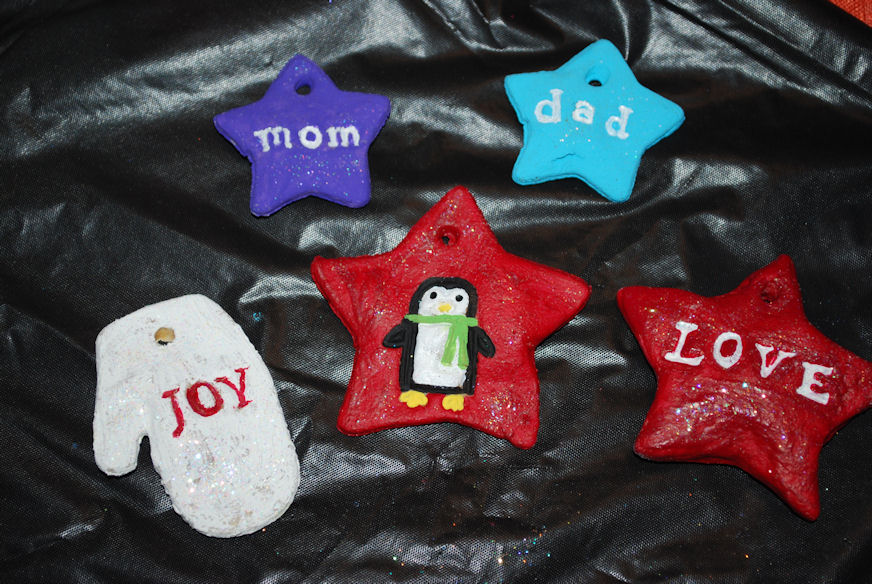
Guess which one a certain helper claimed right away?
{and yes, that’s rosemary, not pine. work with me…use your imagination :)}
For more holiday ornament ideas and DIY projects, check out my archives!


I really love this idea!
Have you thought about joining a handmade ornament exchange? You should!
PS- I’ve been meaning to do this- so it’s inevitable now that I’ve seen this tutorial!
I love it when bloggers show the real steps!LOL…they turned out really well though..and it does look pretty simple..I’m going to try this sometime this week! Thanks Amy!
I’m SOOOO glad I didn’t make salt dough ornaments this weekend, like I was going to. Thanks sooo much for sharing your mess ups. I probably would’ve just dumped the water in, too. Thanks! This will be my Thanksgiving break project….my list is getting longer!
Beautiful!! I was thinking of doing some of these with Hazel or maybe the applesauce cinnamon ones I have seen on pinterest. Yours look great!!
I’m so glad you shared this! I think mabye I should have made add water slowly part of the tutroial in bold 🙂 Yours came out great and I love your little penguin!
just made the dough! Thanks for posting this and reminding me what fun these are to do! I’m thinking my girl and I are in for a fun filled day with this craft!
You crack me up! I LOVE that picture of LC, the look of “Really” is too funny. I love how these turned out, I need to make something like this my kids soon:)
Well I guess you are the resident expert now on these little babies. Fortunately they turned out so nice in the end. It would have been heartbreaking to go through all of that without a nice end result. Love the rosemary – good thinking for staging your shot, lol.
VERY cute! I just saw another post about these kind of adorbz ornaments. Maybe I should try them…
Jamie
For Love of Cupcakes
Every year I tell myself we are going to make these. Hopefully this year we actually do it. Yours turned out very cute.
We love salt dough here! You are really in the festive spirit, these are so pretty and your little one looks like he is having so much fun.
These turned out so cute! I found you through The Girl Creative. Thanks for sharing!
Hi, Amy
I love your new Christmas ornaments. They look great. I found your blog from Tip Junkie link party. Enjoy looking around. I am a new follower. Happy Thanksgiving. Would love for you to stop by http://www.homesweetbutterfly.com
Vanessa
Amy, thank you for sharing them at Crafty Moms Share. Yours came out much nicer than ours, but I am happy with what Hazel did and they are now on the tree.
Those came out great! Love the idea of painting then and using the stamps!
Thanks for sharing,
Lori
Despite the problems these came out super cute. I made salt dough stuff the other day too and we had read you can dry them by leaving them out overnight. Ours just fell apart so I guess we did something wrong too! I love your paint work on all of them, but especially the featured penguin. Thanks for sharing on Monday Madness.
Ha! Love this- the end result was great. 🙂 Thanks for linking to Things I’ve Done Thursday- featuring this tomorrow!
Melanie
Sew Rugged @ bear rabbit bear
bearrabbitbear.blogspot.com
Featuring on Thursday at Bacon Time. 🙂
They did turn out beautiful- and you learned from your mistake! Thank you for sharing your ideas with us on The Sunday Showcase
Thanks for the tutorial, it looks fun! I found you on Red Tricycle.
Oh LC got this one DOWN! He is so stinkin’ cute! Thanks for hooking up all your goods over at the No Rules Christmas Party girl!!
Jen
They are such a great idea for a kids project. Thank you so much for sharing your tips. Megan
Thank you for the insight into the real salt dough adventures. This will be my first year making them and I couldnt get over the fact is just seemed too easy! Glad to know nothing goes as planned but it all turns out great in the end. Thank you and merry Christmas
What happens if they get wet?
Hopefully a little water wouldn’t hurt them because they’re protected by the sealant. I can’t say what would happen if they got totally soaked though.
Can you please help? A older dough ornament has gotten soft. Any way to save it??? It’s from the 80’s! Has beads on it and maybe thin coat of sealant. Thank you!
Hmm…I’m not sure, I’ve never had one go soft on me. Our problem has been that any that had air bubbles in them are kind of fragile and can break after years of use.
I’m going to make some salt dough ortaments.But I don’t know what kind of sealer do I need.Please help
Thanks
Any kind of clear acrylic sealer should work!
This was a super cute tutorial visually and especially tutorially. Your son is so very handsome and seems like a beautiful soul like his Mama. Thank you for sharing this with us!
Aww, thanks so much!
Been making salt dough with the grandchildren and we make pom-poms we tie one Pom Pom to sting or ribbon leave a space then add slat dough stars balls bells hats gingerbread men etc to the sting /ribbon keep going as long as you want then hung up on a fireplace /wall in fact any where you like it looks great for Christmas xxx
Great idea! So festive!
How many ornaments did you get from the recipe??
It’s actually been years since we made these, but from what I remember we got quite a few! The smaller cookie cutters you use, the more ornaments you’ll get!
Making 2 types of clay dough. One with baking soda, cornstarch and water. The other flour, salt, paint and water. Gotta say the cornstarch ones are white and dough is much silkier.
Great tip!